Roads
Road Mesh Settings
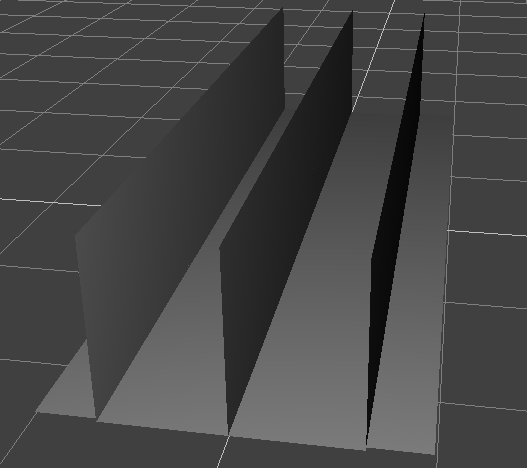
The car navigation system uses special borders with the intersection mask. A border can be represented either as a surface or as a 3D object. Usually, each kind of auxiliary intersection surfaces (left, right, center) is a part of the road mesh. It will be hidden from the scene if:
- A transparent material is assigned to it.
- Its viewport mask is set to 0x0.
The intersection mask value for the left border is 0х00000004, for the right border - 0х00000008.
The picture below shows the example of auxiliary surfaces, designed for the implementation of a two-lane road with two-way traffic.
Cars perform the search for the road and driving direction, and pedestrians perform the search for the sidewalks by means of intersection rays. The amount of traffic lanes is calculated automatically, but the width of the traffic lane is constant (3.75 meters). It can be redefined in the data/projects/driving/scripts/driving_consts.h file (a LINE_WIDTH constant).
The picture below shows the logic of the driving direction detection for the car:
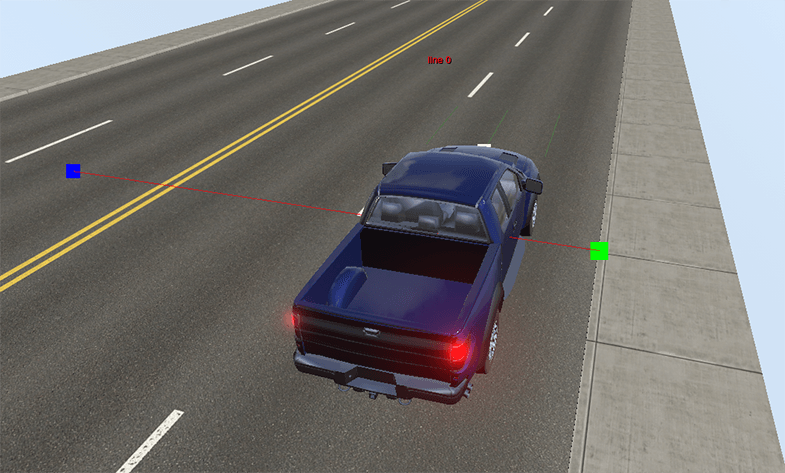
While moving, each object intermittently casts two rays: one to the left, another one to the right. If the left ray intersects the border with the 0х00000008 mask, and the right ray intersects the border with the 0х00000004 mask, we can determine the driving direction, amount of traffic lanes, and number of the lane, along which the object is moving.
You can also specify surfaces onto which cars or pedestrians will be placed automatically. To do so, specify a "spawn_surface" property and either a Spawn Car, or a Spawn Pedestrian parameter.
Such surfaces can also be structured into node references, and then be used to form different road systems.
Crossroads Settings
One of the most important issues of traffic simulation is crossroads crossing. To define the movement trajectory at a crossroad, the system creates special splines. Like road meshes, crossroads also require borders with intersection masks, which allows for the defining of entry and exit roads.
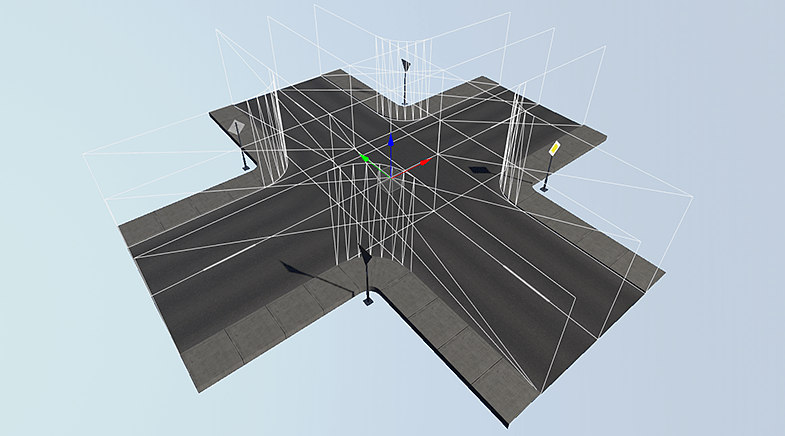
The next step of the crossroad setting is creating a WorldTrigger with a size slightly bigger than the crossroad itself. To define entry and exit roads, there should be special meshes, placed at each entry. They should be children of a WorldTrigger.
The direction of entry meshes along the Y axis should exit the crossroad (in local coordinates). The width along the X axis (in local coordinates) defines the width of the road and can be adjusted by changing the Scale X parameter.
These meshes should have the "junction_entry" property assigned, and if the crossroad is uncontrolled, the driving priority should be specified as the Priority parameter. The higher the value, the higher the driving priority from this entry.
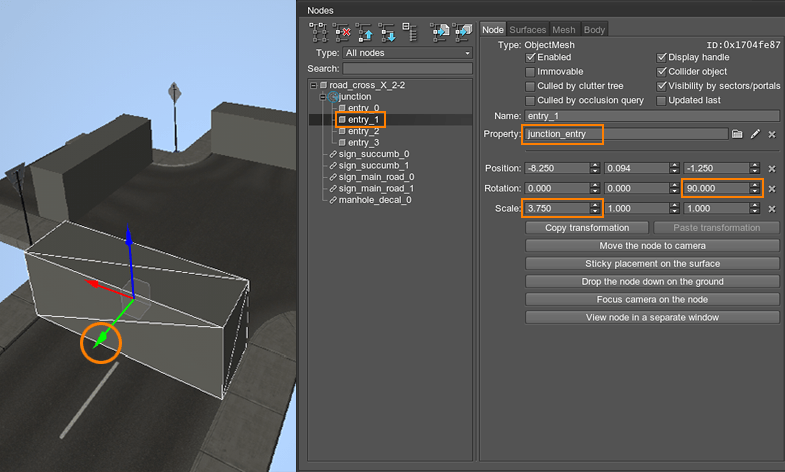
While simulating, these meshes will be disabled; their pivots will be the entry's stop lines. If you need to move the stop line, you can use the "Calculate Stop Line" parameter of the "junction_entry" property. Therefore, changing the Scale Y parameter allows you to move the stop line away, or bring it closer.
If everything is set correctly, on initialization, the crossroad will automatically define the following parameters:
- Driving directions on the crossroads (based on the borders and intersection rays).
- The amount of the traffic lanes.
- Entry and exit priorities.
- Splines for the cars movement.
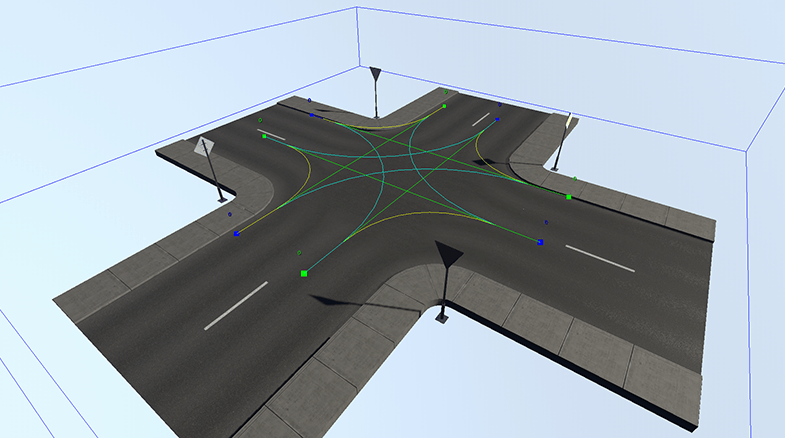
To limit the speed of the crossroad driving, use the following crossroad parameters:
- Forward Speed - to limit the speed while forward driving.
- Turn Speed - to limit the speed while turning.
Roundabouts
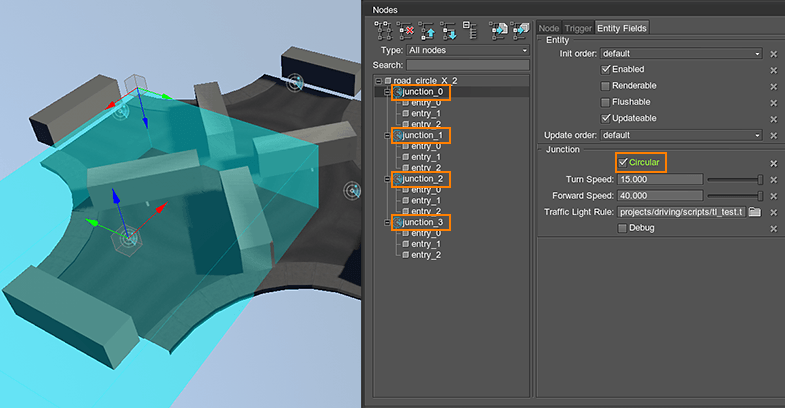
A roundabout is a set of T-shaped intersections for each exit from the circle. To specify that a crossroad is a roundabout, enable the Circular option. Roundabouts are similar to crossroads except for the rules of a crossroad exit.
Traffic Lights
Traffic lights are the important part in crossroads driving regulations. They allow a crossing priority to be dynamically changed.
A special class, called "TrafficLight" and inherited from the "Entity" class, is responsible for the traffic lights. It can be bounded to the following nodes:
- A single ObjectMeshStatic.
- A NodeReference that has an ObjectMesh as a root node.
- A DummyNode that has different ObjectMesh objects as children (if a traffic light contains several meshes).
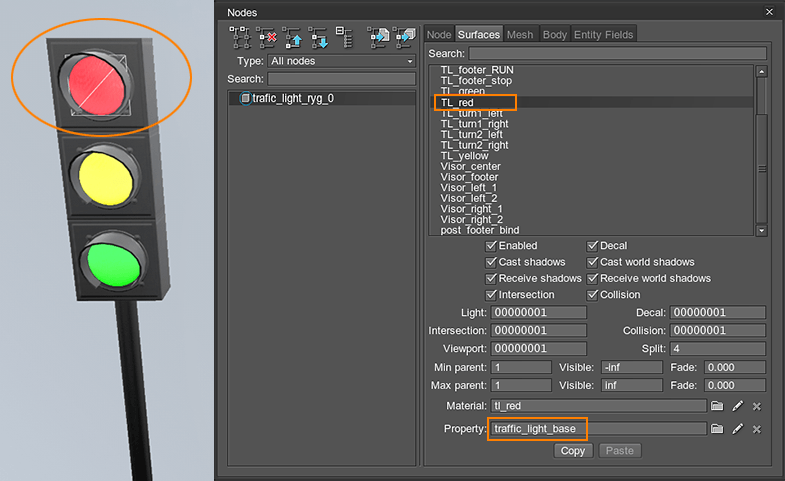
Surfaces responsible for traffic lights signals should have the "traffic_light_base" property assigned. This property has 3 parameters:
- Material on - the material used when the traffic light is on.
- Material off - the material used when the traffic light is off.
- Light type - a string containing the flag list. This string has the following view: "%state_name,%state_name,...,%state_name", where %state_name is one of the following signal types:
- R - red signal.
- Y - yellow signal, always flashing.
- G - green signal.
- GF - green flashing signal.
- GL - green left arrow.
- GLF - green left flashing arrow.
- GR - green right arrow.
- GRF - green right flashing arrow.
- PR - pedestrian red signal.
- PG - pedestrian green signal.
For example, "light type"="GF,G" means that the surface will be enabled if a traffic light has the G or the GF flag.
NoticeA traffic light can be controlled only by a crossroad.
Crossroads with Traffic Lights
To create a crossroad with traffic lights, you need to set a traffic light for each crossroad entry. Note that the entry mesh and the traffic light must have a NodeDummy as a parent; this NodeDummy should be a child of a crossroad WorldTrigger.
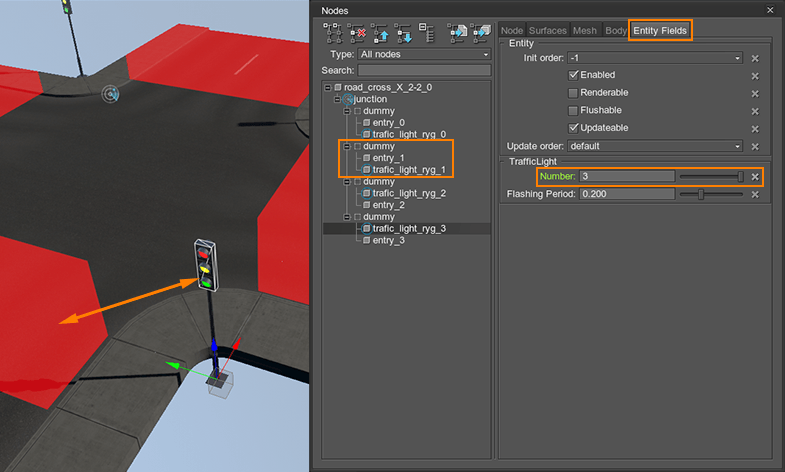
When the car will drive up to the crossroad, a traffic light (if one exists) will be defined for it. The car will make decisions for further movement based on the traffic light signal.
Each traffic light on the crossroad should have an index number (numeration starts with 0), so the crossroad will set traffic light signals in accordance with the given rule. The rule is stored in a text file and is set for a crossroad (a Junction class) in the "Entity Fields" as a "Traffic Light Rule". The file has the following format:
| 10 | "R" | "G" | "R" | "G" |
| 2 | "R" | "GF" | "R" | "GF" |
| 2 | "R" | "Y" | "R" | "Y" |
| 5 | "R" | "R,GL" | "R" | "R,GL" |
| 2 | "R" | "R,GLF" | "R" | "R,GLF" |
| 2 | "R" | "Y" | "R" | "Y" |
| 10 | "G" | "R" | "G" | "R" |
| 2 | "GF" | "R" | "GF" | "R" |
| 2 | "Y" | "R" | "Y" | "R" |
| 5 | "R,GL" | "R" | "R,GL" | "R" |
| 2 | "R,GLF" | "R" | "R,GLF" | "R" |
| 2 | "Y" | "R" | "Y" | "R" |
The first values of each line define the time within which the signals for the crossroads will be set. For example, according to the first line, four traffic lights for the first 10 seconds will have the following signals: the first and third - red signals ("R" status); the second and forth - green signals ("G" status).
After 10 seconds, the status of all traffic lights will jump to the second line, i.e. within 2 seconds traffic lights will have the following signals: the first and third - red signals ("R" status); the second and forth - green flashing signals ("GF" status).
After 2 seconds, the status of all traffic lights will jump to the third line, and so on.
An amount of columns in the file with rules should be equal to the amount of traffic lights for the crossroad.
Crosswalks
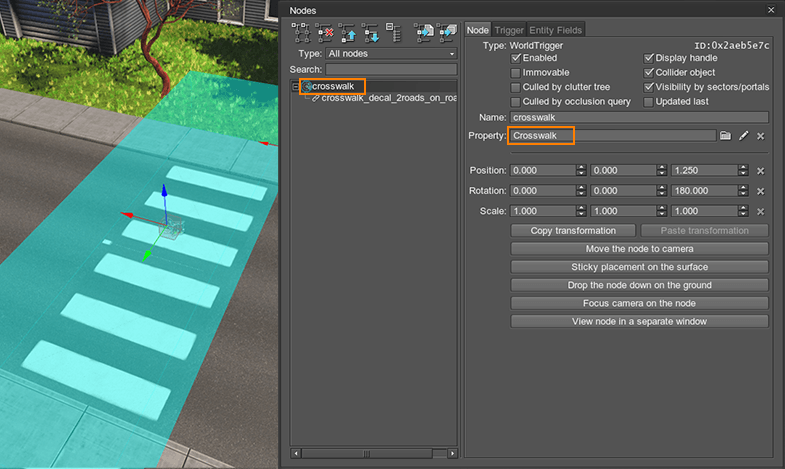
For pedestrians to cross the road, you need to set a WorldTrigger at the place of a future crosswalk. This WorldTrigger should have a "Crosswalk" entity assigned, so the area will become an unregulated crosswalk, pedestrians could cross it, and cars will let pedestrians pass.
In addition, you can set visual nodes, such as a decal with zebra or special signs.
Regulated Crosswalks on Crossroads
To create a regulated crosswalk on a crossroad, you need to do the following:
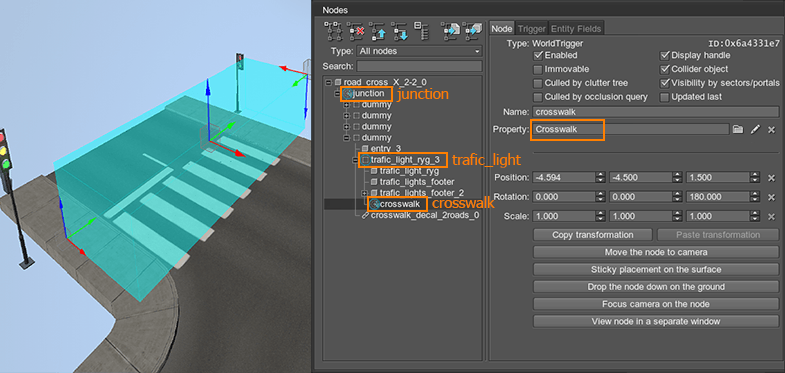
- Add a WorldTrigger of a required size and place it into the required position.
- Make it a child of the traffic light node.
A traffic light will identify a crosswalk and will allow pedestrians to cross if the traffic light status is "PG" (Pedestrian Green), or forbid crossing if the status is "PR" (Pedestrian Red).
Special Zones with Restrictions
Along with crosswalks, traffic lights and driving priorities, there are special adjustable zones with restrictions, for example: speed limit, prohibition of overtaking, etc.
For these zones, there is a special class, "RuleArea", inherited from the "Entity" class. It is binded to the WorldTrigger. When a car gets inside the WorldTrigger, special rules or restrictions are applied to it. All you need is just to expand the class manually and call the required functions.