Creating UnigineScript Application
This article describes how to create an empty project and then add logic to it by using the UnigineScript language. Code written in UnigineScript is the same for all supported platforms: Windows, Linux and OS X.
See Also
- The article on Setting Up Development Environment to learn more on how to prepare the development environment.
Creating Empty UnigineScript Application
After installing the UNIGINE SDK Browser and preparing development environment you can start your own UnigineScript-based project.
To create an empty UnigineScript API project, do the following:
- Open the UNIGINE SDK Browser.
- Go to the Projects tab and click CREATE NEW.

- Specify the following parameters:
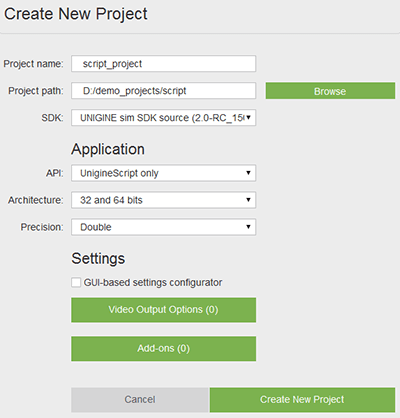
- Project - specify the name of your project.
- Project Path - specify the path to your project folder.
- SDK - choose the Unigine SDK.
- API - choose UnigineScript only to start working with the UnigineScript.
- Architecture - specify the architecture of your target platform.
- Precision - specify the precision. In this example we will use double precision.
注意Read more about these parameters in this article -
Click the Create New Project button. The project will appear in the projects list.
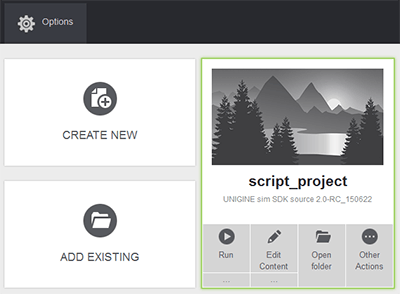
You can run your project by clicking the Run button.
Implementing UnigineScript Logic
In this section we will add logic to the empty UnigineScript application project.
The following example shows how to add a primitive box mesh to the world and rotate it.
- In the Unigine SDK Browser, choose the created UnigineScript project and click the Edit Content button.
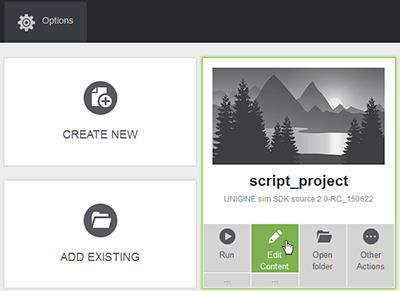
- In the Unigine Editor that will be opened, add the primitive box as described in this section. Also name the primitive as in the example.
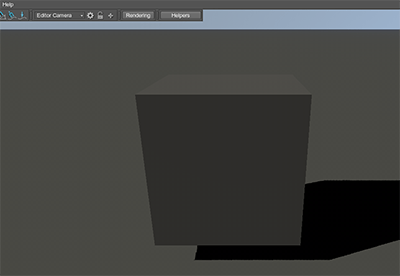
- Save the World, by clicking File -> Save World on the Menu bar or press CTRL + S and close Unigine Editor.
- In the Unigine SDK Browser, choose your UnigineScript project and click the Open Folder button.
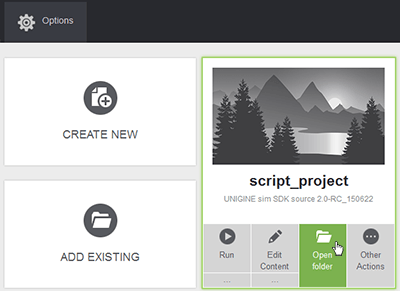
- Open the world script .cpp file located in the <YOUR PROJECT FOLDER>\data\<YOUR PROJECT NAME>\ (in our case, it is script\data\script_project\script_project.cpp file) by using any plain text editor or IDE.
-
Modify the file by adding the following code:
源代码(UnigineScript)
#include <core/unigine.h> Node box; int init() { PlayerSpectator camera = new PlayerSpectator(); camera.setPosition(Vec3(2.0f,0.0f,1.5f)); camera.setDirection(Vec3(-1.0f,0.0f,-0.5f)); engine.game.setPlayer(camera); // search the node by the specified name int index = engine.editor.findNode("box"); // get the node by its index if(index != -1) { box = engine.editor.getNode(index); } return 1; } int shutdown() { return 1; } int update() { //check whether the node exists if(box != NULL) { // get the frame duration float ifps = engine.game.getIFps(); // set the angle of rotation float angle = ifps * 90.0f; // get the current transformation of the node and apply rotation mat4 transform = box.getTransform() * rotateZ(angle); // set new transformation to the node box.setTransform(transform); } return 1; }注意In the code above we load the cs_project/cs_project.cpp world script file. You should specify the name of your project's world script file. - Save changes in the world script file.
- In the Unigine SDK Browser, click Run to launch the project

最新更新: 2017-07-03
Help improve this article
Was this article helpful?
(or select a word/phrase and press Ctrl+Enter)