Parameters Tracks
Here you can find what parameters are available in Tracker and how to animate them depending on their type (for example, how to move nodes, change material parameters, etc.).
Node-Related Tracks
Node-related tracks (for example, that enables the node, or changes its position) need to be bound to some specific node in the world:
- Select node dialog allows to choose a node to be animated by the track.
- After that, you can change the node bound to the track in the Node field.
Common Node Parameters
| enabled | Enables or disables the node. | ||||||||||
|---|---|---|---|---|---|---|---|---|---|---|---|
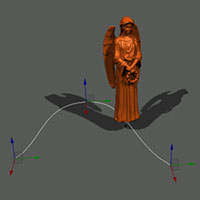
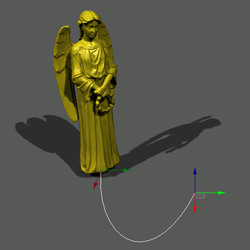
| position | Moves the node along X, Y or Z axes. Position of key frame points can be changed directly in the world by dragging manipulators.
Notice
Enable both the track graph (  ) and editor Visualizer (Tools -> Show -> Visualizer) in order to see the created track path in the world. ) and editor Visualizer (Tools -> Show -> Visualizer) in order to see the created track path in the world.
|
||||||||||
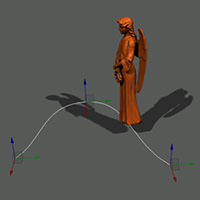
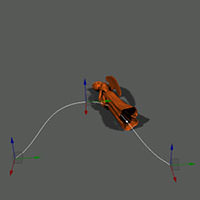
| rotation | Rotates the node along X, Y or Z axes:
|
||||||||||
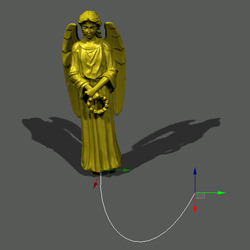
| scale | Scales the node along X, Y or Z axes. |
Light Sources Tracks
These tracks control parameters of light sources:
- Common light parameters
- Omni light parameters
- Projected light parameters
- World light parameters
Objects Tracks
Common Objects Parameters
Skinned Mesh Parameters
| play | Toggles playback of the skinned mesh animation. |
|---|---|
| animation | Sets animation (from *.smesh file) for the skinned mesh. |
Particle System Parameters
These tracks control parameters of particles (and their emitters).
Player Tracks
These tracks are used to set up cameras used for cutscenes. Two types of cameras can be used:
- Dummy player — a simple free-flying camera
- Persecutor player — camera that follows a node
| fov | Field of view of the player. |
|---|---|
| znear | Distance to the camera near clipping plane. |
| zfar | Distance to the camera far clipping plane. |
Persecutor Parameters
Persecutor position can be controlled in one of two ways:
- By setting node position (node enabled track).
- By changing phi and theta angles for the persecutor. (This variant is also used to rotate a persecutor.)
Sound Source Tracks
These tracks control parameters of sound sources. For common sound parameters, see sound.
Material-Related Tracks
Material-related tracks (that change some material setting over time) are added in the following way:
- Select material dialog allows to choose a material to be animated by the track. (After that, you can change the material bound to the track in the Name field.)
- Choose a setting:
- If it is one of common material settings, you can add it straight away.
- To add any other material setting, check the type of the material state or parameter you are going to change (toggled state, switched state, texture, color parameter or slider parameter) and choose it in the list.
- In the latter case, select the setting in the drop-down list: State, Parameter or Texture.
Property-Related Tracks
Property-related tracks (that change some property setting over time) are added in the following way:
- Select property dialog allows to choose a property to be animated by the track. (After that, you can change the property bound to the track in the Name field.)
- Choose the parameter:
- If it is one of common property parameters (intersection or collision), you can add it straight away.
- To add any custom property setting, check the type of the property state or parameter you are going to change (toggled state, switched state, float parameter, toggled parameter, switched parameter, string parameter or color parameter) and and choose it in the list.
- In case of a custom setting, select it in the drop-down list State or Parameter.
Render-Related Tracks
These tracks control render settings:
- Common settings
- Stereo settings
- Reflection distance
- Tessellation settings
- Stems and leaves animation settings
- Occlusion and global illumination settings
- Refraction dispersion for red, green and blue channels
- Motion blur settings
- Light scattering settings
- Volumetric shadows settings
- Glow settings
- DOF (depth of field) settings
- HDR settings
- Color correction settings
Render settings are applied to the screen image (i.e. all cameras both in the editor and in the game).
| enabled | Enables or disabled rendering of the world into a screen buffer. |
|---|---|
| renderMaterials | Sets render postprocess materials for the screen. |
| compositeMaterial | Sets custom composite shader for screen image. |
| postMaterials | Sets post postprocess materials for the screen. |
| fadeColor | Solid color to paint the screen over. It can be used to create smooth fade-in and fade-out effects. |
Sound-Related Tracks
These tracks control common sound settings. For individual sound sources, see sound source nodes.
Game-Related Tracks
These tracks can be used to create and edit cutscenes: switching between cameras, adding and changing postprocess effects. See tips how to create a cutscene.
| enabled | Enables or disables the camera used in-game (when the editor is unloaded). When disabled, the played would not be updated. |
|---|
Game Player Tracks
These tracks control the camera used in-game.
| node | Allows to choose a player used to render the screen image. |
|---|---|
| fov | Field of view of the current in-game player. |
| znear | Distance to the near clipping plane (in units) of the current in-game player. |
| zfar | Distance to the camera far clipping plane (in units) of the current in-game player. |
| postMaterials | Post postprocess materials for the current in-game player. |
Track-Based Track
These track allows for convenient mixing between different complex tracks (i.e. saved *.track files with a number of tracks inside).
For example, if there are saved tracks files that control day-night shift and tracks that contain weather conditions (windy, cloudy and rainy weather, loading them as track tracks allows to set the day time, while controlling the amount of wind, rain and cloudiness.
