Adding Morph Targets
This article describes how to work with a morph target animation also known as blend shapes in Unigine. Usually, morph targets are used to change facial expressions of characters.
The following article shows how to add a mesh with morph targets to Unigine.
We are going to use Autodesk Maya, export from Autodesk 3ds Max is also available.
Requirements
- You should have Unigine plugins for 3D editors installed. They will be installed automatically when you install Unigine SDK.
- It is supposed that you already have a 3D model with blend shapes ready to be exported.
- It is supposed that you already have a world created.
See Also
- Description of the ObjectMeshSkinned class functions.
Step 1. Export a Mesh with Blend Shapes from Maya
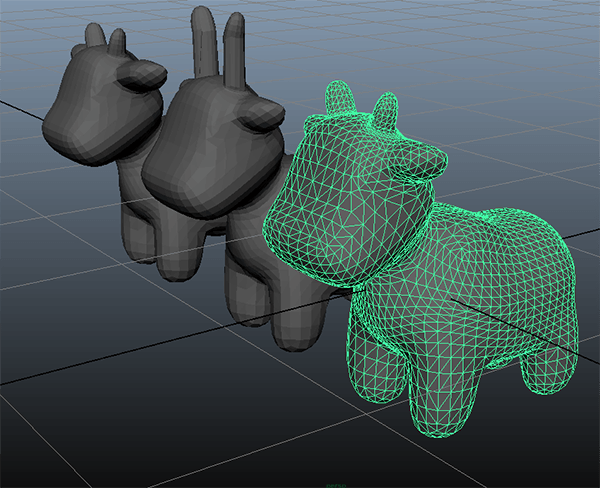
This section shows the way of exporting meshes with blend shapes in the Unigine .mesh format from Autodesk Maya. It contains an example mesh of a calf, which has 2 blend shapes (morph targets).
To export the mesh with blend shapes, you should do the following:
- In Autodesk Maya, select the mesh with blend shapes to be exported.
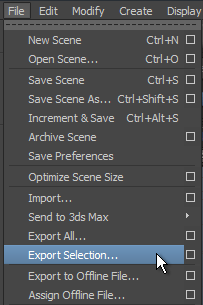
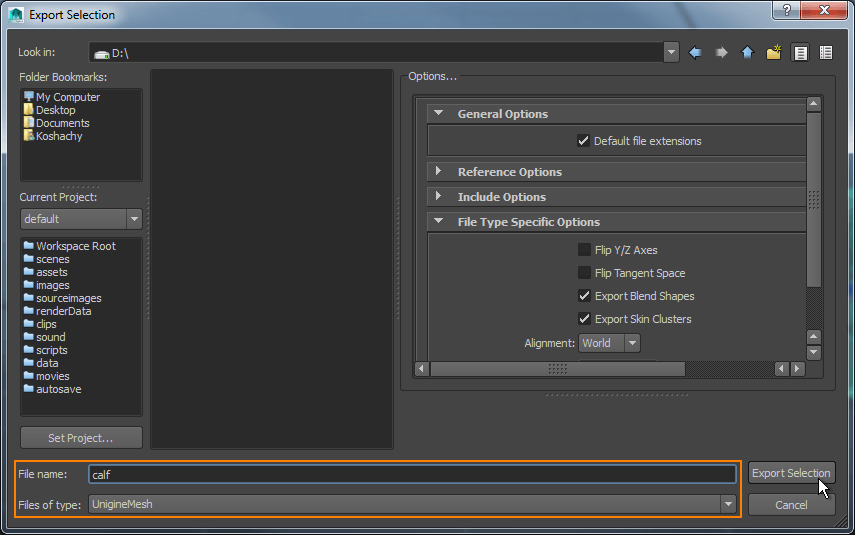
- On the main menu, click File -> Export Selection...
- In the Export Selection window, choose a folder to save the mesh and specify a name for the mesh file. In the Files of type drop-down list, choose UnigineMesh.
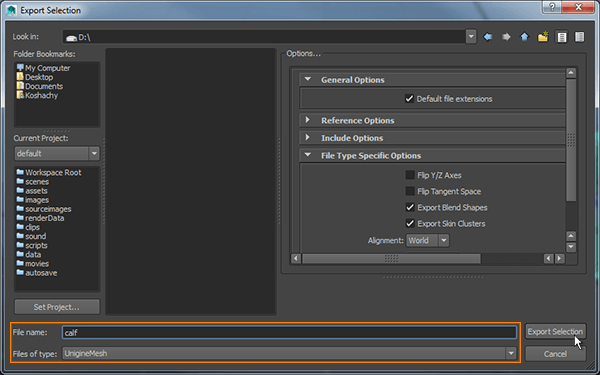
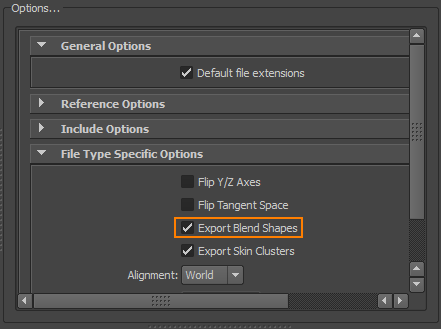
- In the File Type Specific Options tab with export options, specify parameters to export the mesh. To export Blend Shapes, set the Export Blend Shapes checkbox checked.
 NoticeRead more about export parameters in the Plugins for Maya article.
 - Click Export Selection.
Now you have the mesh in the Unigine .mesh format, which can be easily added to your project.
Step 2. Add a Mesh into the World
This section shows how to add the exported mesh to the world by using UnigineScript.
Each blend shape of the mesh is a target. You need to create morph targets for a surface of the mesh and set parameters to these targets to control the morph target animation. The following example shows, how to create morph targets and set parameters by using UnigineScript:
- Open your world script .cpp file.
- Put this code into your world script file.
Source code (UnigineScript)
#include <core/unigine.h>

ObjectMeshSkinned mesh;
int i = 0;

/* This function adds a mesh as a node to the editor
 */
Node add_editor(Node node) {
	engine.editor.addNode(node);
	return node_remove(node);
}

int init() {

	/* This block creates a camera and add it to the world
	 */
	PlayerSpectator camera = new PlayerSpectator();
	camera.setPosition(Vec3(2.0f,0.0f,1.5f));
	camera.setDirection(Vec3(-1.0f,0.0f,-0.5f));
	engine.game.setPlayer(camera);

	// Add mesh. Here you should specify the path to your mesh file which is relative to your project's data folder
	mesh = add_editor(new ObjectMeshSkinned("my_project/meshes/calf.mesh"));

	// Set mesh parameters: position, material, property
	mat4 transform = translate(vec3(0,0,0));
	mesh.setWorldTransform(Mat4(transform));
	mesh.setMaterial("mesh_base","*");
	mesh.setProperty("surface_base","*");

	// Set the number of mesh targets
	mesh.setNumTargets(5,0);

	return 1;
}

int shutdown() {
	return 1;
}

int update() {

	// Calculate weights of targets
	float k0 = clamp(sin(i), 0.0f, 1.0f);
	float k1 = clamp(cos(i), 0.0f, 1.0f);

	// Set targets with parameters
	mesh.setTarget(0,1,0,1.0f,0);
	mesh.setTarget(1,1,0,-k0,0);
	mesh.setTarget(2,1,0,-k1,0);
	mesh.setTarget(3,1,1,k0,0);
	mesh.setTarget(4,1,2,k1,0);

	// Change the argument of sin() and cos() functions
	i = i + 0.01;

	return 1;
}
The code given above adds the mesh to the world, assigns material and property and sets parameters to morph targets. Let's clarify the essential things:
- The exported mesh was added to the world by using ObjectMeshSkinned constructor. The path which is relative to the data/ folder of the project was passed as an argument to the constructor.
- The setNumTargets() function sets the number of targets for the surface of the mesh. The exported mesh in the example given above has 2 targets (blend shapes).
- By using the setTarget() function, all parameters for each created morph target are set in the world script'supdate() function. Each target has its target weight. Weights have influence on coordinates of the mesh: coordinates are multiplied by their weights. In result the new mesh is created which is equal to the sum of the all enabled targets that are multiplied by their weights, like in the following formula:
Formula
final_xyz = target_0_xyz * weight_0 + target_1_xyz * weight_1 + ... - Since in the code given above,sin() andcos() functions are used for animation blending of different targets, five targets are created:
-
Source code (UnigineScript)This target is if for bind pose without any interpolation.
mesh.setTarget(0,1,0,1.0f,0); -
Source code (UnigineScript)This targets are used for interpolation of two animations blending.
mesh.setTarget(1,1,0,-k0,0); mesh.setTarget(2,1,0,-k1,0); -
Source code (UnigineScript)This is for first animation blending which is used sin() function for interpolation.
mesh.setTarget(3,1,1,k0,0); -
Source code (UnigineScript)This target is for second animation blending which is used cos() function for interpolation.
mesh.setTarget(4,1,2,k1,0);
-
- Load your world in UnigineEditor.
After assigning the material to the mesh, result looks as follows: