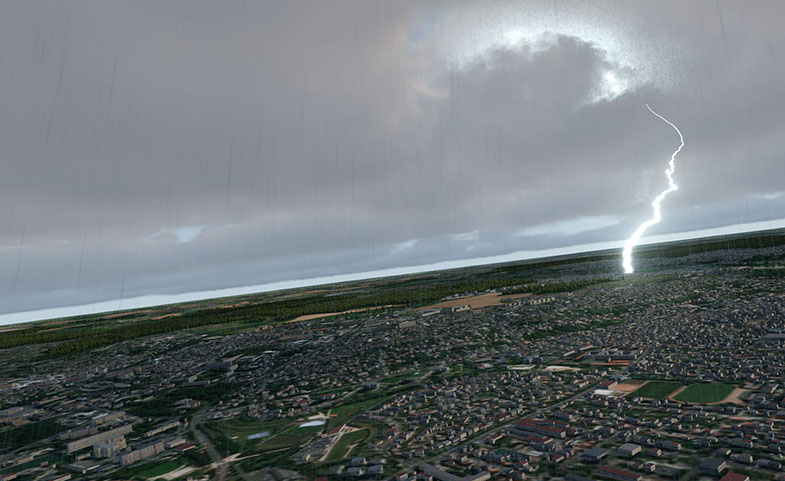
Environment Settings
One of the key factors making visualization of the terrain database, with all entities moving around, immersive, and giving a perception of being physically present in the simulation is environment. It includes sky with celestial bodies and atmospheric effects that dramatically change the look of your virtual world depending on the weather and the time of day. The following models are used:
- An ephemeris model determines the position of the sun and moon, which both cast light into the scene, depending on given coordinates and date/time.
- A weather model, either in the IG or supplied by an external weather simulation, provides the cloud coverage, and a global wind concept with direction and strength, affecting vegetation animation and the environment.
See Also#
- The IG plugin API section for more details on managing IG via code (C++)
- SkyMap class for more details on managing sky and celestial bodies via code (C++)
- Meteo class for more details on managing global weather settings via code (C++)
- Region class for more details on managing weather regions via code (C++)
- Weather Layer class for more details on managing weather layers via code (C++)
Celestial Bodies#
Using a full-year ephemeris model, IG automatically updates positions of the Sun, Moon, and stars based on the date, time, and geographic location.
By default IG is configured to work in the Greenwich time zone. But you can change time zone via code or by using the IG Editor Plugin.
Configuring the Star Field#
Star field intensity might seem too low by default. You may need to adjust brightness level of your displays or increase maximum brightness of the star field for your area.

To set up the stars and make them look brighter do the following:
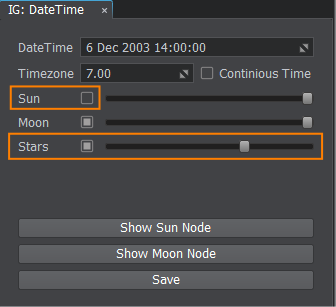
- Temporarily disable the sun node in the IG:DateTime window of the IG Editor Plugin and make sure the Stars intensity is set to high value.
- Open Environment Settings (Windows -> Settings -> Runtime/World/Render/Environment).
- Set the Environment Texture to stars_c.hdr.
-
Click Environment Color and increase values of RGB color components until you reach the desired color and brightness of the star field (e.g., to 100,100,100).
 NoticeThe Alpha channel is used by the system to control Star Intensity (e.g., via CIGI).
 - Enable the sun node back again and save your world.
Stars are positioned on the sky automatically, depending on the date/time and geographic location.
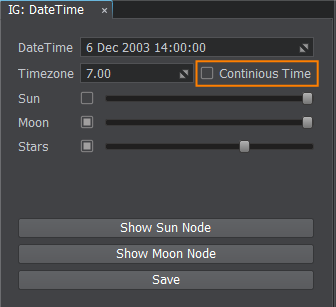
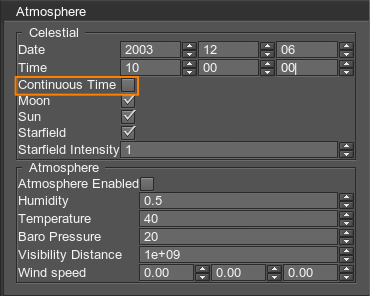
Enable the Continuous Time option to make the star field move simulating the Earth rotation via IG Editor Plugin or IG Host.
Configuring Sun and Moon#
IG has a built-in celestial body control (celestial_control packet). In order to use it, you should have:
- Two nodes, one for the Sun, and one for the Moon
- The Celestial property assigned to the sun node
- Parameters of the Celestial property containing links to the corresponding nodes.
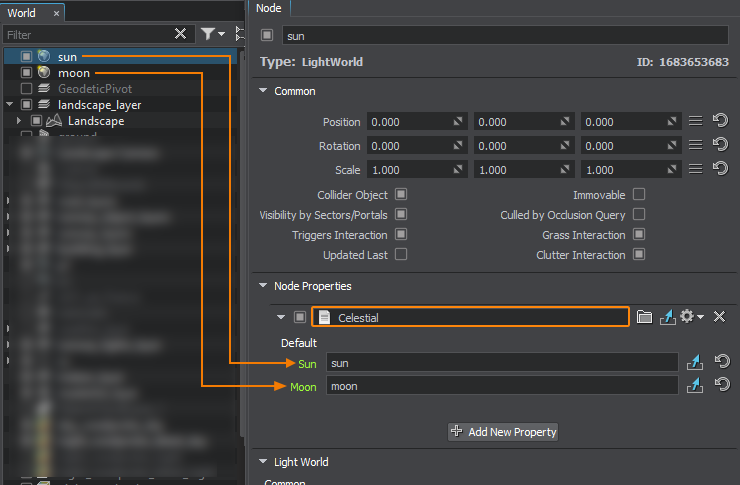
Positions of the Sun and the Moon are adjusted automatically depending on the date/time and geographic location.
SkyMap Change Callbacks#
Sometimes it may be necessary to perform certain actions when the state of the sky changes (e.g. enable lighting at nignt time). Callbacks can be used for this purpose. Just implement your specific actions in a callback function and set it as follows:
SkyMap change callback implementation:
/// callback function to be called when sky state changes
void SomeClass::my_callback()
{
	// pointer to your sun node (don't forget to initialize it)
	NodePtr sun;

	// calculating zenith angle to determine if it is night time or not
	float zenith = getAngle(vec3_up, sun->getDirection(AXIS_Z));
	bool night = zenith > sun_zenit_threshold;

	// switching lights
	for (auto & it : lights)
	{
		it.data.setEnable(night);
	}

	// switching the emission state for emissive materials
	for (auto & it : emissive_materials)
	{
		it->setState("emission",night);
	}
}

// ...
// somewhere in code
void SomeClass::init()
{
	// adding "my_callback" to be called on changing sky state
	ig_manager->getSkyMap()->addCallbackRefresh(this, Unigine::MakeCallback(this, &SomeClass::my_callback ) );
}
Atmospheric and Weather Effects#
IG supports the following weather effects:
- Multiple atmospheric layers
- Sun angle-dependent haze color and density
- Procedurally generated volumetric clouds
- Lightning, rain, snow
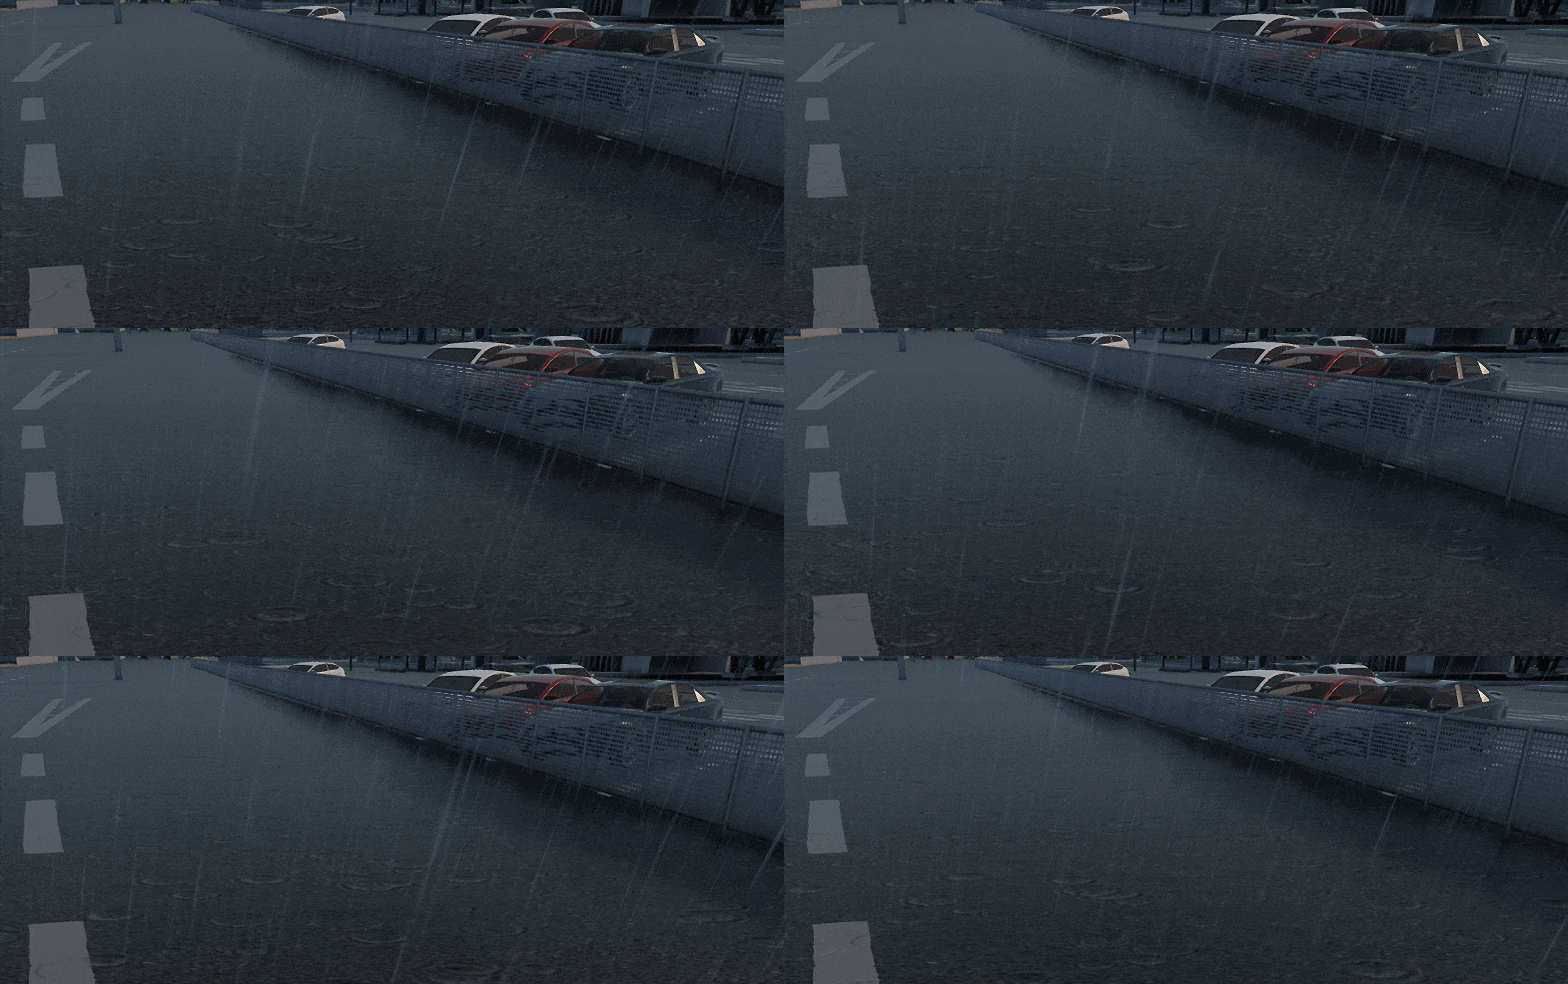
Weather simulation is achieved with the set up of the following entities.
Weather Regions#
Weather regions represent the shape of weather in certain areas from the top-down view (cyclone, turbulence zone, thunderstorm front). Various custom weather layers can be added to a region on demand.

The type of region specify its shape:
- Global - covers the whole world, has a default global layer
- Rectangle - rectangular shape
- Polygon - custom shape
There is always a Global region present in the world. The number of possible regions is unlimited.
A region can be set up either via the IG Editor Plugin or by the means of IG Host.
Parameters#
- Enabled - enables or disables the selected region
- Type - type of the region:
| Type of the region | Parameters |
|---|---|
| Global | It is not possible to edit parameters of the Global region. |
| Rectangle | Represents a rectangle-shaped area.
|
| Polygon | Represents a region of a free form.
|
Weather Layers#
Weather layers represent atmospheric layers inside a region. Layers comprise a vertical profile of the weather region. Atmospheric effects are observed anywhere within the vertical range of a layer. Each region can have an unlimited number of layers.
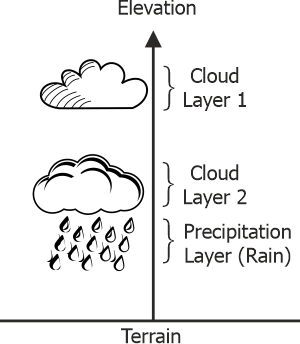
Type of layer specify its effect:
- Base layer - contains only numerical values: temperature, pressure. It also contains parameters for wind and visibility range (haze) which can be seen visually.
- Cloud layer - contains clouds which can be of various types.
- Precipitation layer - contains precipitation effects which can be of various types (rain, snow).
By default every region has an almost infinite Global layer. You can add more layers if necessary.
A layer can be set up either via the IG Editor Plugin or by the means of IG Host.
Parameters#
- Enabled - enables or disables the selected layer
- Elevation - layer’s height above sea level
- Thickness - vertical width of the layer
- Transition - smooth border transition width
- Visibility - visibility distance within the layer (can be used to simulate haze)
- Coverage - density of layer effects
- Humidity, Temperature, Barometric - density of the layer’s effects
- Lightning - lightning frequency
Parameters Blending#
When different regions with layers intersect each other, all their parameters are blended together according to CIGI recommendations:
| Atmospheric Parameter | Blend Type |
|---|---|
| Temperature | Average |
| Pressure (Barometric) | Maximum |
| Humidity | Maximum |
| Visibility | Maximum |
| Wind | Sum of velocity vectors |
Adding and Setting Up Layers in the Editor#
To add a new layer to a region, use the IG:Meteo window of the IG Editor Plugin.
- Select the region in the left Regions list and click the required Add Layer button.
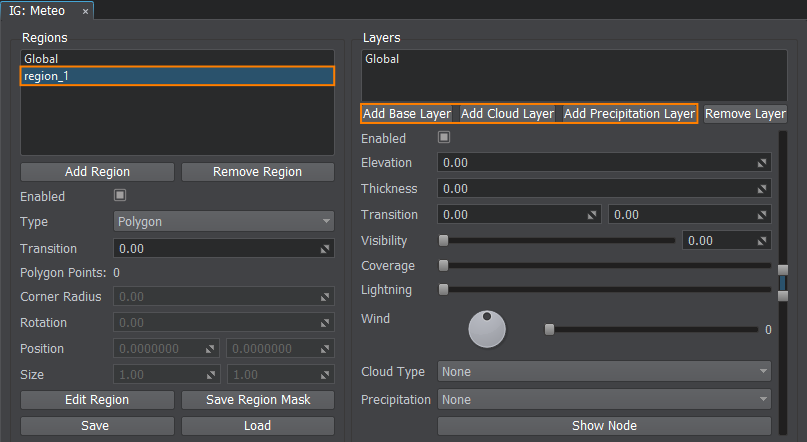
- Depending on the type of the layer you must specify its properties (see below).
Clouds#
Volumetric clouds are particle masses that simulate light absorption, creating a realistic reduction in visibility when flown through. Clouds can cast shadows on the terrain.
IG supports all types of clouds:
- altocumulus
- altostratus
- cirrocumulus
- cirrostratus
- cirrus
- cumulonimbus
- cumulus
- nimbostratus
- stratocumulus
- stratus
You also can extend the default cloud set by inheriting new materials from the clouds_base.
Cloud coverage is set automatically using the Coverage value from a weather_control packet received.
Cloud coverage does not change immediately, it has some transition period providing smoothness. You can adjust transition time by changing the value in the cloud_transition_time tag in the configuration file (data/ig_config.xml).
Cloud type for a cloud layer and other parameters can be set up via IG Editor Plugin or by the means of IG Host.
Precipitations#
Precipitations start playing via particles when the active camera gets inside the region with the corresponding precipitation layer enabled.
A precipitation layer can be set up either via the IG Editor Plugin or by the means of IG Host.
Adjusting Precipitations Appearance#
To adjust specific parameters for rain or snow (spawn rate, size of raindrops/snowflakes, etc.) select the IG precipitation node in the World Nodes window and tweak the parameters of the PrecipitationEffect property assigned to it.
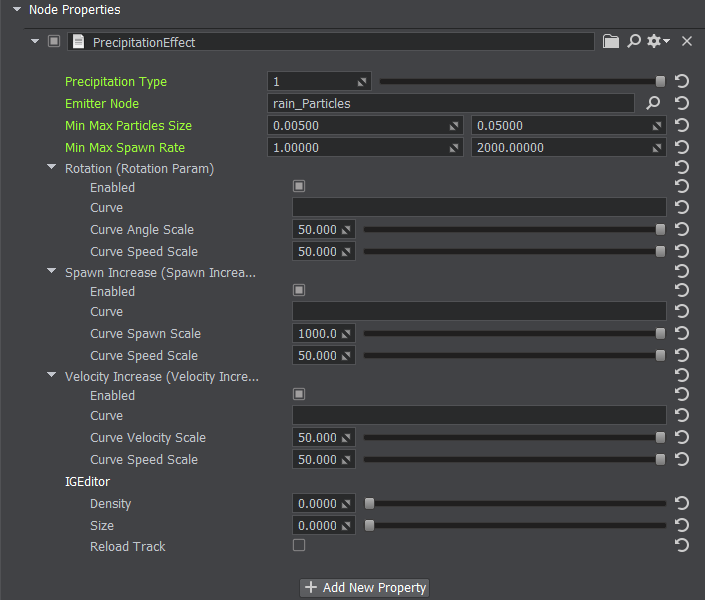
The following parameters are available:
- Precipitation Type — type of precipitation (rain or snow).
- Emitter Node — particles node that simulates the effect.
- Minimum and Maximum Particles Size — limits for random particles size.
- Minimum and Maximum Spawn Rate — limits for spawn rate value.
- Rotation — rotation parameters for particles based on the camera movement.
- Enabled — enables the particles rotation.
- Curve — sets the interpolation curve for rotation (linear interpolation when the curve is not specified).
- Curve Angle Scale — maximum deflection angle.
- Curve Speed Scale — maximum speed when the maximum deflection angle is achieved.
- Spawn Increase — spawn increase parameters for particles based on the camera movement speed.
- Enabled — enables the spawn increase.
- Curve — sets the interpolation curve for spawn increase (linear interpolation when the curve is not specified).
- Curve Angle Scale — maximum spawn rate.
- Curve Speed Scale — maximum speed when the maximum spawn rate is achieved.
- Velocity Increase — velocity increase parameters for particles based on the camera movement speed.
- Enabled — enables the velocity increase.
- Curve — sets the interpolation curve for velocity increase (linear interpolation when the curve is not specified).
- Curve Angle Scale — maximum velocity.
- Curve Speed Scale — maximum speed when the maximum velocity is achieved.
- IGEditor — editable parameters for preview in Editor.
- Density - particles density.
- Size - particles size.
- Reload Track - reloads the track file.
Lightning#
Lightnings are particles that get spawned and played inside a layer’s volume. They can be enabled with any type of layer.
Lightning parameters can be set up either via the IG Editor Plugin or by the means of IG Host.
Setting Up New Lighting Nodes#
In order to setup a custom lightning strike and expand the list of lightning types, do the following:
- Create a particle system representing new lightning and assign a LightningEffect property to the ObjectParticles node.
- Assign this ObjectParticles node to the Emitter Node field.
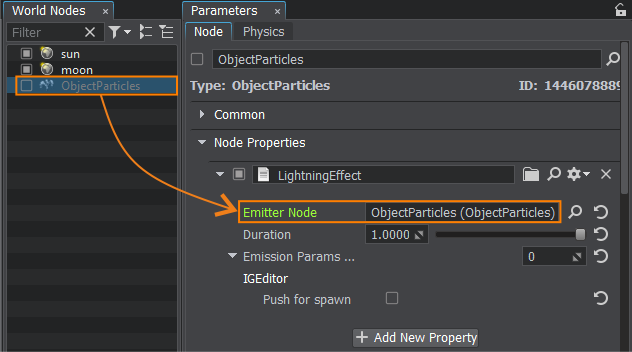
- Export the particles to a node reference.
- Go to the configuration file (data/ig_config.xml) and add a new lightning_source entry to the lightning sources section (lightning_sources). Specify the new id and path to the newly created node representing lightning.
ig_config.xml (XML)
<lightning_sources> <lightning_source id="0" node_path="ig/weather/fx/lightning/nodes/ObjectParticles.node"/> </lightning_sources> - Save the ig_config.xml file and restart the UnigineEditor to see the new lightning in action.
Wind#
Particle Systems (rain, snow, and so on) can be affected by the wind controlled by IG when they get inside a region with wind enabled. Wind also affects the cloud movement in cloud layers.
Weather layer wind changes global Animation Scale and Animation Wind for Vegetation depending on player's position inside weather layers.
To adjust the wind, go to IG:Meteo window, select a region and a layer inside of it. Use manipulators to specify the direction and force of the wind inside the layer.
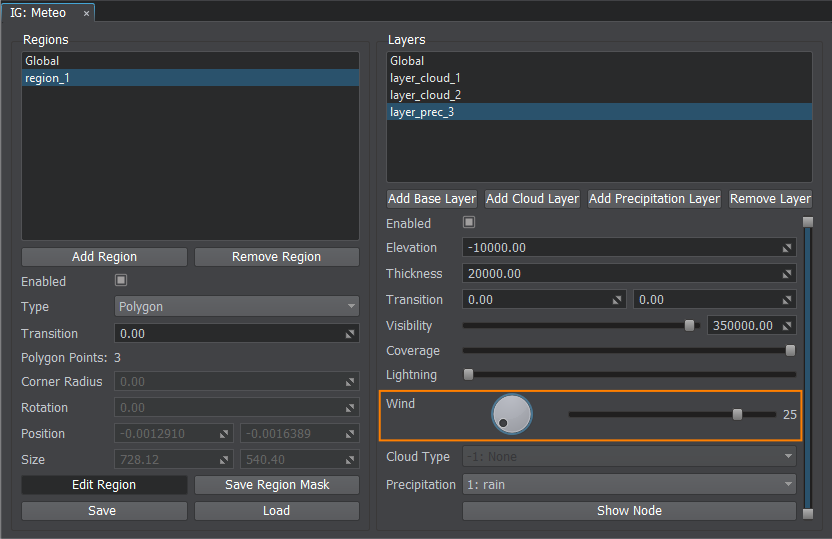
Wind can also be set up via the IG Host.
For your convenience, we have also added the windsock.node asset to the IG Template, it is available in ig_data\objects\windsock\.
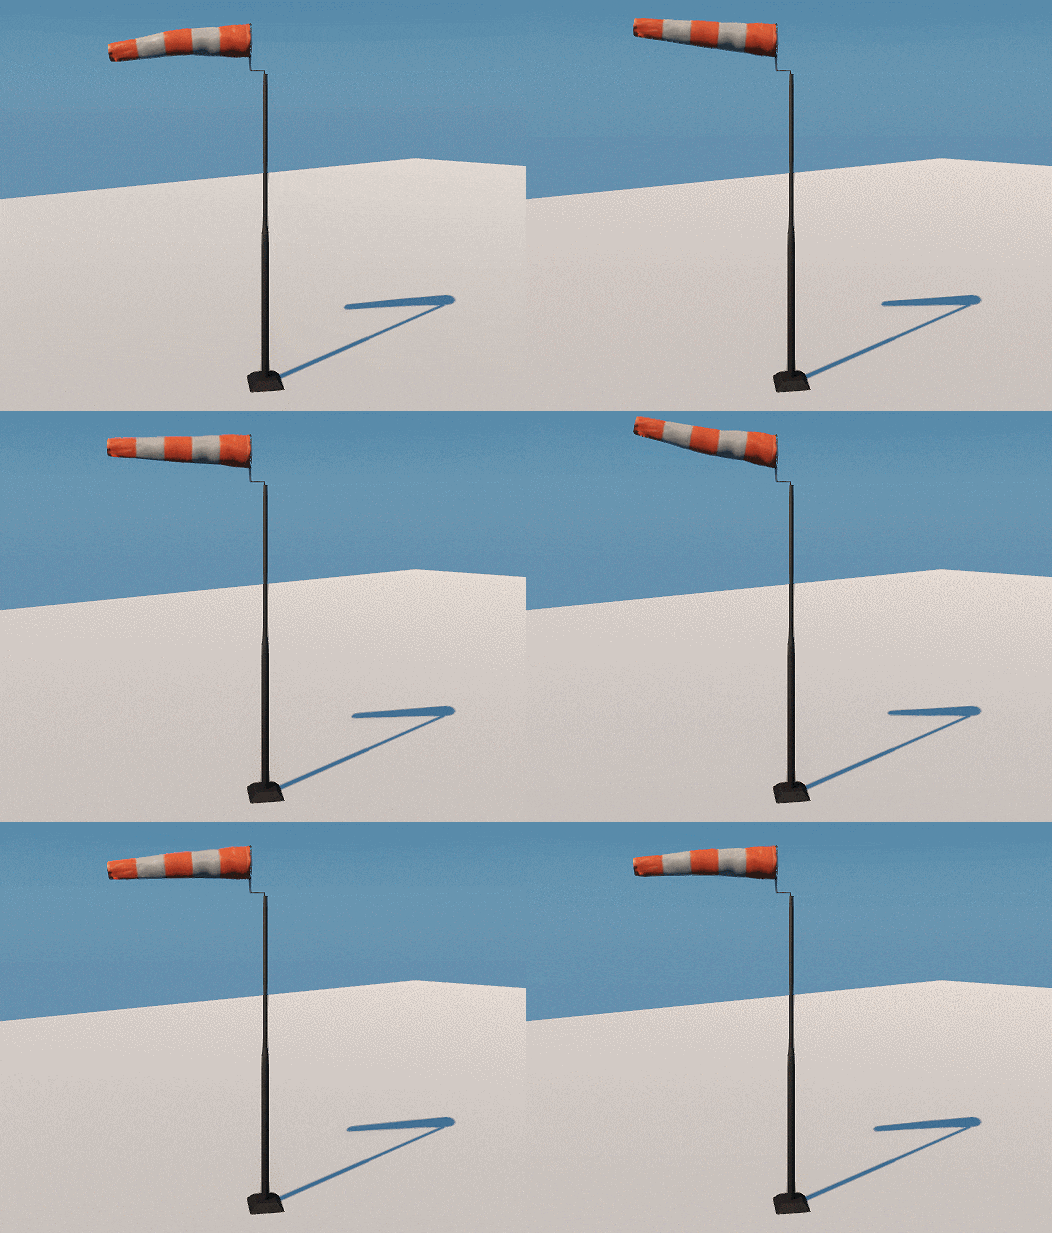
This asset is already preconfigured to be affected by the IG wind via the WindSock property.

The following parameters are available:
- Angle Wind — additional angle rotating the mesh to align it with the wind direction.
- Mesh Skinned — the windsock mesh.
- Anim Power — animation of the windsock deformation depending on the wind speed variation.
- Anim Standing — animation of the windsock rippling.
