Lightmapping
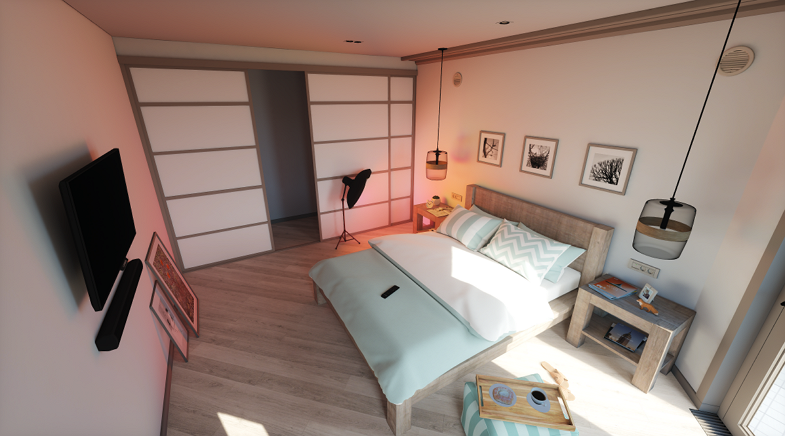
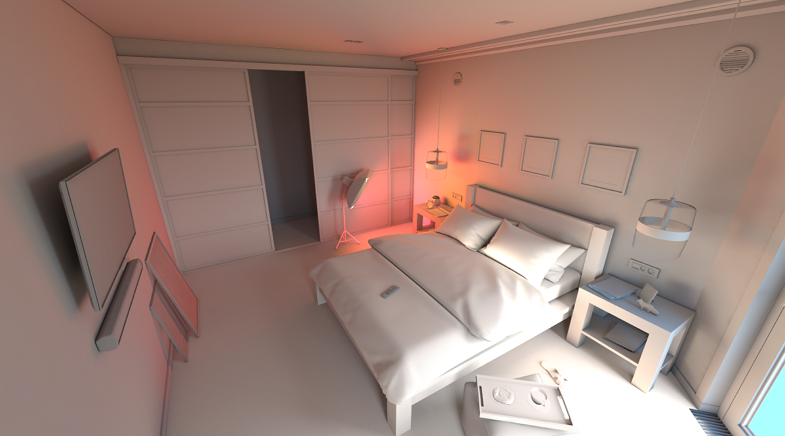
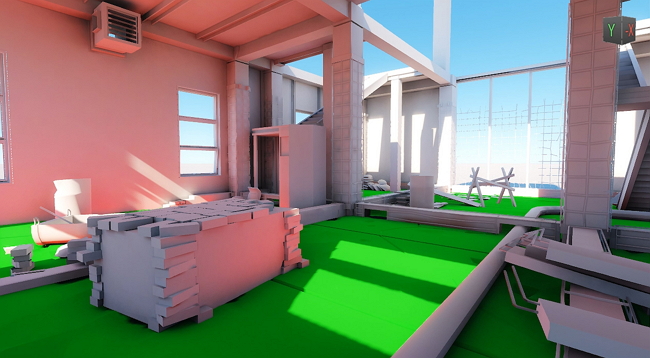
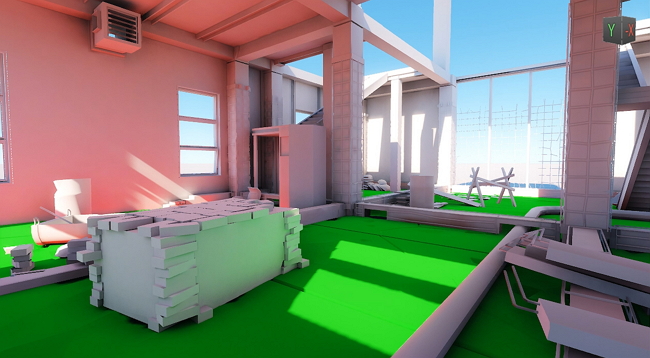
Lightmapping is a static global illumination technique using precalculated textures that store brightness and reflected color of lit surfaces. By using lightmapping you can avoid heavy computations of lighting in primarily static scenes.
Lightmapping is the most efficient solution enabling to achieve realistic diffuse lighting and keep the high performance. It is capable of giving high-detailed global illumination combined with simulation of many light bounces. The number of bounces is the key aspect of creating realistic lighting in bright scenes. When you use lightmapping it doesn’t matter how many rays, bounces, or light sources are there, as everything is calculated once and then baked in textures.
UNIGINE provides an integrated GPU-accelerated Lightmapper tool available in the Bake Lighting window.
Current limitations:
- Lightmapping is available only for surfaces of Static Mesh objects.
- Only Non-Directional lightmaps are supported at the moment (normal maps are not taken into account).
- Only global illumination is baked, direct lighting is to be provided by light sources.
See Also#
- Quick video guide: How To Bake Global Illumination to Lightmaps.
- Quick video guide: How To Reuse Lightmaps for Levels of Detail.
- Quick video guide: How To Tweak Baked Lighting Dynamically via the Lightmap Color.
- Lightmaps baking is also available via code by using the BakeLighting Class.
Preparing The Content#
Proper and non-overlapping UV-coordinates of scenery are required for correct lightmapping. In the case your assets do not have ones, automatic UV unwrapping on import is provided. The overall workflow is the following:
-
In the Import Settings for FBX, CAD models and UNIGINE .mesh assets, select the UV Channel and Target Resolution to be used for lightmaps and, if needed, check UV channels to unwrap according to the selected Packing Quality. Traditionally, the 0 UV channel is used for texturing and the 1 channel is for lightmapping.
The Lightmap Target Resolution parameter has the direct influence on the baking time and the final quality.
 NoticeUnwrapping thin polygon meshes intended to be used with double-sided materials applied, such as pieces of paper, banners or fabrics, may lead to visual artifacts when lightmapping. It is recommended to consider re-modeling such meshes by adding polygons for the other side of the model.
 -
For all surfaces intended to be lightmapped, the Lightmaps Parameters are needed to be adjusted:
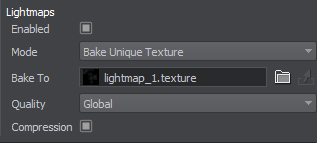
- Select the Static Lighting Mode for the surfaces (or the Advanced lighting mode).
- Check Enabled to enable the feature.
- Select the Bake Unique Texture, if you intend to use the integrated lightmapper.
- Also, you can specify the lightmap Texture generated in a third-party software. Select the Use Custom Texture mode for this purpose.
For a surface to contribute to static GI, it must have the Lighting Mode set to Static or have the Cast Global Illumination option enabled in the Advanced Lighting Mode.
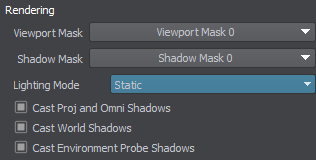
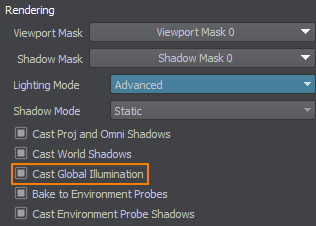
For selective group-based shading when baking lightmaps, adjust the Viewport Masks. A surface will be visible for the lightmapper only if its Viewport Mask matches the Baking Viewport Masks of the Bake Lighting window.
NoticeIt is not recommended to bake unique lightmaps for objects stored in multiple Node References that refer to the same .node asset — the assigned lightmaps will be lost. However, you can save a lightmapped object to a node reference after baking and clone, if needed.-
Finally, set up light sources in the scene:
- For light sources that should contribute to lightmapping, select the Static mode, Dynamic lights will be ignored. Only indirect lighting from lights is baked into lightmaps, so light sources are to be kept enabled to provide direct lighting and specular highlights.
- For emissive surfaces (having Emission state in the material parameters enabled) also enable the Emission Bake GI option. Both direct and indirect (bounced) lighting from emissive materials is baked into lightmaps.
- Lighting from Voxel and Environment Probes is not considered.
- Proceed to light baking.
Levels of Detail#
There is no need to bake a separate lightmap for each level of detail. You can save space and time by sharing already baked lightmaps between different LODs (works for LODs having the same UV maps):
-
Prepare a matching UV mapping in your modeling software to ensure that the lightmap is consistently mapped to similar parts of geometry.

- Make sure to uncheck automatic unwrapping in the import settings of the model to keep the prepared UVs.
- Select the Bake Unique Texture mode for LOD 0.
-
Select the Reuse Texture From Other Surface mode for all other LODs that will share its lightmap. Specify the LOD 0 in their Surface parameter.

- Proceed to light baking to bake the lightmap for the LOD 0.
- The lightmap texture baked for LOD 0 will be automatically used for the other LODs.
Baking#
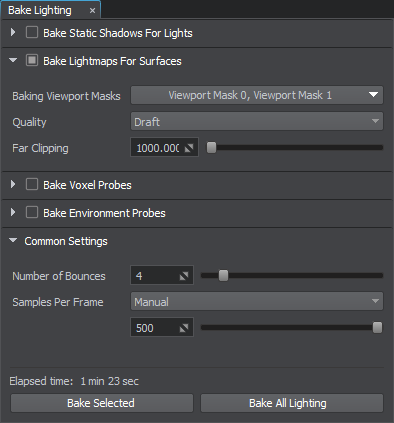
- Enable the Lightmap buffer: Rendering -> Buffers -> Lightmap.
- Open the Bake Lighting window.
- Enable Bake Lightmaps for Surfaces. Adjust the baking settings:
- Set up the Baking Viewport Masks.
- Select the desired baking Quality. The Draft option provides the shortest baking time and is suitable for development iterations, while the Ultra quality engages the biggest possible number of light rays to be simulated and the best sampling resolution.
- Adjust the Far Clipping Distance for simulated light rays.
- Adjust the Common Settings:
- Select the number of light ray bounces. Higher values will result in a brighter lighting since each surface receives more photons.
- Set the number of samples calculated per frame. This parameter is available for adjustment during baking process.
- Start baking process by clicking Bake All Lighting and wait for it to finish. Live preview is available. Several iterations (one per bounce) will be simulated for each affected surface.
You can stop the process at any moment by using the Stop button and you will be prompted to keep the achieved result or restore the previous textures.
- Upon completion, generated lightmaps will be saved in the bake_lighting/lightmaps folder and applied to the corresponding surfaces.
- In the materials settings of lightmapped surfaces, consider enabling the Lightmap Cubic Filtering option for better quality.
- As a matter of fine-adjustment, tweak the Lightmap Color parameter.
You can check the result by selecting the Baked Lightmap mode in the Rendering Debug.
If you are not satisfied with results on certain objects, you can select surfaces and/or nodes and perform partial re-bake using different settings by clicking Bake Selected in the Bake Lighting window.
Objects with lightmaps assigned are free to be transformed and cloned (even though it is going to break consistency of lighting). The Bake Unique Texture mode ensures that re-baking lighting for several clones that have the same lightmap assigned will generate a separate lightmap texture for each surface.

