Adding Animated Object into the World
Adding an animated object into Unigine is no harder than adding a simple static model. You just need to export an animated model from a 3D computer graphics software as a file (or files) of a Unigine-native format and then add it into the Unigine-powered project.

The Adding Object into the World tutorial can be useful.
- The Unigine plugins for 3D editors installed.
- An animated 3D model ready to be exported and necessary textures. Check recommendations.
- A project created via Unigine SDK Browser.
Step 1. Export an Animated Model
An animated model can be exported into Unigine in one of the following ways:
- As a single .mesh file storing model geometry and animation. This way of storing is good for simple objects as lift doors.
- As separate files: a .mesh file to store model geometry and an .anim file to store its animation. This way is suitable for complex objects with a number of animations, such as a character that can walk, run, jump and so on.
1 Method: One File for Mesh and Animation
- In Autodesk Maya, open the animated model to be exported and select it.

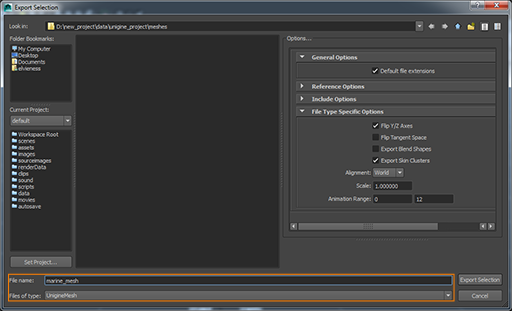
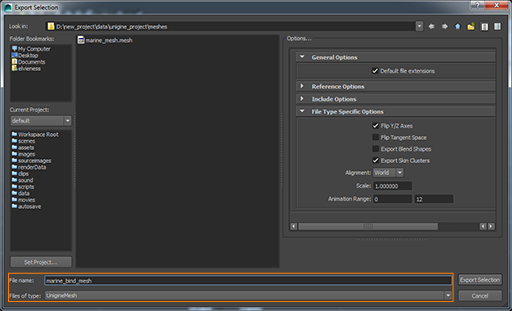
- On the main menu, click File -> Export Selection....

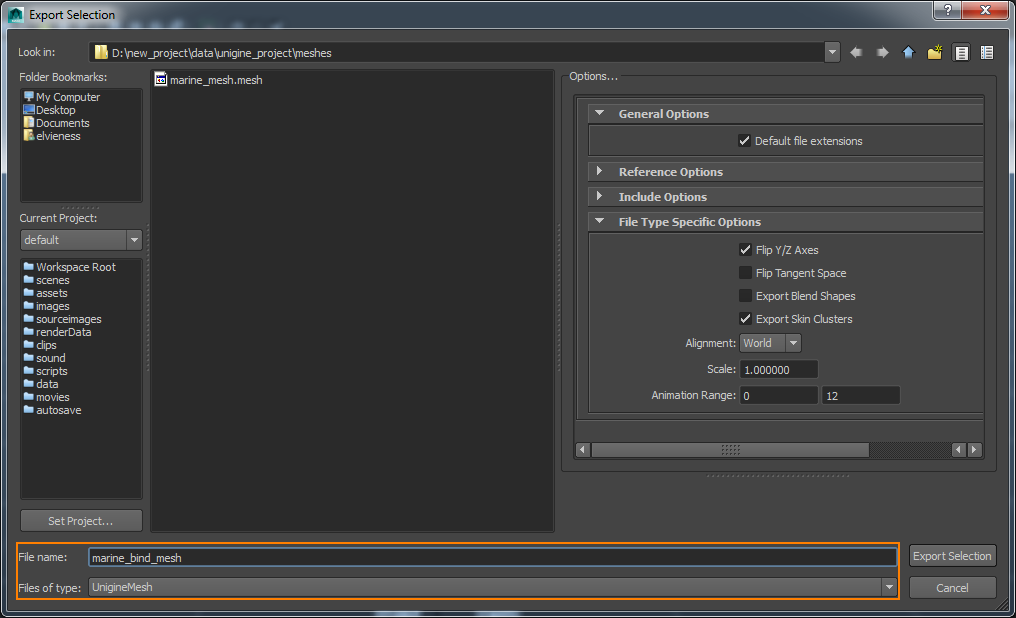
- In the Export Selection window that opens, choose a folder to save the model and specify the mesh name. In the Files of type drop-down list, choose UnigineMesh.
NoticeWe recommend you to save the exported mesh into the data/<project_name>/meshes/ folder.
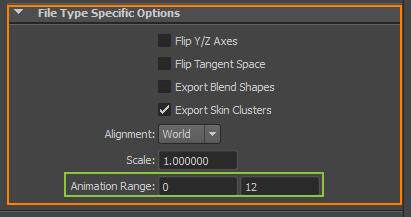
- Specify parameters to export the animation: set the first and the last animation frame number in the Animation Range option, uncheck the Flip Y/Z Axes option, check the Export Skin Clusters option.
Read more about export parameters in the Plugins for Maya article.
- Click Export Selection. The model and its animation will be saved in the specified file with the .mesh extension.
You can check the result of the export in the Script Editor. On the main menu click Window -> General Editors -> Script Editor.
The Script Editor window will open:
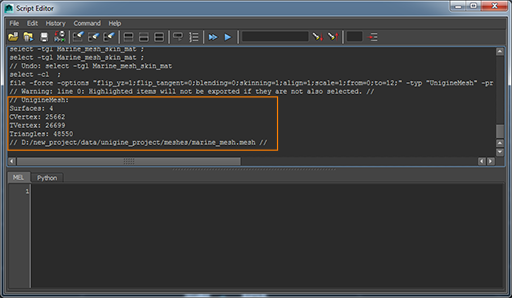 NoticeIn case of any errors, open the Script Editor window to check error details.


2 Method: Separate Files for Mesh and Animation
- In Autodesk Maya, open the animated model to be exported and select it.
- On the main menu, click File -> Export Selection....
- In the Export Selection window that opens, choose a folder to save the model and specify the mesh name. In the Files of type drop-down list, choose UnigineMesh.
NoticeWe recommend you to save the exported mesh into the data/<project_name>/meshes/ folder.
 WarningAll filenames in Unigine are case sensitive! We recommend you to use lowercase for file names.
 - In the File Type Specific Options tab with export options, specify parameters to export the skinned mesh:
- To export only the bind pose of the model without animation, specify 0 in both fields.
- Uncheck the Flip Y/Z option.
- Check the Export Skin Clusters option.
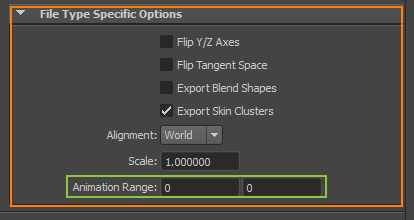
Read more about export parameters in the Plugins for Maya article.
- Click Export Selection.
NoticeYou can check the result of the export in the Script Editor.
- Select the skinned mesh again to export animation of the model.
- On the main menu, click File -> Export Selection....
-
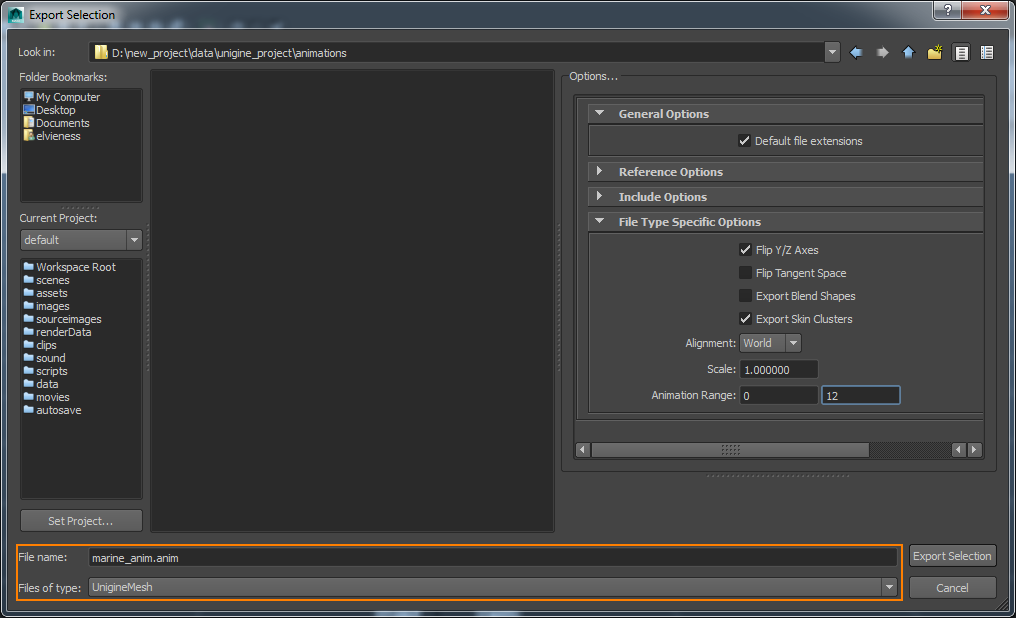
In the Files of type drop-down list, choose UnigineMesh and specify a folder to save the animation.
NoticeThen specify a name of the file with the *.anim extension into which the animation will be exported. For example: marine_anim.anim.We recommend you to save the exported mesh into the data/<project_name>/animations/ folder.
 NoticeYou should add the .anim extension to the name of your animation file in the File name field to export animation in a separate file. Otherwise, it will be exported as the .mesh by default.
 - Specify parameters to export the animation. The export options must be the same as above, except the Animation Range option. You should set here the first and the last animation frame number.
- Click Export Selection. The animation of the model will be saved in the specified .anim file.
Step 2. Add Skinned Mesh into the World
- Run the project with the loaded editor via the SDK Browser.
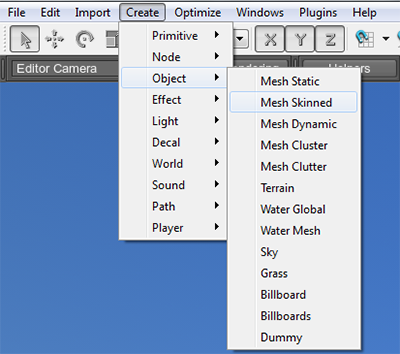
- On the Menu bar, click Create and choose Object -> Mesh Skinned.
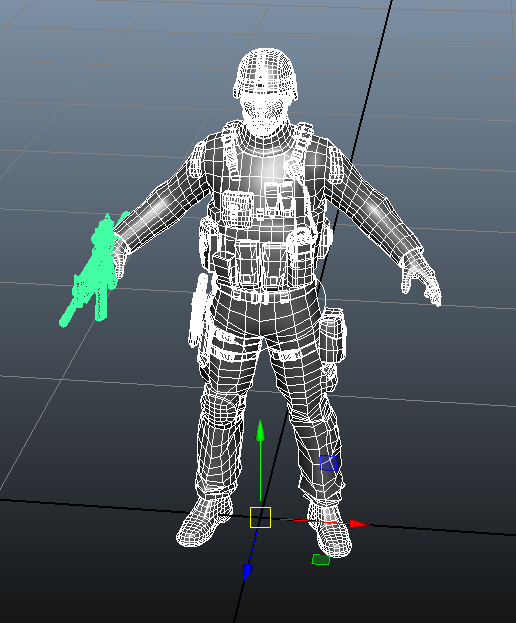
- In the file dialog that opens, choose the skinned mesh file that you have exported from Autodesk Maya. It can be both with animation or without.
The model will appear in gray as it uses a default material mesh_base.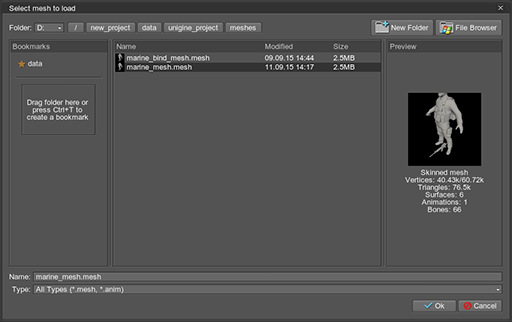

-
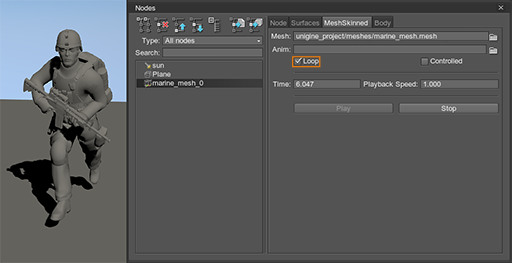
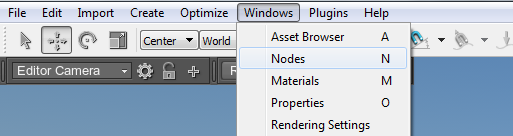
Click Windows -> Nodes or press N to open the Nodes window.
-
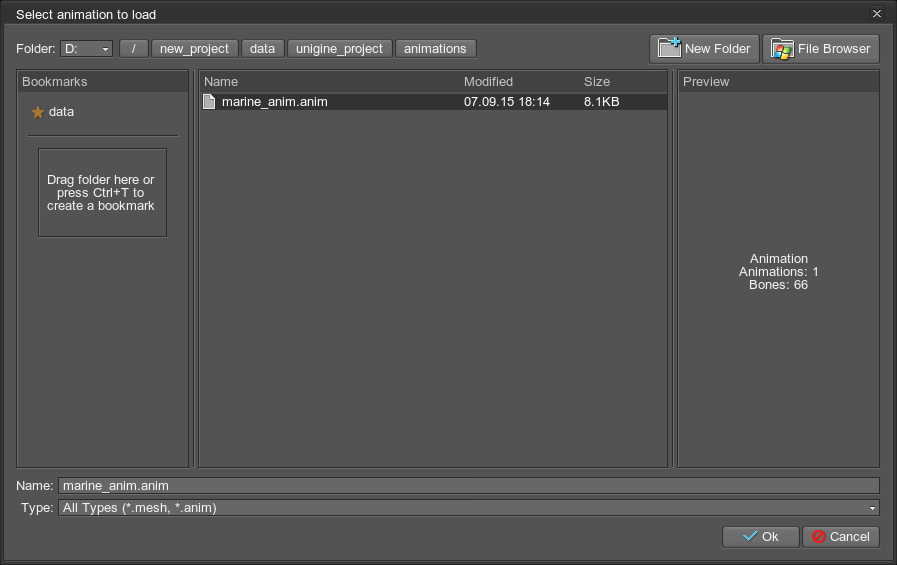
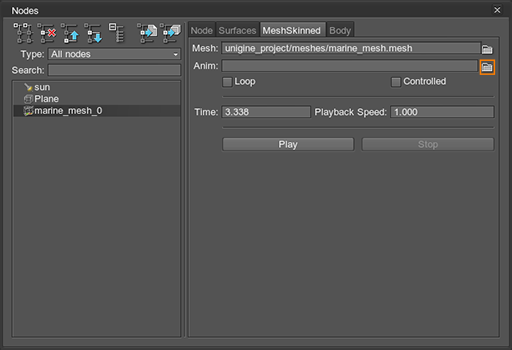
Choose the added node and open the MeshSkinned tab. If the .mesh file was exported separately with .anim file, then click Load animation, otherwise, go to the step 7.
-
In the file dialog that opens, choose the .anim file that you have exported from Autodesk Maya.

- Loop the animation and press Play.