This page has been translated automatically.
UnigineEditor
Interface Overview
Assets Workflow
Settings and Preferences
Adjusting Node Parameters
Setting Up Materials
Setting Up Properties
Landscape Tool
Using Editor Tools for Specific Tasks
FAQ
Программирование
Fundamentals
Setting Up Development Environment
Usage Examples
UnigineScript
C++
C#
UUSL (Unified UNIGINE Shader Language)
File Formats
Rebuilding the Engine and Tools
GUI
Double Precision Coordinates
API
Containers
Common Functionality
Controls-Related Classes
Engine-Related Classes
Filesystem Functionality
GUI-Related Classes
Math Functionality
Node-Related Classes
Networking Functionality
Pathfinding-Related Classes
Physics-Related Classes
Plugins-Related Classes
CIGI Client Plugin
Rendering-Related Classes
Внимание! Эта версия документация УСТАРЕЛА, поскольку относится к более ранней версии SDK! Пожалуйста, переключитесь на самую актуальную документацию для последней версии SDK.
Внимание! Эта версия документации описывает устаревшую версию SDK, которая больше не поддерживается! Пожалуйста, обновитесь до последней версии SDK.

Vegetation Add-On

A Vegetation add-on provides a scene containing the set of ready-to-use nodes for the following plants:

  • Blue oaks
  • Buck brushes
  • Coast bushes
  • Coconut tree
  • Douglas firs
  • Foothill pines
  • Fir
  • Manzanita

Opening World

To open the world containing special effects do the following:

  • Install the Vegetation add-on (available via UNIGINE SDK Browser in the Add-Ons section) and add it to your project (by clicking Configure Project -> Add-ons in the Projects section of UNIGINE SDK Browser).
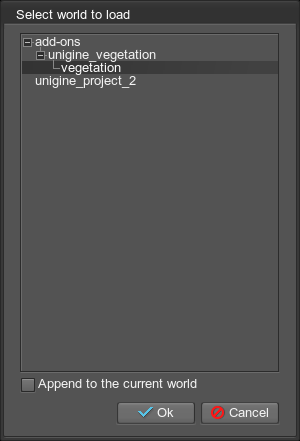
  • Click File -> Open World (Ctrl + O), choose add-ons -> unigine_vegetation -> vegetation and click Ok. The scene will appear.
Notice
The node references of effects will be also available independently in the data/add-ons/unigine_vegetation/nodes directory.
Last update: 10.08.2018
Build: ()