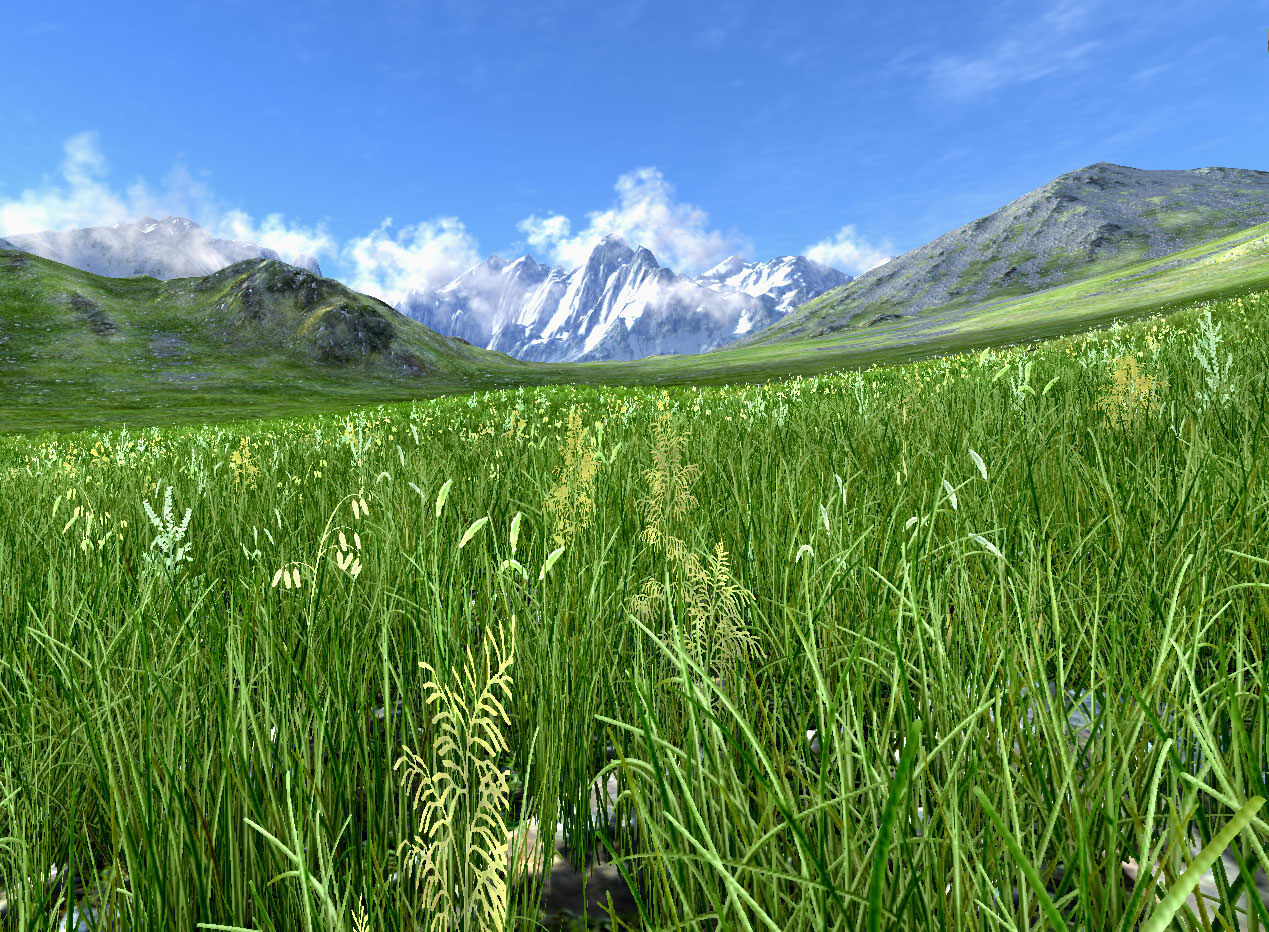
Adding Grass
The article provides the tips and tricks how to create animated grass, swaying and moving as if with the wind. Your grass will also realistically vary in color across the field, so that it does not look unnatural like a freshly-painted lawn. Moreover, you will keep the frame rate high when rendering all these polygons. No matter how big your grass field should be (it can cover the whole terrain), grass appears only around the camera. And here is a first tip: grass looks better upon a hilly terrain. As for planes, low and non-dense grass would be a reasonable choice.
Required Textures
The textures that are required to set up grass (within this tutorial) are the following:
- Diffuse textures.
Within this tutorial, we will use 2 diffuse textures: one for regular grass and one for grass of various types. Both textures should contain 4 slots in a row and any number of such rows from 1 to 4.
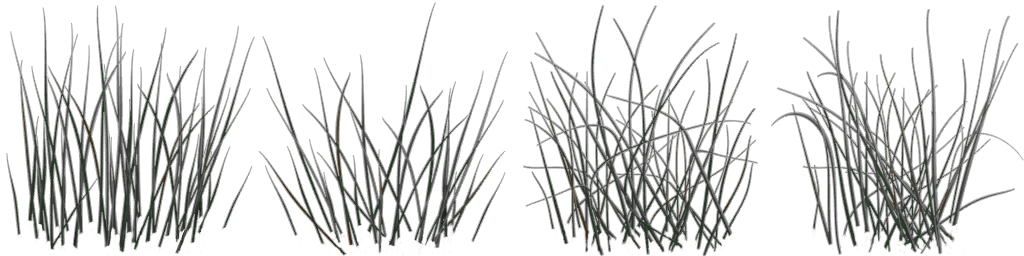
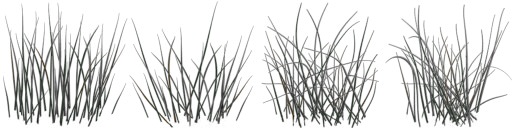 Diffuse Texture for Regular Grass
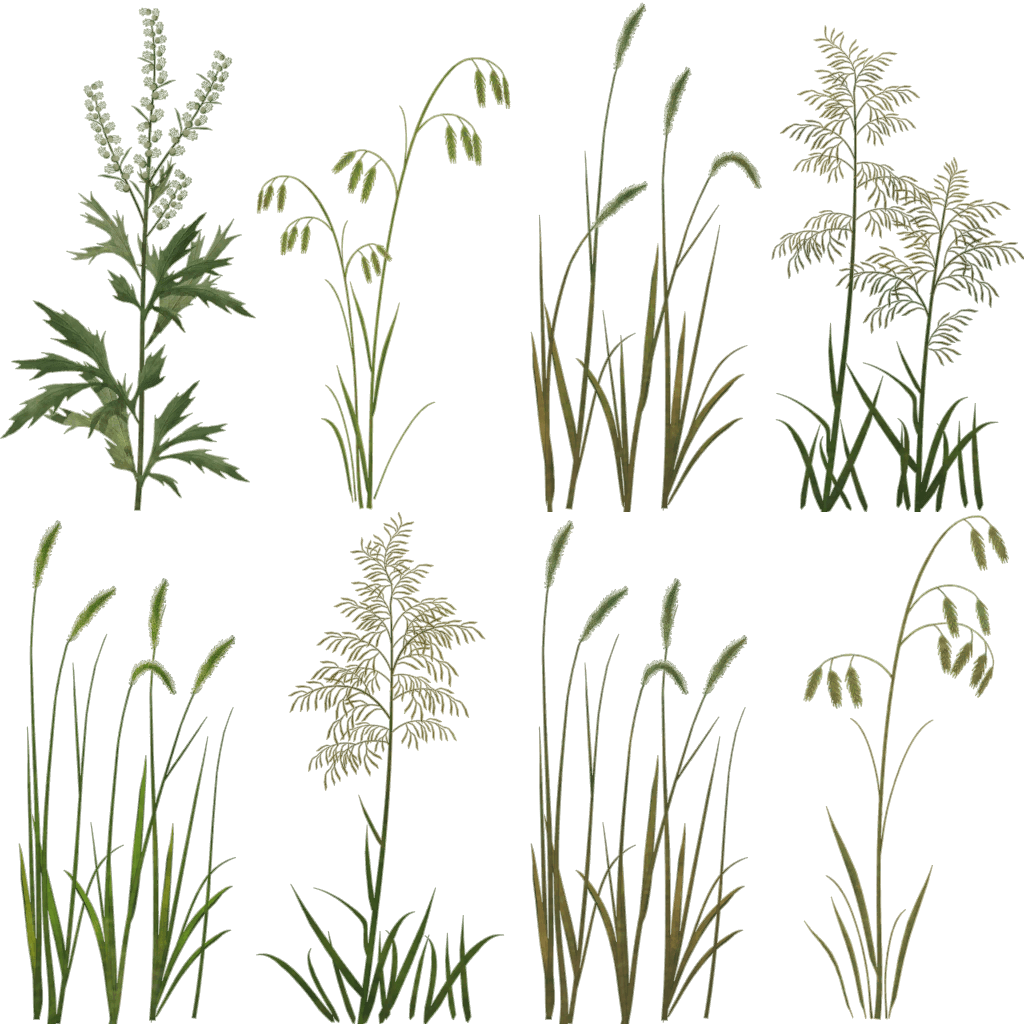
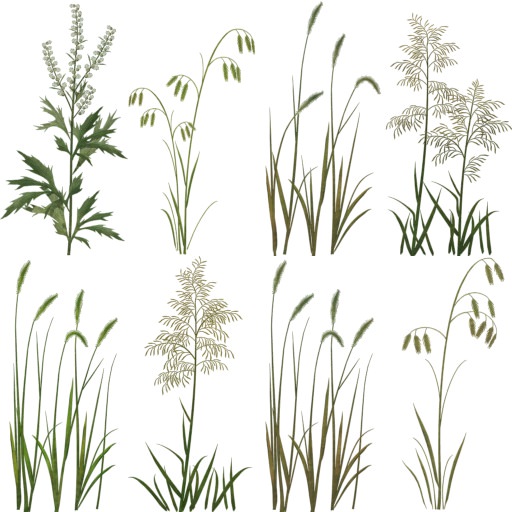 Diffuse Texture for Grass of Various Types
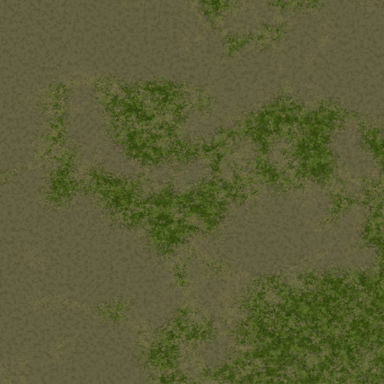
 - Spatial noise texture (RGB). It will cover the whole terrain and allows you to color grass differently in all locations.
NoticeSpatial noise texture is used to color the grass that has the gray diffuse texture or to add irregularity to the grass that has the colored diffuse texture.
This texture is generated based on the terrain's albedo texture colors.
NoticeWithin this tutorial, for the 8193 × 8193 terrain, 2048 × 2048 texture will be enough (1 pixel will be mapped to cover 4 units).The texture does not have the same size as the terrain, but should meet the following requirements:- Dimensions of the texture should be equal to some power of two (for example, 1024 × 1024 , 2048 × 2048 and so on).
- Dimensions of the texture should be proportional to the terrain size. For example, if you have the 4096 × 4096 terrain, the texture should not be 256 × 512 .
- Dimensions of the texture should be chosen so that to get the result of appropriate quality after mapping pixels to the terrain. For example, if you have the 4096 × 4096 terrain and the 1024 × 1024 texture, 1 pixel of this texture will be mapped to cover 4 units of the terrain. If such quality is enough, you can use this texture. Otherwise, you should create a new one of an appropriate size.
- Mask texture (RGBA8) that determines spreading of grass across the terrain. This texture is generated based on the terrain's height map. For example, for the 8193 ×
8193
terrain, the reasonable size could be 1024 ×
1024
(see details on choosing the size of the texture above).
Each channel of the mask (R, G, B and A) controls if the grass from the 1st, 2nd, 3rd and 4th columns (respectively) is rendered or not. The grass will grow only across areas with a channel color value.
NoticeWithin this tutorial, one mask texture will be used for both regular grass and grass of various types. So the grass from all columns of both textures will be rendered where white color is. The mask can be found in the <UNIGINE SDK Browser>/demos/valley_demo/demos/valley/masks folder.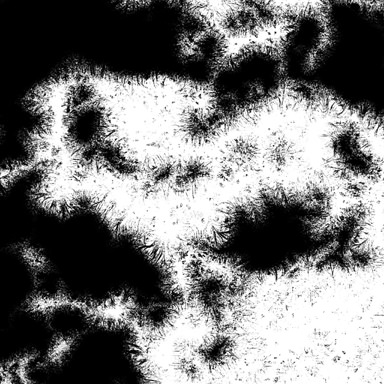
Required Settings
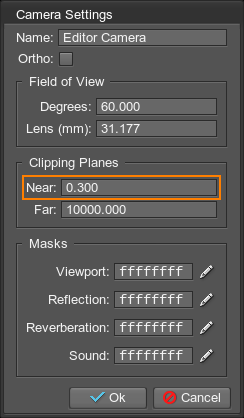
You may need to increase the precision of the depth buffer. Otherwise, flickering of grass in the distance may occur.
Click
 on the
Camera panel and increase the Near value (the near clipping plane) up to 0.3.
on the
Camera panel and increase the Near value (the near clipping plane) up to 0.3.
Step 1. Prepare World
Before adding and setting up grass, you should prepare a world. If you have a set up world with the terrain, the sun and the atmosphere, you can use it. If you don't have one, you can slightly modify the Valley Benchmark world (can be added via UNIGINE SDK Browser): disable all child nodes of the terrain node in the World Hierarchy.
Within this tutorial the modified Valley Benchmark world will be used.
Step 2. Add Grass
Within this tutorial, we are going to add 2 types of grass: the regular grass and the grass of various types.
- On the Menu bar, choose Create -> Object -> Grass and drop the grass somewhere in the world.

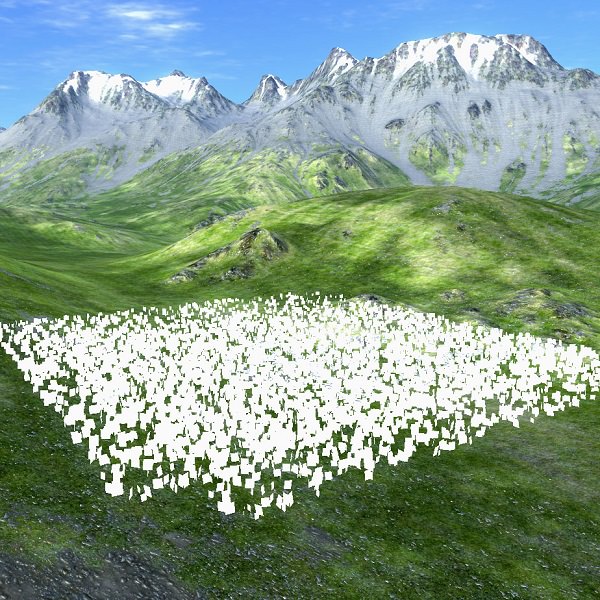 2 Grass Objects Added to World
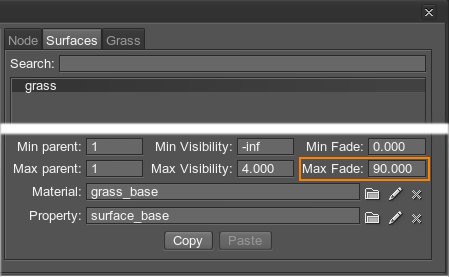
 - Select the added Grass Object in the World Hierarchy window. In the Node tab of the Parameters window, go to the Surfaces section and define the area of visibility for the future grass field. All the grass blades cannot be rendered all at once, especially, if the field is huge. Instead, they are going to be rendered in a small area around the camera.
Set the Maximum Visible distance to 4 units. Within this distance from the camera all grass blades are visible.
- Set the Maximum Fade distance to 90 units. Over this distance the grass will gradually fade out according to the alpha channel value of its diffuse texture.
- Set the real size of the grass field: go to the Grass tab and set Size X (along the X axis) and Size Y (along the Y axis) to repeat the size of the8193 × 8193 terrain.
In the result, you will see that the grass polygons appear and fade out within the set distance (94 units).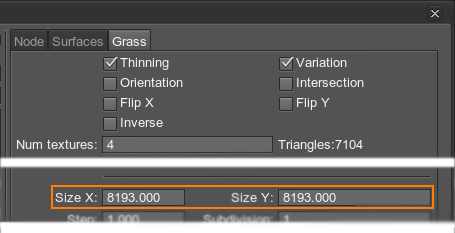
- Add the grass object as a child node to the terrain, so it can grow upon the terrain repeating its relief: drag the grass node to the terrain one with the left mouse button pressed.
- Check Intersection option to enable intersection with a parent node.
Now the grass grows upon the terrain (repeats its relief), but the field is still not positioned properly: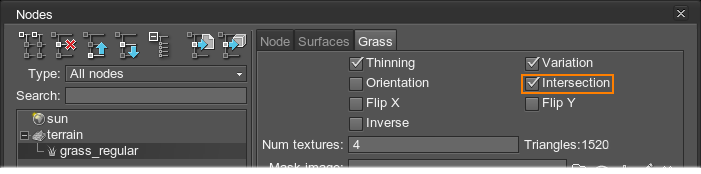

- Go to the Node tab and reset position of the grass object to 0 relative to its parent.
Position of the grass object becomes synchronized with the terrain: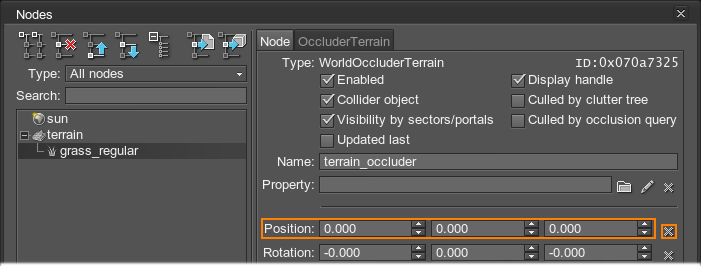

- Select the grass_regular node and press Ctrl + D to clone the node and then rename it to grass_variation.. The new grass node will be added as a child to the terrain node automatically.
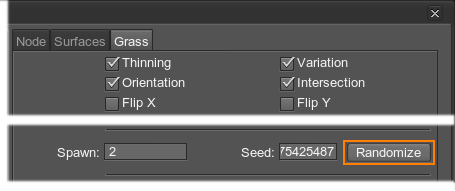
- Currently, coordinates of the grass quads of both objects are coincide. To avoid grass quads flickering, position grass quads of the grass_regular object differently: click Randomize to generate a random seed.
Step 3. Set Up Grass Color
Now you should create materials for the grass objects before tweaking their spread any further.
- On the Menu bar, choose Windows -> Materials (or press M) to open the Materials window with material settings.
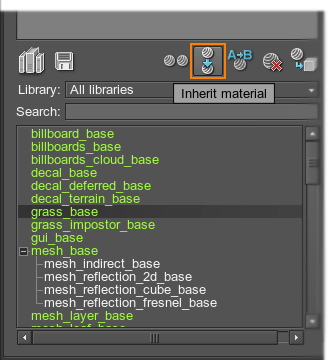
- Select a base (and therefore unchangeable) grass_base material in the list and click Inherit material.
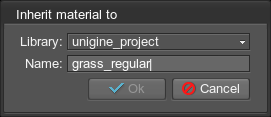
- Choose the folder where to save a new material and specify its name. The new *.mat file will be created.
- Select the grass_regular node and click Assign material to apply it to the selected node.

- Select the created grass_regular material in the list of materials and click Inherit material (see step 2 above).
NoticeIn this case, a new material will inherit all settings of the grass_regular material (e.g. slope, stem noise and so on). Anyway, you still can inherit a material for the 2nd grass object from the base grass_base material and set specific settings for it.
- Choose the folder where to save a new material and specify its name. The new *.mat file will be created.
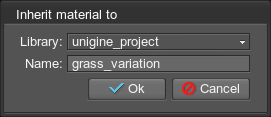
- Select the grass_variation node and click Assign material to apply it to the selected node (see the step 4 above).
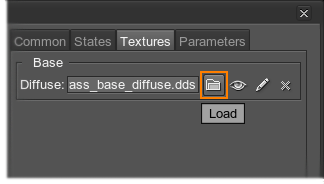
- Adjust the materials of the grass objects: go to the Textures tab and load the diffuse texture.
NoticeYou may want to manually edit the alpha channel of the mipmaps, because on automatically generated mipmaps thin blades may disappear incorrectly or unpleasantly.
- Select paths to the diffuse textures for the grass_regular and grass_variation materials.
You can use the following textures:
- The <UNIGINE SDK Browser>/demos/valley_demo/demos/valley/textures/grass_regular_d.dds texture for the grass_regular material.
- The <UNIGINE SDK Browser>/demos/valley_demo/demos/valley/textures/grass_variation_d.dds texture for the grass_variation material.
The diffuse textures are now loaded, but the number of rows in these textures is wrong: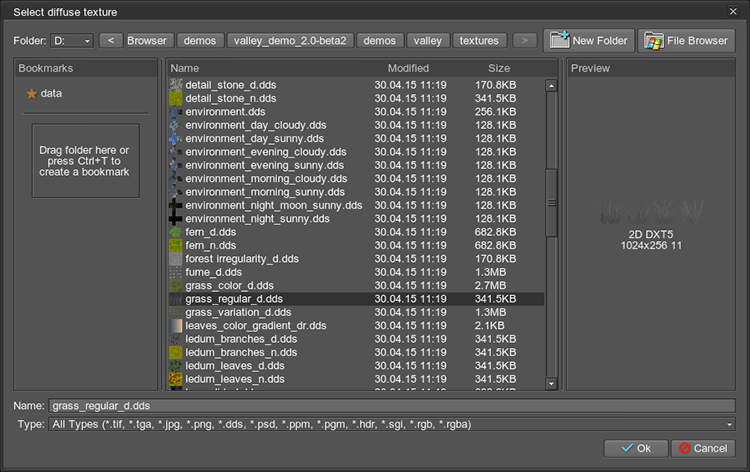
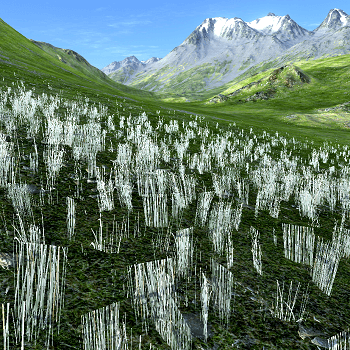 grass_regular
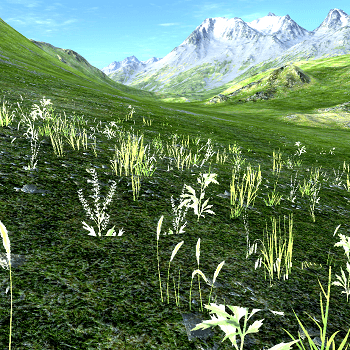 grass_variation
 - Go to the Grass tab of the Parameters window. Set the proper number of horizontal rows in the diffuse textures in the Num textures field. For example, we only have1 row for the regular grass and 2 rows for the grass of various types.
As you can see, the grass with the diffuse textures assigned looks unnatural on the terrain: its color remains the same regardless of its location.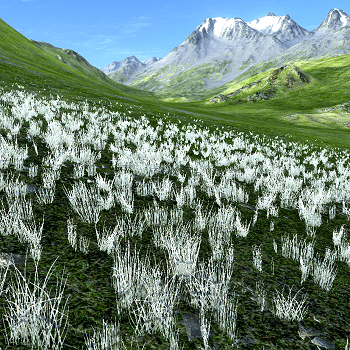 grass_regular
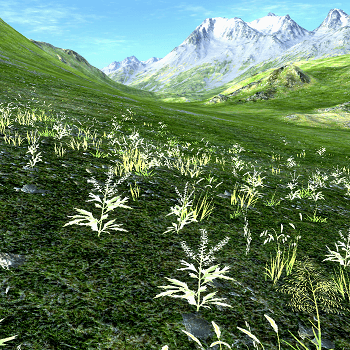 grass_variation
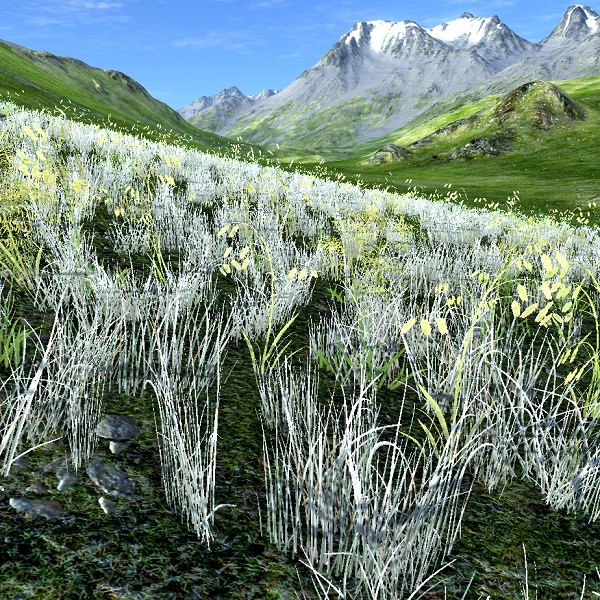
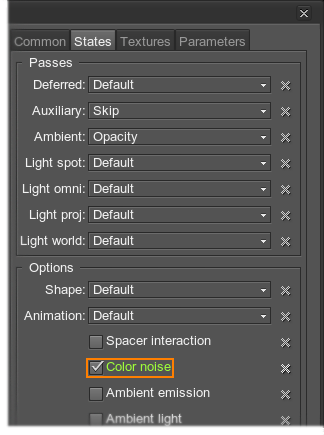
- Go to the States tab of the Materials window. Check the Color noise option for thegrass_regular material. It will allow you to color blades of the regular grass differently across the whole field. The Color noise option will also be set for the grass_variation material.
- For the grass_variation material, go to the States tab of the Materials window and uncheck the Color noise option. It will allow the grass of various types to differ from the regular grass.
- Go to the Textures tab and load the Spatial noise texture.
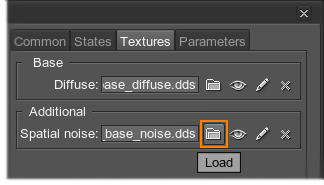
- Select path to the spatial noise texture. You can use the following texture from Valley Benchmark:
<UNIGINE SDK Browser>/demos/valley_demo/demos/valley/textures/grass_color_d.dds
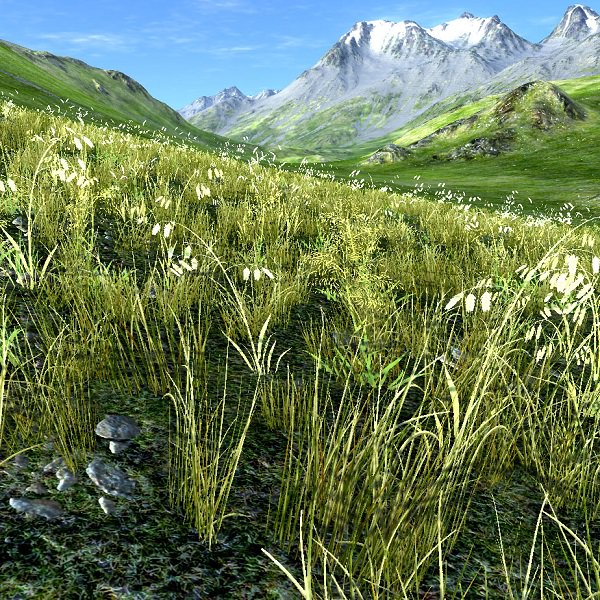
The grass will be colored as follows: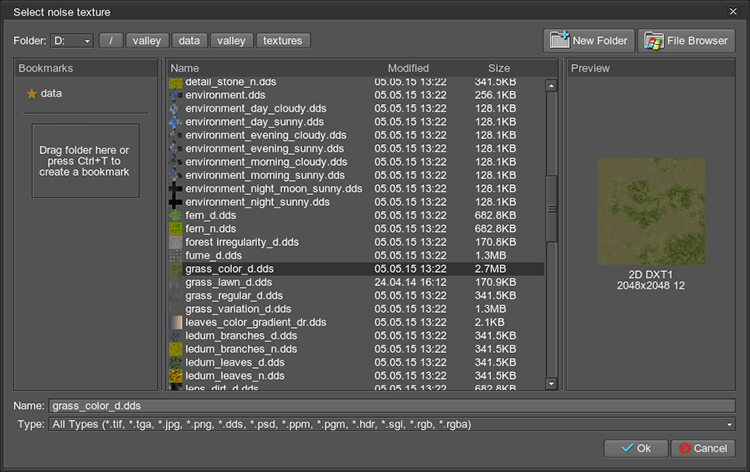
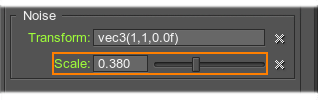
- Go to the Parameters tab of thegrass_regular material. Double-click on the Noise Transform field (or modify the expression right in this field).
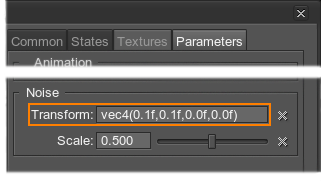
- Set the scale by X and Y axes to 1: in this case, the spatial noise texture will cover the entire terrain.
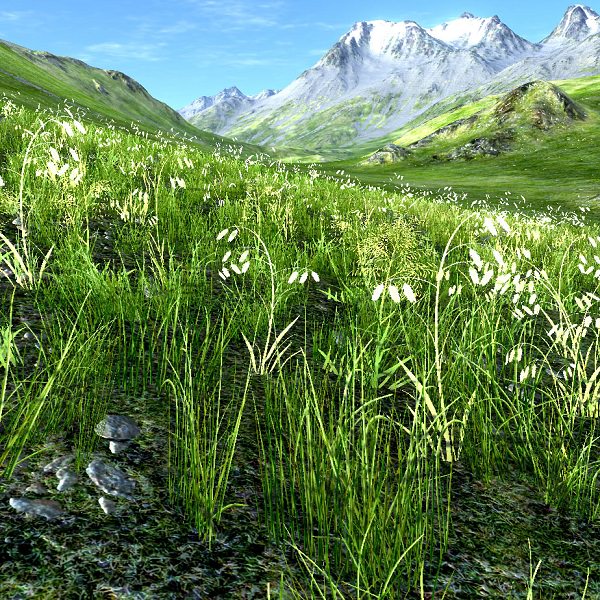
You can see patches of dark green, light green and yellow:

- The colors are too vivid to match the terrain colors. Drop the Scale to 0.38 to dim the noise color.
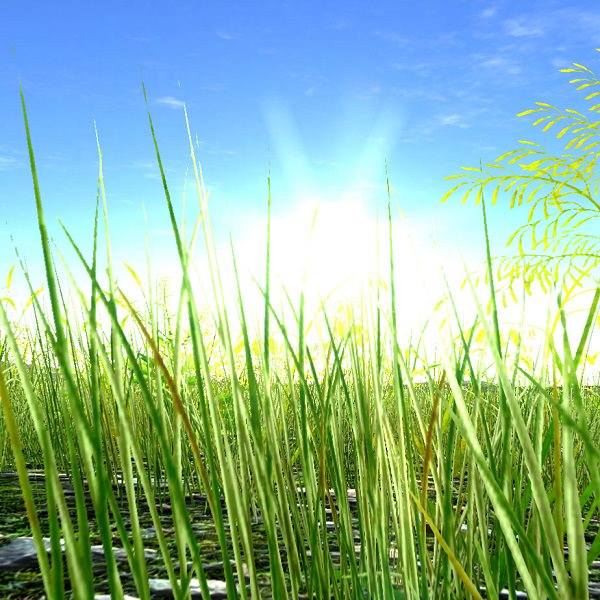
- The blades are quite thin, so make them a little bit more transparent to light when it shines from behind: increase the Translucent parameter up to 0.7 for the grass_regular material.
The grass will become more transparent and lighter: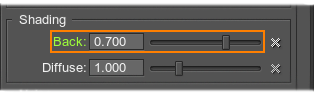
- Increase the Alpha intencity to 0.75 to darken diffuse coloring of the regular grass.
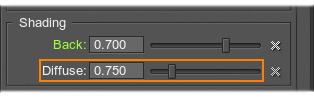
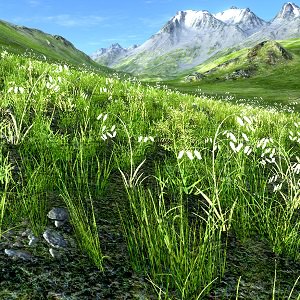 Diffuse = 1.0
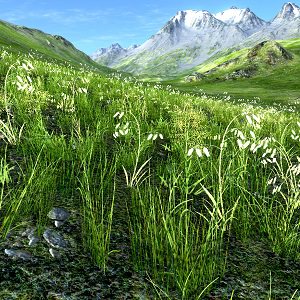 Diffuse = 0.75
 - For now, transparency and diffuse coloring values are the same for the grass_regular and grass_variation materials.
Change these settings for the grass_variation: set the Translucent parameter to0.5 and the Alpha intencity to 0.58.
Back = 0.70; Diffuse = 0.75
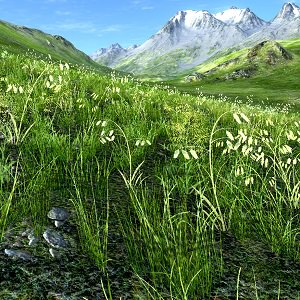 Back = 0.50; Diffuse = 0.58
 - For the grass_regular material, go to the Common tab and disable shadows from the grass:
- Uncheck the Cast world shadow box. After that, the grass will not cast shadows from world lights.
- Uncheck also the Cast shadow box to disable shadows from other types of light sources: omni and projected ones.
NoticeFor the grass_variation material, shadows will be disabled automatically.
The grass blends with the terrain smoother and that will allow us to make a denser looking filed: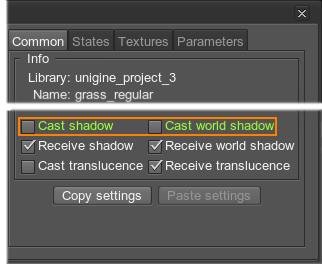 Shadows enabled
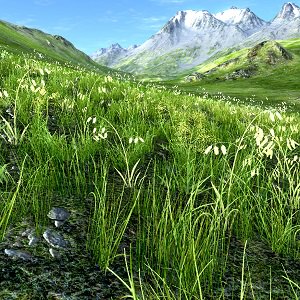 Shadows disabled
Step 4. Set Up Grass Density and Spread
- First, set up the density of the grass. For the regular grass, go to the Grass tab of Parameters window and drop the Step to 15. It will make the cells which are used to render the grass field smaller, however, this value is not so large to hit the performance when the cell is created.
The grass is regenerated. The density also changed, because it is defined for one cell. As we made the cell smaller, the grass turned out to be slightly more dense.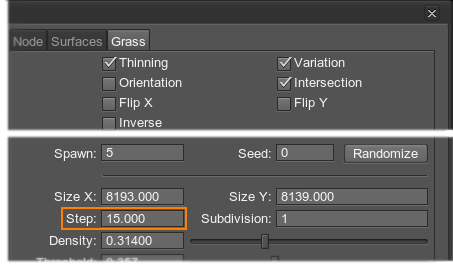
 Step = 40
 Step = 15
 - Increase the Density of the regular grass in a cell to 2.5 to add more grass blades on the field.
For the various grass, set this value to 0.5.
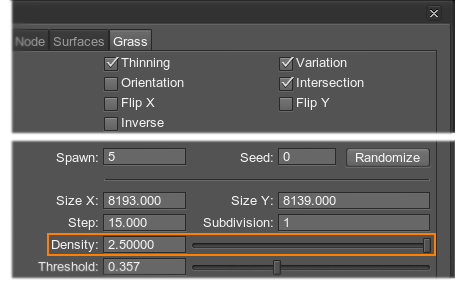 Density (grass_regular) = 0.314; Density (grass_variation) = 0.1
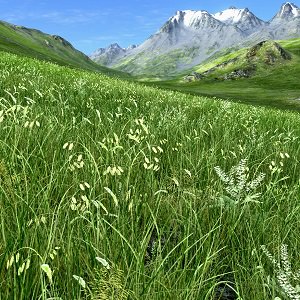 Density = 2.5
 - It's time to tweak the spread of the grass. Click
 to load a
Mask image that will specify the areas where the grass grows.
NoticePerform this step for both grass objects.
to load a
Mask image that will specify the areas where the grass grows.
NoticePerform this step for both grass objects.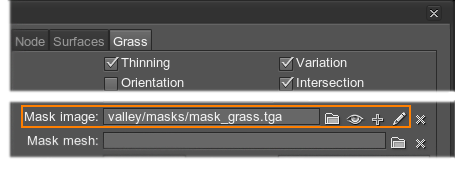
- Select a path to your mask texture, if any.
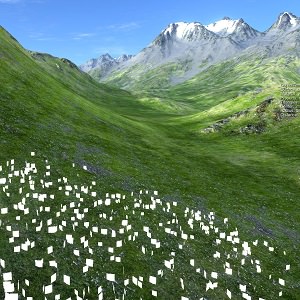
The grass no longer grows on mountains peaks and stony areas: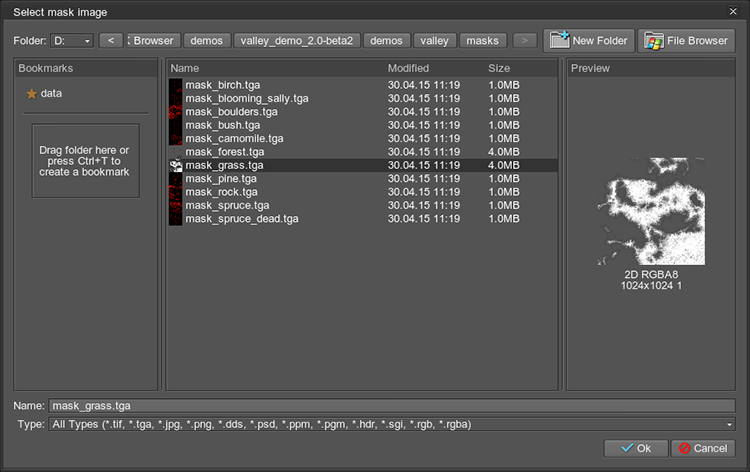
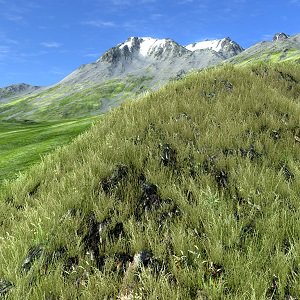 No Image Mask
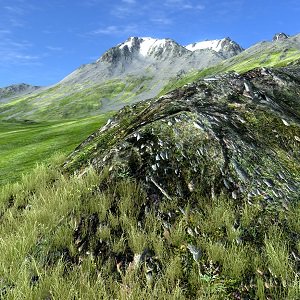 Image Mask Set for GrassNoticeTo paint the image mask directly in the scene, use Mask Editor.
 - Drop the Threshold to 0.3 to lower the mask intensity.
NoticePerform this step for both grass objects.
This will increase the area that the grass covers: Threshold = 0.5
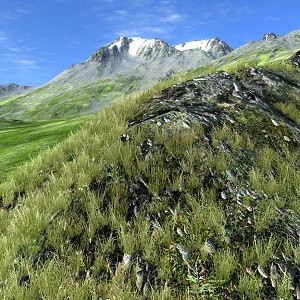 Threshold = 0.3
 - Usually the grass does not grow on the steep hillsides.
Increase the Angle to 0.7 to make steep areas grassless.
NoticePerform this step for both grass objects.
Now the spread of the grass is more realistic: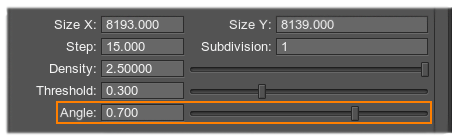
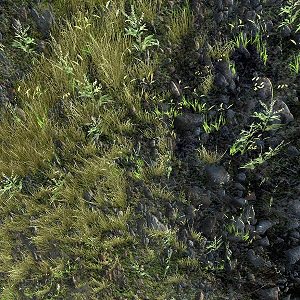
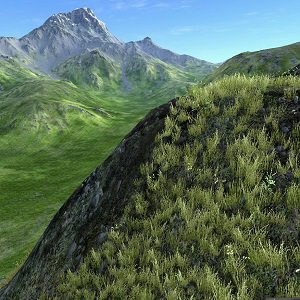 Angle = 0.0
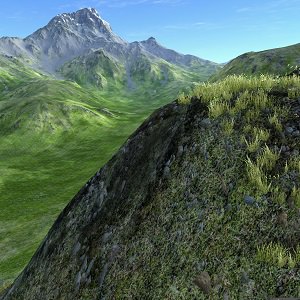 Angle = 0.7
 - Currently, all types of the grass of various types (in other words, slots of the diffuse texture of the grass_variation node) are spread uniformly across the grass field. However, in nature, one type of grass can predominate over the others or grow in small groups.
To achieve this, change the Probability parameter so that one type of the grass will predominate over the other types according to the diffuse texture.
For example, you can set the probability factor to 4 for the 1st column of the grass_various_d.dds texture: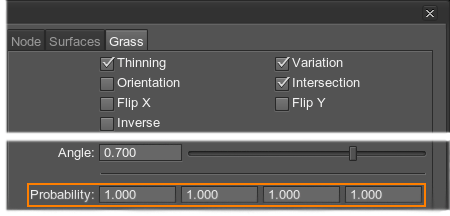 Default Probability Factor
 Custom Probability Factor
Step 5. Set Up Grass Shape and Orientation
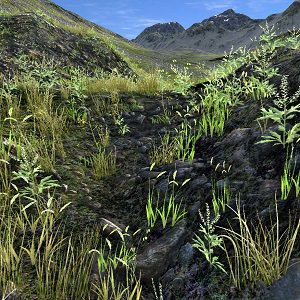
- When changing from bare areas to grassy ones, our grass starts to grow as small and thinned out. But on the stones, it does not look too good:
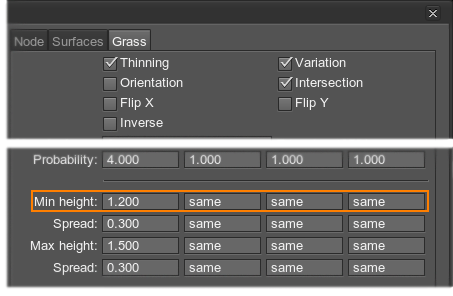
Increase the Min height up to 1.2. In areas with low density (according to the mask) the grass will be higher. You can set different height values for each of four columns in the diffuse texture, or leave it the same for all.
NoticePerform this step for both grass objects.
 Min height = 1
 Min height = 1.2
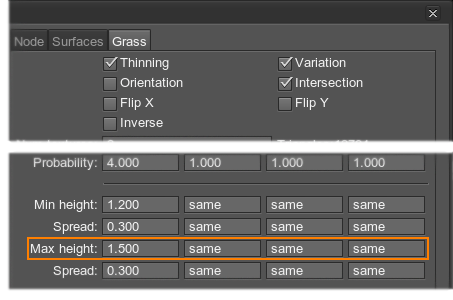
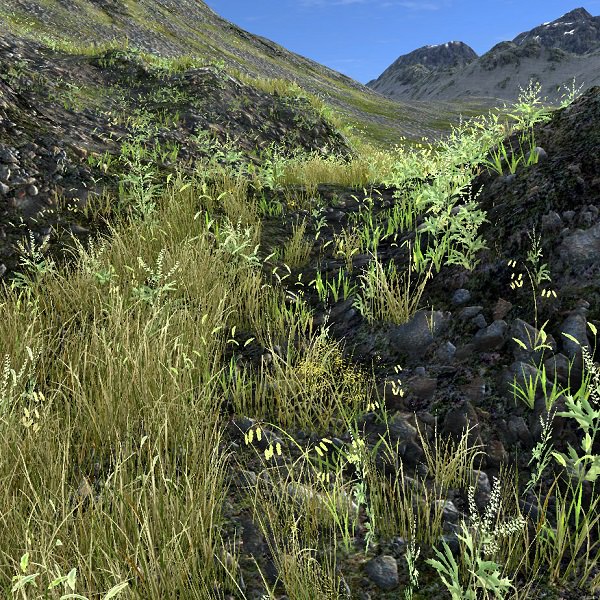
 - Increase the Max height of the grass blades to 1.5 units. In areas with high density (according to the mask) the grass becomes higher. We'll use the same height for all four columns in the diffuse texture as well.
NoticePerform this step for both grass objects.
- We have set the mean value of the grass height. It is an average height that is randomized. As a result, higher and lower grass blades are randomly planted. However, the difference between the highest and the lowest is pretty big.
Decrease Spread for Max height and Max height down to 0.1 units. It controls how blades can possibly vary in height. In our case, it will make the grass on the field more uniform in height.
NoticePerform this step for both grass objects.
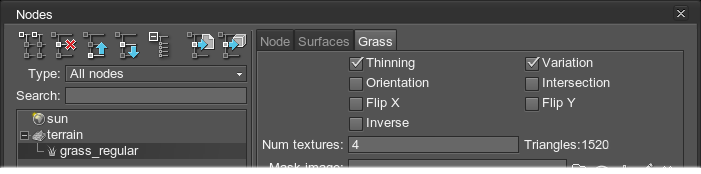
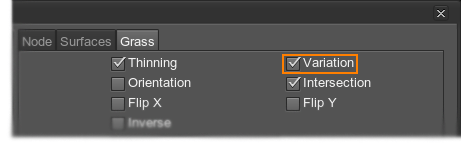
- Check the Variation box, so that the grass blades from diffuse texture are flipped horizontally at random.
NoticePerform this step for both grass objects.
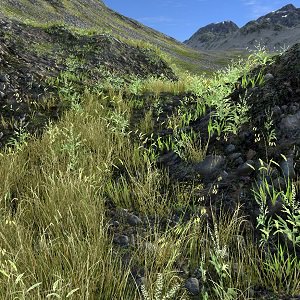 No Variation
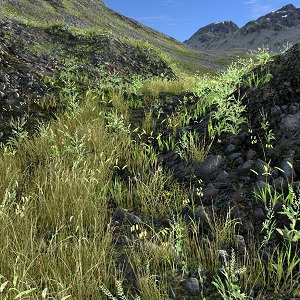 Grass with Variation Flag Enabled
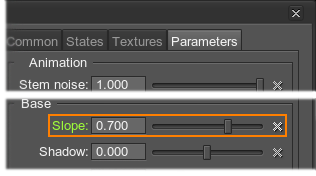
 - From above the grass seems too flat.
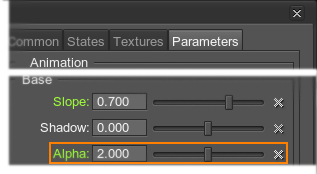
In the Materials window, go to theParameters tab and increase the Slope to 0.7 to make it more billboard-like.
NoticeThe slope will be the same for both the grass_regular and grass_variation materials.
 Slope = 0.5
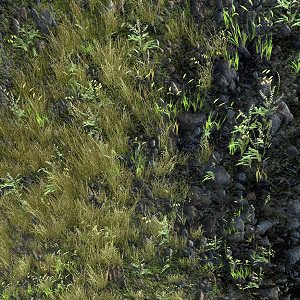 Slope = 0.7
 - Grass blades are too thin and sometimes appear in dashed lines.
Increase the Alpha intencity up to 2 to make the blades look thicker and the grass denser.
Step 6. Set Up Grass Animation
In nature, grass isn't static. So, it is necessary to set up grass animation. It can be set via animation settings of the grass material, so that all grass polygons are animated uniformly. Or you can animate some specific area of the grass field by using animation fields.
Within this tutorial, only the first method will be used. The example on using grass with animation fields can be found here.
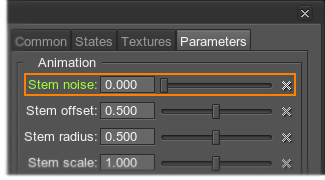
- On the Parameters tab of the Materials window, set the Stem noise to 0 to make all the grass blades move uniformly. It will help to learn how to adjust the animation.
 Stem noise = 1
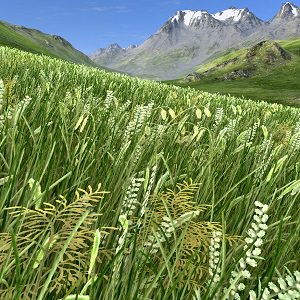 Stem noise = 0
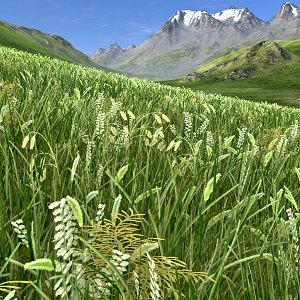
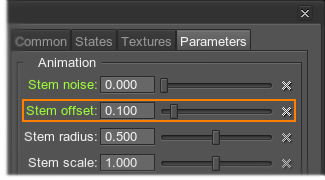
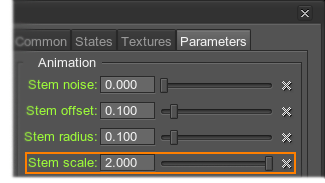
 - Decrease the Stem offset to 0.1 to make the grass sway and stretch horizontally to a lesser degree.
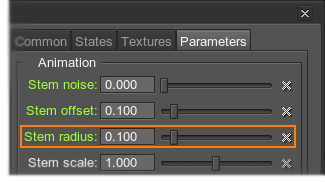
- Decrease the Stem radius to 0.1 so that the grass does not bend down to the ground.
- Increase the Stem scale to 2 to make the grass move two times faster.
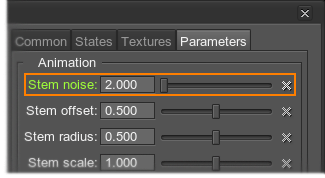
- Increase the Stem noise to 2 to make the blades movement more random.
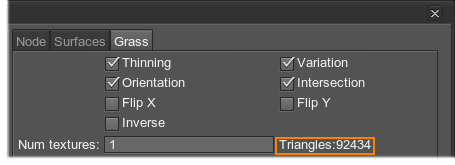
Step 7. Optimize Grass
Grass optimization means reducing the number of grass polygons rendered each frame and the number of DIP calls. To optimize the grass that we added and set up above, perform the following for both grass objects:
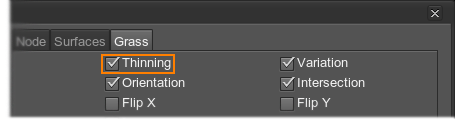
- Set the Thinning option to reduce the number of grass polygons rendered across the grass Fade distance.
- Set the Spawn rate that controls the number of grass cells rendered each frame to 2.
NoticeOf course, you can set this value to 1. However, too small spawn rate may cause popping of the grass quads on the approach of the camera to the grass field (especially at a low FPS value).
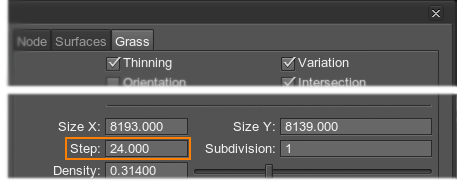
- Change the size of the cell Step to the optimal one: set it to 24.
After changing the settings mentioned above in the step 7, you can compare the previous and the current number of grass triangles: simply check the Triangles counter.