Skinned Mesh
A ![]() skinned mesh is an object that can contain both mesh geometry and animation data. It is usually used for rendering characters with a bone-based animation or a morph target animation (also known as blend shapes).
skinned mesh is an object that can contain both mesh geometry and animation data. It is usually used for rendering characters with a bone-based animation or a morph target animation (also known as blend shapes).
The animation data and the mesh geometry can be stored in a single .mesh file or in separate .mesh and .anim files. Separate files are usually used for complex objects with a number of animation (for example, characters), single file is usually used for simple objects (for example, lift doors).
Skinned meshes are created in the third-party graphics programs (such as 3ds Max, Maya, etc.) and can be converted to the Unigine native format via plugins to 3D editors (.mesh and .anim).
Most of the operations with the skinned mesh are performed via scripts, but you can do some of them via UnigineEditor:
- The maximum number of bones per surface is 128.
- The maximum number of active morph targets is 7.
- The maximum number of surfaces organized in hierarchy in skinned mesh is 32768.
See Also#
- The Adding Morph Targets tutorial to know how to add morph targets in Unigine
- The Mesh File Format article to know more about .mesh and .anim formats
- The ObjectMeshSkinned class to edit skinned meshes via API
Adding a Skinned Mesh#
To add a skinned mesh to the scene via UnigineEditor, do the following:
- Run UnigineEditor.
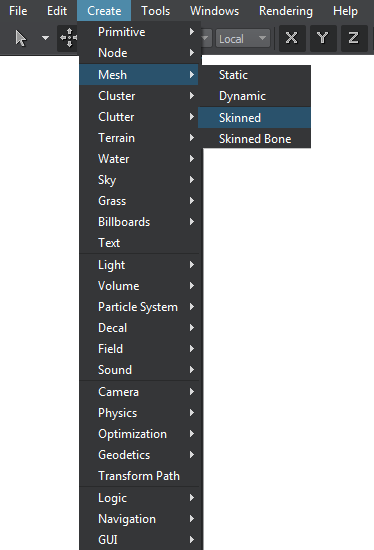
- On the Menu bar, click Create -> Mesh -> Skinned.
- In the dialog window that opens, choose the path to the .mesh file.
- Place the mesh somewhere in the world.
Loading a Skinned Mesh and Animation#
To replace a loaded skinned mesh with a new one, do the following:
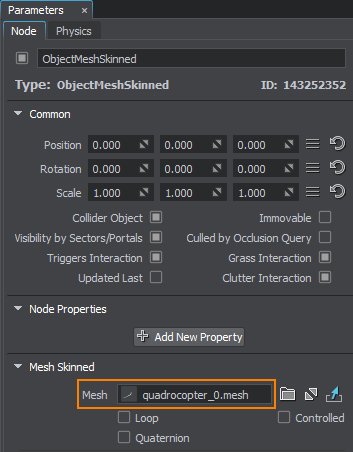
- Choose the mesh in the World Hierarchy window and go to the Node tab of the Parameters window.
- In the Mesh Skinned section, choose the path to the new .mesh file in the Mesh field.
To add animation or replace the existing with a new one via UnigineEditor, do the following:
- Choose the mesh in the World Hierarchy window and go to the Node tab of the Parameters window.
- In the Mesh Skinned section, choose the path to a new .anim file in the Preview Animation field.
Setting Up Animation#
You can perform the following operations with skinned meshes animation via UnigineEditor:

| Loop | Play an animation in a loop. |
|---|---|
| Quaternion | Toggles the dual-quaternion skinning mode on and off. The dual-quaternion model is an accurate, computationally efficient, robust, and flexible method of representing rigid transforms and it is used in skeletal animation. |
| Controlled | Set the flag identifying that the mesh animation is controlled by a parent skinned mesh. |
| Time | Set the animation time, in animation frames. The time count starts from the zero frame. If the time is set to be between frames, animation is blended. If the time is set outside the animation frame range, the animation is looped. |
| Playback Speed | The multiplier of the animation playback time. |
| Preview Animation | Path to a file with animation (.anim) to be played. |
| Play | Start the animation playback. |
| Stop | Stop the animation playback. |
Optimizing Animation Playback#
Updating each frame a huge number of objects located far away from the camera that are hardly distinguishable or observed as a mass is a waste of resources.
To improve performance and avoid the excessive load, animation playback can be updated with a reduced framerate. When the player is out of the area specified by the Update Distance Limit, the animation stops to be updated and freezes statically.
The set of frame rates enables you to specify how often the animation playback should be updated when the object is visible, when only the shadow of the Skinned Mesh is visible, or when it is not visible at all.

This feature is enabled with default settings ensuring optimum performance and can be adjusted per-object in the UnigineEditor or via API at run time.