mesh_base
A mesh_base material is a physically based material featuring PBR (physically-based rendering) and SSR (screen space reflections) technologies. It provides the realistic reflections and lighting model. The material is available in the Materials list and is used as the default one.
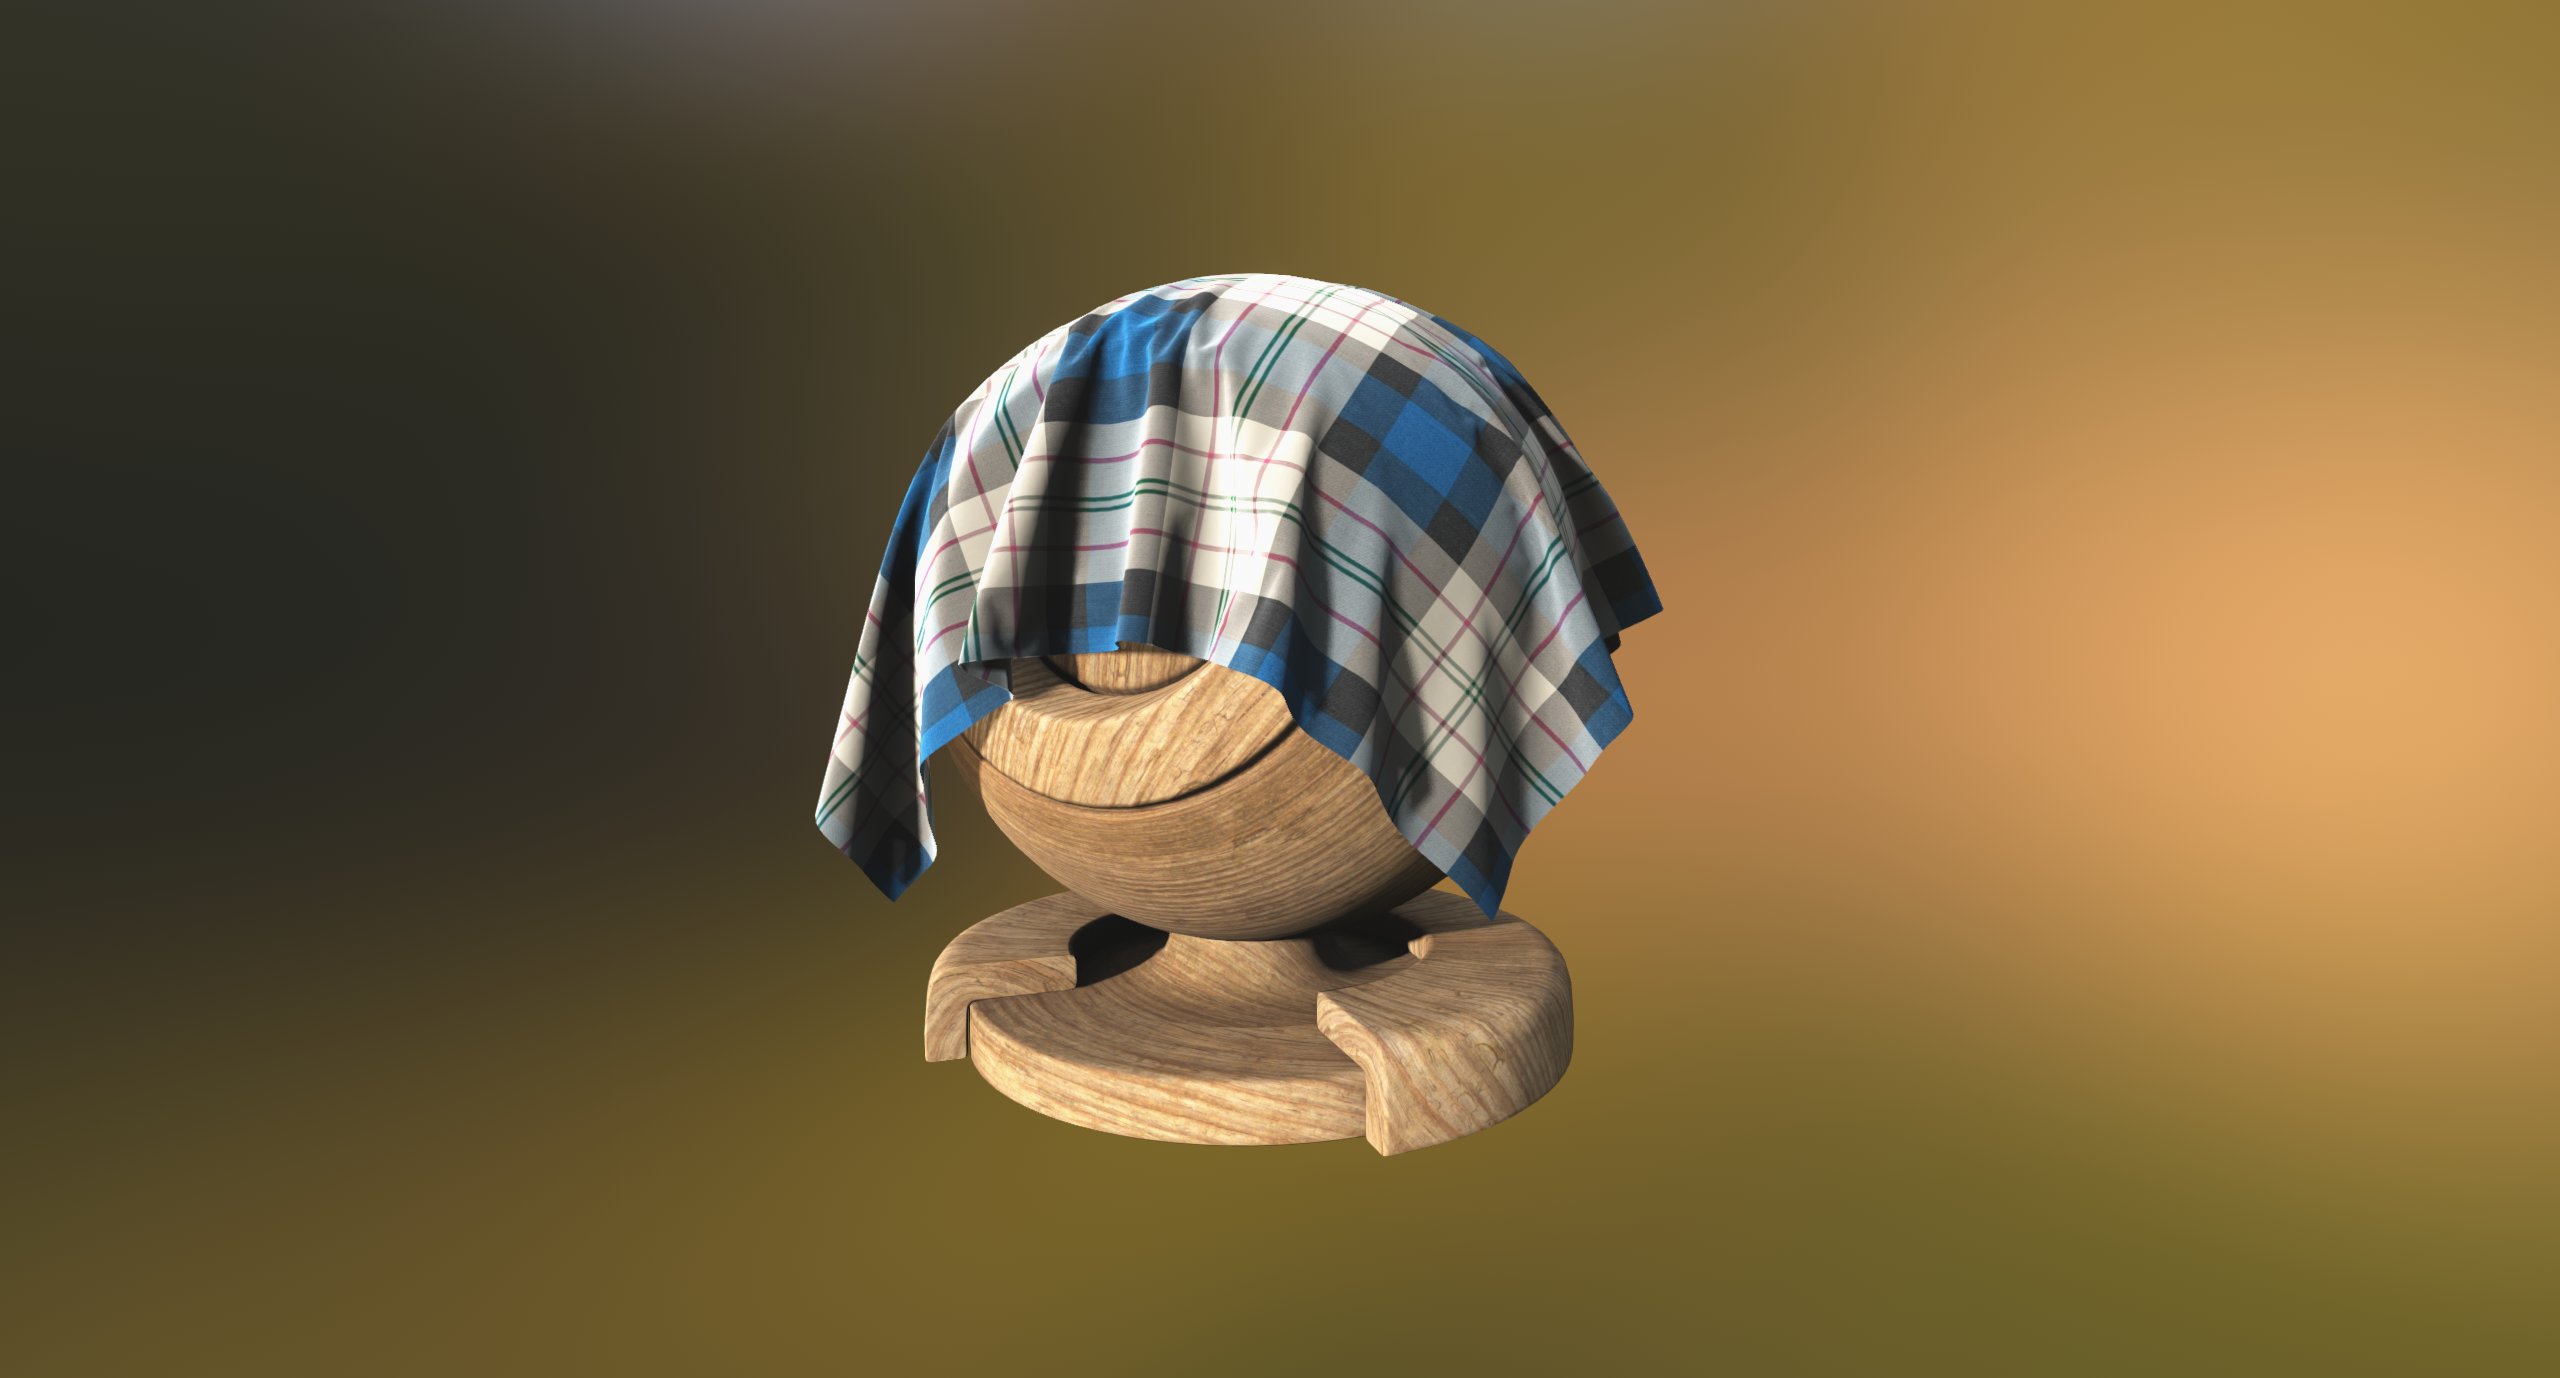
Options available in the States tab enable different features thus activating additional textures and their parameters.
Workflows
The main thing about the PBR material is a workflow. There are two workflows for Unigine PBR materials: Metalness and Specular. The specular workflow works with the old standard of textures that was used in the mesh_base material (diffuse, specular, gloss). Metalness works with the new standard of textures (albedo, metalness, roughness).
We've kept the Specular workflow to make it easier to upgrade your projects that have the old texture standard.
We strongly recommend to use the Metalness workflow for creating materials in new projects as it uses a less number of texture channels, and material parameters of the Metalness workflow are more similar to material parameters of the real world.
By using the Workflow field you can specify the workflow of the material:
- Metalness — with the new standard of textures.
- Specular — with the old standard of textures.
Deferred Buffers
Deferred Buffers option specifies if deferred buffers of the material should be filled.
Emission
Emission simulates glow from extremely bright surfaces, therefore imitating real light sources and highlights. It can be used, for example, to simulate a glow of distant objects. Enabling the option activates an additional emission texture.
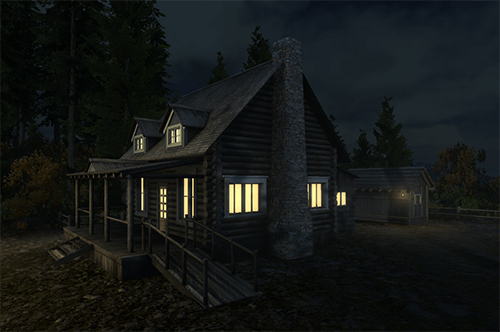
Emission Texture
Emission map stores information about the light emission. It is blended additively over a texture, so areas which do not glow at all should be pure black on the glow map, and any brighter colors will appear to be emitting light.
|
|
|
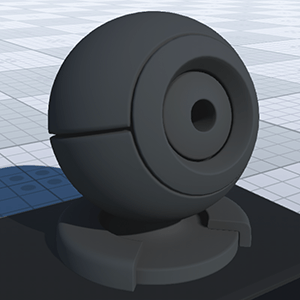
Emission state disabled
|
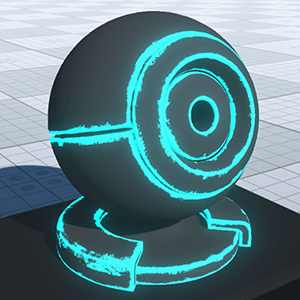
Emission state enabled, with emission texture
|
The texture is 4-channeled:
- RGB values store information about a glowing color.
- An alpha (A) value stores a glow mask:
- White color indicates that the area will be glowing.
- Black color indicates that the area is not glowing.
Emission Parameters
Color
Color is a color picker to choose a color multiplier for the emission texture.
Scale
Scale is a coefficient to scale emission texture intensity. The higher the value, the lighter and brighter light areas of the emission texture are.
Ambient Occlusion
Ambient Occlusion (SSAO) is a real-time imitation of the diffuse indirect light and its shadows.
Enabling the option activates the Ambient occlusion field that specifies which UV coordinates of the mesh will be used for textures:
- Base - base UV coordinates.
- First UV - map the texture using the first UV coordinates of the mesh.
- Second UV - map the texture using the second UV coordinates of the mesh.
Ambient Occlusion Texture
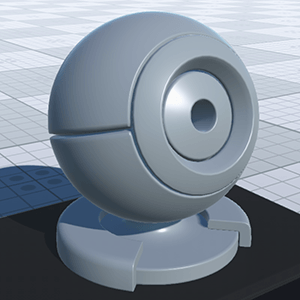
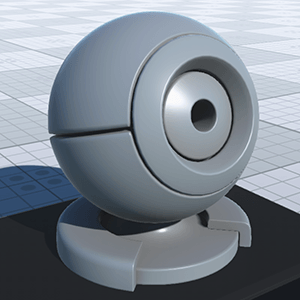
Ambient occlusion (AO) texture modulates the global environment illumination, for example, when an object is lighter at the top from sky above, and darker at the bottom from the ground below.
|
|
|
Without AO texture
|
With AO texture
|
The texture uses only R channel.
Ambient Occlusion Parameters
Auxiliary Buffer
Auxiliary activates the auxiliary texture and parameters.
Auxiliary Texture
Auxiliary texture is a texture that used for auxiliary rendering pass.
Auxiliary Color
Auxiliary color parameter specifies the constant color for the auxiliary pass.
Vertex Color
The vertex color is a color assigned to each vertex of the 3D model in any third party 3D editor. After being imported to Unigine, such model can be used in a number of ways allowing you to reduce the amount of used texture and broaden the diversity of the final materials.
The Vertex color checkbox enables an additional Vertex color options field used for per channel modulation of the albedo, AO, light map, emission and auxiliary textures.
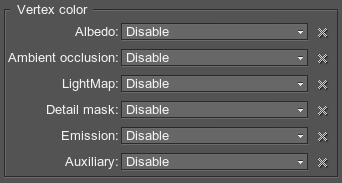
For the AO and detail textures you can choose which texture channel (R, G, B or A) to use. For albedo, light map, emission and auxiliary textures RGB channels are used simultaneously.
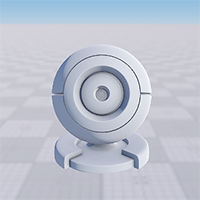
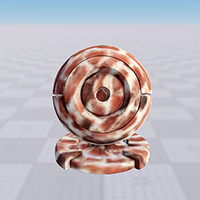
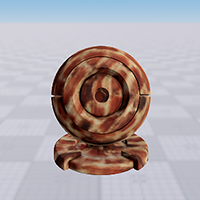
For example, using the vertex color of the albedo texture allows you to create a detail material. At the pictures below there is a model containing vertex colors (brown spotted). Left to right:
- No texture is used, Vertex color is disabled.
- No texture is used, Vertex color is enabled, the Albedo RGB mode is used.
- The diffuse texture (light wood) is assigned, Vertex color is enabled, Albedo RGB mode is used.
|
|
|
Planar Reflections
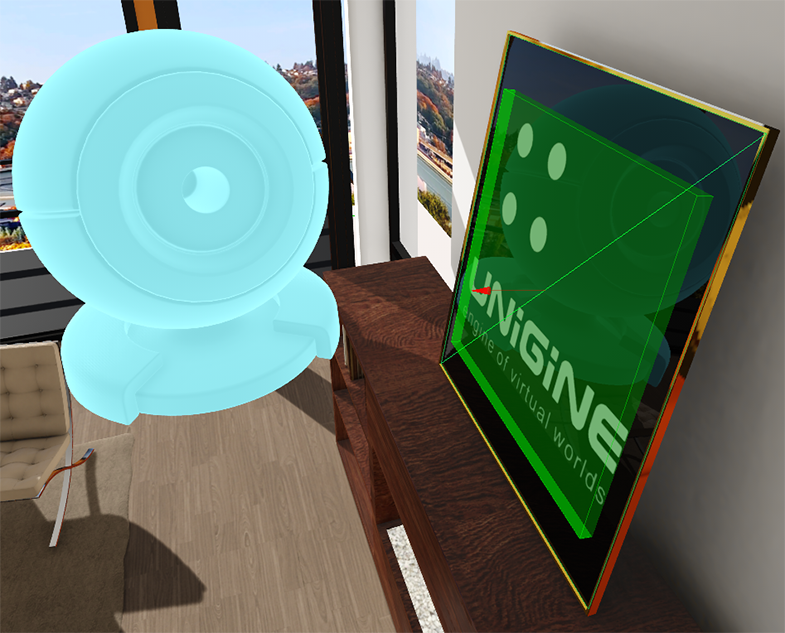
The mesh_base material features a dynamic planar reflection technique. The reflecting power of the material depends on two parameters: metalness and roughness.
By using planar reflection options, you could create flat mirrors and flat dynamic reflective surfaces: parquet, flat varnished surfaces, etc.
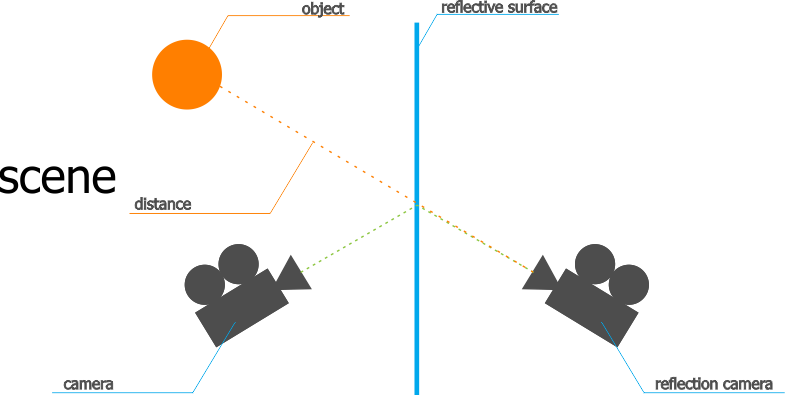
The engine renders dynamic reflections for planar reflection by computing the position of the reflection camera. Reflection camera represents a camera on the other side of the reflective surface: the distance from reflector to camera is the same for real camera and reflection camera.
Planar reflections don't reflect each other: they render environment cubemap instead. Also, planar reflections miss post-effects.
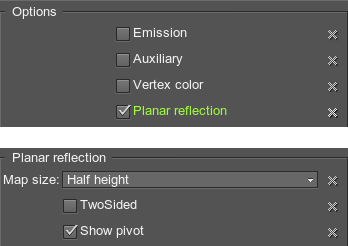
To enable the planar reflections for the material, click the Planar reflection checkbox. After enabling the option, the additional Planar reflection field becomes available. Ensure that the material has dynamic reflections. If not, tune the following parameters: Metalness and Roughness for metalness workflow, Specular and Gloss for specular workflow.
Map Size
Specifies the size of the reflection map: the higher the value, the better the quality.
Available sizes of the map are:
- 128 — creates a reflection image with 128x128 resolution.
- 256 — creates a reflection image with 256x256 resolution.
- 512 — creates a reflection image with 512x512 resolution.
- 1024 — creates a reflection image with 1024x1024 resolution.
- 2048 — creates a reflection image with 2048x2048 resolution.
- 4096 — creates a reflection image with 4096x4096 resolution.
- Quart height — creates a reflection image with the resolution height/4 xheight/4, where height is an application window height.
- Half height — creates a reflection image with the resolution height/2 xheight/2, where height is an application window height.
- Height — creates a reflection image with the resolution height xheight, where height is an application window height.
TwoSided
TwoSided option enables a two sided planar reflection.
Show Pivot
Show Pivot option shows the pivot plane, which shows the direction of reflective surface. By specifying the direction of planar reflection, you can create a reflection surface even if it was exported at an angle.
Planar Reflection Parameters
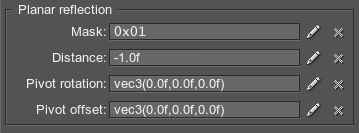
The set of planar reflection parameters (available on the Parameters tab):
Mask
Mask specifies the viewport mask of the reflection camera.
Distance
Distance from the reflection camera to the object that will be reflected. In other words, the distance equals the distance from camera to the reflective surface plus the distance from object to reflective surface.

Pivot Rotation
Pivot Rotation specifies the rotation of the reflection pivot point.
Pivot Offset
Pivot offset specifies the position of the pivot point.
Vegetation Parameters
The mesh_base material allows you to create materials for vegetation crowns and trunks. Enabling the Vegetation checkbox activates a set of additional animation and geometry parameters.
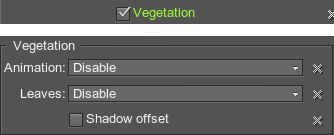
Animation
Enables leaves animation. The available values are:
- Disabled — the material is static.
- Default — animation of leaves is enabled and can be controlled by the animation parameters.
- Field — animation of leaves is enabled, can be controlled by the animation parameters, and material's animation parameters can be affected by an animation field.
Animation Parameters
Animation parameters are present only if an Animation option is enabled. These parameters are available on the Parameters tab.
- Stem noise — a coefficient to scale a spatial noise that diversifies the direction of movement of the vegetation stems.
- Stem offset — a coefficient to scale an amplitude of horizontal movement for the vegetation stems.
- Stem radius — a coefficient to scale an amplitude of vertical movement for the vegetation stems.
- Stem scale — a coefficient to scale the speed of vegetation stems movement.
- Leaf noise — a coefficient to randomize the orientation and direction of rotation for leaves (seen only on several nodes with the same material). By the minimum value of 0, all leaves are synchronized in their movement. Higher values make leaves randomly move in different directions.
- Leaf offset — a coefficient to scale leaves rotation amplitude. By the minimum value of 0, leaves do not move at all. Higher values make leaves move with greater amplitude.
- Leaf scale — a coefficient to scale the speed of leaves rotation. By the minimum value of 0, leaves do not move at all. Higher values make leaves move with faster.
- Field mask — a field mask that specifies an area of the animation field to be applied to leaves. This mask must match the field mask of the animation field.
NoticeThe parameter is available only if the Animation state is set to Field.
Leaves
Leaves specify the way to render the leaves geometry:
- Disabled — leaves are not rendered.
- Geometry — leaves are rendered as a standard polygons.
- Billboard — leaves are rendered as billboards that always face the camera.
Shadow Offset
Shadow offset enables an offset parameter for leaves shadows.
2D Noise
2D noise enables a spatial color noise based on a 2D texture. Enabling the option activates the following texture and parameters:
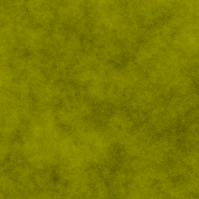
2D Noise Texture
A color noise 2D texture.
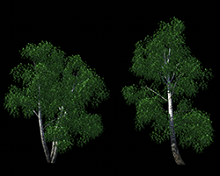
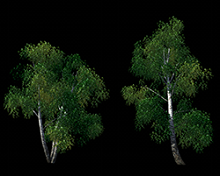
3D Noise
3D noise specifies if additional spatial noise and color gradient textures will be added. These textures add a random color variation to leaves.
|
|
|
Disabled Color noise
|
Enabled Color noise
|
Enabling the option activates the following textures and parameters:
3D Noise Texture
A single channeled spatial color noise texture used to randomize the coloring of leaves according to the gradient color texture.

Color Gradient
A gradient texture that modulates leaves colors (for example, from bright green to yellow). 0.5 means the texture does not affect leaf color. Higher values lighten the colors (are added). Lower values darken the colors (are subtracted).

Intensity
Noise texture intensity. By the maximum value of 1, the color noise is fully visible.
UV Transform
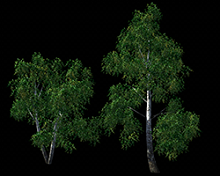
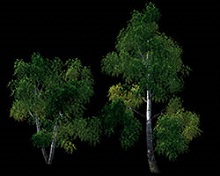
Noise texture native coordinates transformation along X, Y and Z axes. A vector of the three float components:
- By high values, color blobs are small in size (for example, several blobs per leaf). Tiles of the spatial noise texture are small and repeat often
- By low values, color blobs are big (for example, several blobs for the whole tree). Tiles of the spatial noise texture are big and repeat a few times
|
|
|
Transform = vec3(0.1)
|
Transform = vec3(0.01)
|
Detail Rendering
Detail rendering activates a set of textures (diffuse, normal, specular for the Specular workflow; albedo, normal and shading for Metalness workflow) to form a material layer. It is applied for bringing detailing to the material.
Available options are (when the state is enabled):

- Blending - detail blending mode.
- Alpha blend
- Overlay - depending on the base texture (diffuse or albedo) color, the base and detail textures colors are either multiplied (for dark color pixels) or screened (for light color pixels), which leads to the contrast increase while preserving highlights and shadows. Grey pixels are not effected at all.
- Multiply - the base texture (diffuse or albedo) color is multiplied by the detail texture color, resulting in darker colors. White pixels are not effected at all.
NoticeIf detail textures are not visible enough in the resulting image, try increasing its color scale parameter (Diffuse or Albedo).
- Angle fade - detail angle fade.
- Disable - disable overlapping of the base material.
- Object transform (overlap) - overlap the base material by using the object transformation (detail textures will be rotated with the mesh). This option can be used to create stone material with moss, rust and corrosion atop.
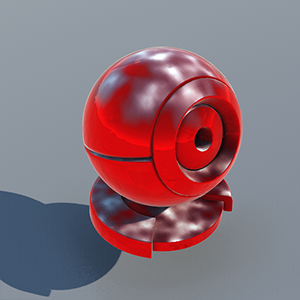
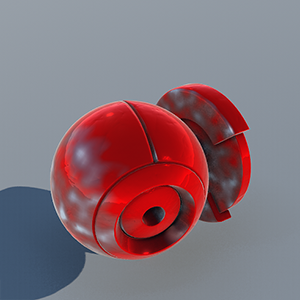 Base albedo textureDetail albedo texture
 - World transform (overlap) - overlap the base textures by using the world transformation (no matter if you rotate the object, the detail textures will always be projected atop). This option can be used to create stone material with moss, rust and corrosion atop.

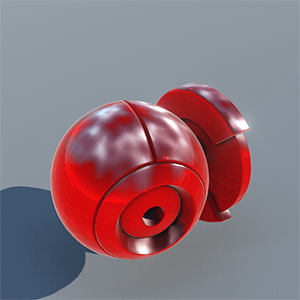 Base albedo textureDetail albedo textureNoticeThese two overlap options (Overlap (object transform) and Overlap (world transform)) replaced the old mesh_overlap_base material.
- Mask - a texture mask is used for blending base and detail materials selectively (the detail textures will be shown according to the mask).
NoticeEnabling the mask activates the Detail mask field that specifies which UV coordinates of the mesh will be used for the detail mask:This option replaced the old mesh_layer_base material.
- Base -
- Detail -
- First UV -
- Second UV -
- Triplanar -
- Overlap (object transform) -
- Overlap (world transform) -
Normal Map

Normal map specifies the type of normal mapping that is used for a model.
- Object space normal maps are characterized by their full spectrum (rainbow-colored) appearance. They used for meshes which vertices cannot be deformed (it requires the model to remain in its original orientation). Object space normals are best for things that can move, but cannot be deformed, like walls, doors, cars, weapons, etc. It's easier to generate high-quality curvature because object space normal map completely ignores the crude smoothing of the low-poly vertex normals.
- Tangent space normal maps are easily recognized by their mostly blue appearance. Tangent Space normal maps can be rotated and deformed, therefore they are ideal for characters or objects that need to have vertex deformation, like water or tree limbs.
Opacity Map
Opacity map indicates the alpha channel of which texture to use:
- Diffuse or albedo - use the alpha channel of the main (albedo or diffuse) texture.
- Normal - use the B channel of the normal map.
Light Map
Light map activates an additional light map texture therefore specifying that the material will be rendered lit by it. Material color (diffuse or albedo) is multiplied by the light map and the ambient color.
Enabling the state activates the Lightmap option that specifies which UV coordinates of the mesh will be used for the light map texture:
- Base - base UV coordinates.
- First UV - map the texture using the first UV coordinates of the mesh.
- Second UV - map the texture using the second UV coordinates of the mesh.
Light Map with Ambient
Specular Map
Specular map activates a specular texture channel in the shading texture.
Microfiber Map
Microfiber map activates a microfiber texture channel in the shading texture.
Translucent Map
Translucent map activates an additional translucent texture.
Parallax Mapping
Parallax mapping activates an additional parallax texture to obtain the parallax or cutout effect.

|

|
|
Disabled Parallax mapping
|
Enabled Parallax mapping
|
Available options are:
- Shadow -
- Depth cutout -
- Cutout -
Calculate Tangent Space
Geometry Inflation
Geometry inflation allows you to apply an additional visual effect without real geometry changing. By using this option, you can create wires and balloons by specifying the type of inflation.
Available options are:
- Disabled - disables geometry inflation.
- Wire - wire type. It will bloat the geometry normals to provide more realistic wire depending on the distance to the mesh.
- Balloon - balloon type. It bloats the geometry by specified constant.
UV mapping

These options specify which UV coordinates of the mesh will be used for textures.
Base Map
Base map option specifies which UV coordinates of the mesh will be used for base textures.
- First UV - map the texture using the first UV coordinates of the mesh.
- Second UV - map the texture using the second UV coordinates of the mesh.
- Triplanar - map the texture without using UV coordinates of the mesh (textures are projected by using triplanar mapping).
Detail Map
Detail map option specifies which UV coordinates of the mesh will be used for detail textures.
- First UV - map the texture using the first UV coordinates of the mesh.
- Second UV - map the texture using the second UV coordinates of the mesh.
- Triplanar - map the texture without using UV coordinates of the mesh (textures are projected by using triplanar mapping).
- Object transform (overlap) -
- World transform (overlap) -
Post Processing
Post processing options activates post processing effects for the material.
- SSAO - enables screen space ambient occlusion.
- SSR - enables screen space reflections.
- SSS - enables subsurface scattering.
- DOF - enables the depth of field effect.
- Motion blur - enables the motion blur effect.
- Sun shafts - enables sun shafts.
- Shoreline wetness - enables the wetness effect for objects near the shoreline.
Textures
All of the textures fields have set default textures, which can be replaced by your own ones. Availability of some textures depends on the set States values.
Metalness Wokflow: Base Textures

Albedo Texture
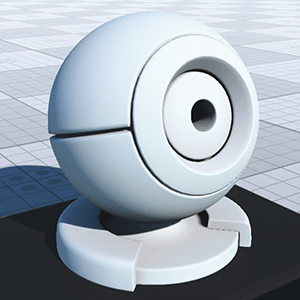
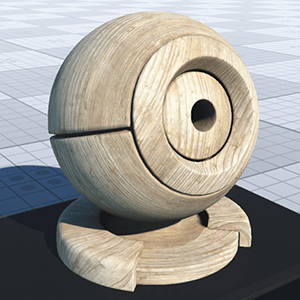
Albedo texture specifies the color of the surface.
|
|
|
Without albedo texture
|
With albedo texture
|
The texture is 4-channeled:
- RGB values store color information.
- An alpha (A) value stores transparency information:
- White color indicates that the area will be visible.
- Black color indicates that the area will be transparent.
Shading Texture
Shading texture is a container for four different textures:
- The R channel stores a metalness texture.
- The G channel stores a roughness texture.
- The B channel stores a specular texture.
- The A channel stores a microfiber texture.
Metalness Texture
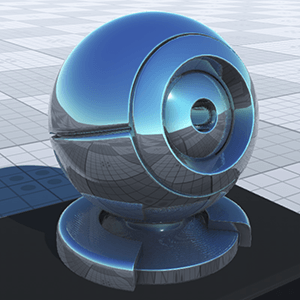
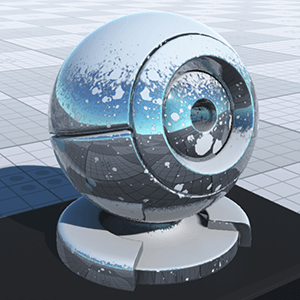
A metalness texture stores information about material's metalness:
- White pixels indicate that material is metal.
- Black pixels indicate that material is dielectric.
|
|
|
The whole applied texture channel is white
|
The applied texture channel is partially white (reflective areas) and black (non-reflective white splashes)
|
Roughness Texture
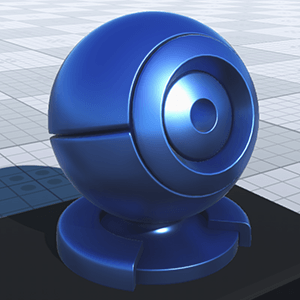
A roughness texture stores information about material's roughness:
- White pixels indicate that material is rough.
- Black pixels indicate that material is smooth.
|

|
|
Without the applied texture channel
|
With the applied texture channel
|
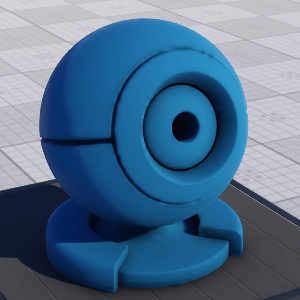
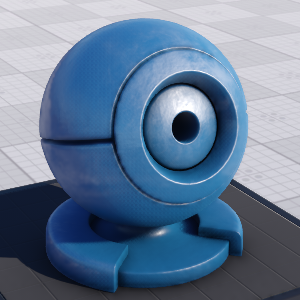
Specular Texture
A specular texture stores the light reflectance information. It defines shininess and a highlight color of the surface. The lighting is calculated as a Lambertian lighting model plus a surface angle, light angle, and viewing angle dependent specular highlight (Blinn-Phong lighting model).
- White color indicates that the area will be reflective.
- Black color indicates that there will be no reflections.
|
|
|
Without the applied specular texture channel
|
With the applied specular texture channel
|
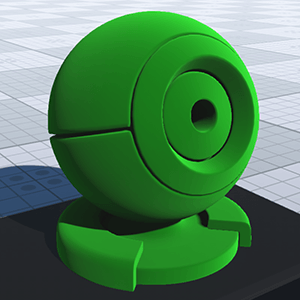
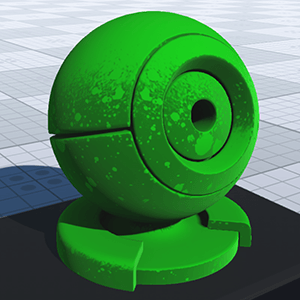
Microfiber Texture
A microfiber texture creates an effect of napped surface. The lighter the pixel, the more napped material will be.
 |
 |
Without fibers texture |
With fibers texture |
Normal Map
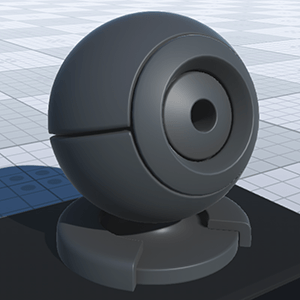
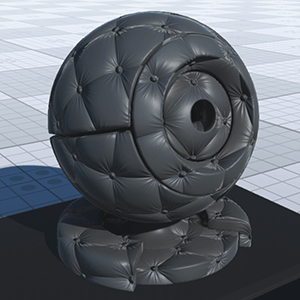
Normal map stores height information required to achieve an effect of Normal Mapping (a technique creating the illusion of depth for adding details without using additional polygons). When calculating lighting of the surface, the mesh geometry is overridden by the normals value.
|
|
|
Without normal map
|
With normal map
|
The texture is 2-channeled:
- RG values store two components of a surface normal.
- B value is calculated based on the R and G values in run-time.
Specular Wokflow: Base Textures
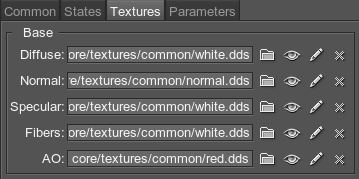
Diffuse Texture
Diffuse texture specified the color of the surface. It is lightened according to a Lambertian lighting model (light intensity is permanent regardless of the camera motion and rotation and depends solely on the angle between the surface and the light direction).
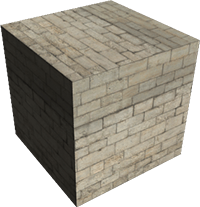
The texture is 4-channeled:
- RGB values store color information.
- An alpha (A) value stores:
- Transparency information (if the Alpha test option is enabled):
- White color indicates that the area will be visible.
- Black color indicates that the area will be transparent.
- Detail mask.
- Transparency information (if the Alpha test option is enabled):
Normal Map
Normal map stores height information required to achieve an effect of Normal Mapping (a technique creating the illusion of depth for adding details without using more polygons). When calculating lighting of the surface, the mesh geometry is overridden by the normals value.
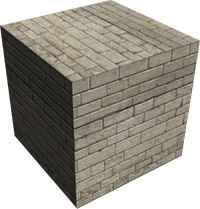
The texture is 2-channeled:
- RG values store two components of a surface normal.
- B value is calculated based on the R and G values in run-time.
Specular Map
Specular map stores the light reflectance information. It defines shininess and a highlight color of the surface. The lighting is calculated as a Lambertian lighting model plus a surface angle, light angle, and viewing angle dependent specular highlight (Blinn-Phong lighting model).
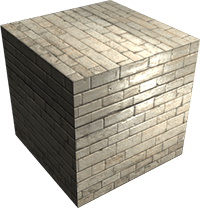
The texture is 4-channeled:
- RGB values store reflection color and intensity:
- White color indicates that the area will be reflective.
- Black color indicates that there will be no reflections.
- An alpha (A) value specified the specular power (Gloss):
- White color indicates that the specular highlights are very bright and intense.
- Black color indicates that the specular highlights are dull.
Detail Textures
An additional set of the textures to form a material layer. The set contains all the textures from Base textures group, except for the Microfiber texture.
For the Specular workflow, the mask of the Detail textures set is specified in the Alpha channel (A) of its diffuse texture.
Detail Blend Mask
Detail blend mask is a mask for two detail textures. Determines the way for two base and detail textures to be rendered.
The texture is 1-channeled:
- R values store information about which textures will be rendered:
- Black areas - base textures will be shown.
- Red areas - detail textures will be shown.
Additional Textures
Microfiber Texture
Microfiber texture creates an effect of napped surface. The lighter the pixel, the more napped material will be.

|

|
|
Without microfiber texture
|
With microfiber texture
|
The texture uses only R channel.
Lightmap Texture
Lightmap is a texture storing pre-computed light information. Usually is used for static objects.
Parallax Texture
Parallax map stores information about per-pixel parallax displacement.
The texture uses only R channel:
- White color indicates that the pixels are not displaced.
- Black color indicates that the pixels will be depressed farthest away.
Parameters
Transformation Parameters
The tiling and offset for the textures set are set in the Transform field of the Parameters tab.
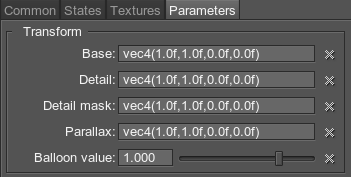
- Base - base textures coordinates transformation.
- Detail - detail textures coordinates transformation.
- Detail mask - detail mask texture coordinates transformation.
- Parallax - parallax texture coordinates transformation.
- Balloon value - wire/balloon transformation coefficient.

Triplanar transform parameters:
- Base triplanar pow - a coefficient to scale the smoothness of interpolation between three projections.
By the minimum value of 1, textures are interpolated as smoothly as possible.
The higher the value, the more visible the line between projections and the narrower blended area is. - Detail triplanar pow - a coefficient to scale the smoothness of interpolation between three projections.
By the minimum value of 1, textures are interpolated as smoothly as possible.
The higher the value, the more visible the line between projections and the narrower blended area is.
Texture Coordinates Transformation
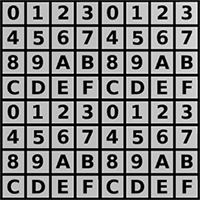
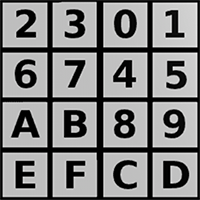
Texture coordinates transformation parameter is a vector of four float components, consisting of two pairs of vector elements:
- Scale texture coordinates, along the X and Y axes.
For example, by the scale of 2 ;2 the texture will be repeated four times on the surface. See the second picture below.
- An offset of the texture respectively to its initial position along X and Y axes.
For example, by the offset of 0.5 along the X axis the texture will be repositioned to the right (so the left edge of the texture will be rendered in the center). See the third picture below.
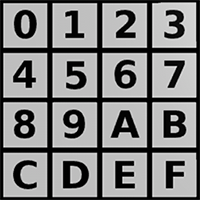
|
|
|

|

|

|
Base Textures Shading Parameters
The group of parameters in the Shading tab contains options for base textures.
Metalness Workflow: Base Textures Shading Parameters
Albedo
Albedo is a multiplier of the base color of the surface provided by the albedo texture.

Metalness
Metalness is a multiplier of metalness.

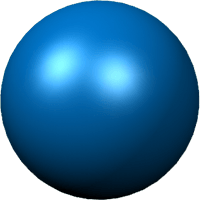
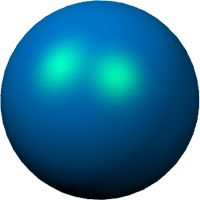
Specular
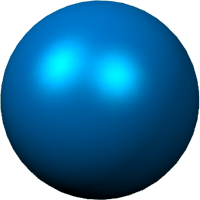
Specular is a color picker to choose the auxiliary specular color for the specular texture. It can be used for specifying different specular colors for one texture or modifying the texture color on the spot. The specular color of the texture and this color will be blended.
|
|
|

|

|

|
Roughness
Roughness is a multiplier of the roughness of a surface.

Normal Intensity
Normal Intensity is an intensity of the relief of the normal map.

Translucent
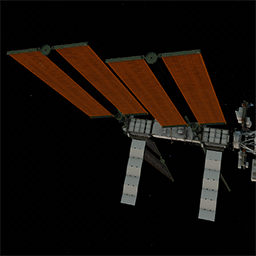
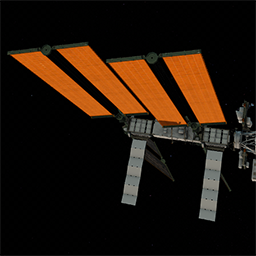
Translucent is a scale of the translucency effect, which permits light to pass through the object, but diffuses it so objects on the opposite side are not clearly visible.
|
|
|
Translucent = 0
|
Translucent = 1
|
Microfiber
Microfiber is a coefficient to scale the intensity of the microfiber (provided by a microfiber texture). The higher the value, the higher the microfiber texture effect is.
Material Mask
Material mask parameter specifies decal bit-mask. If the material mask of the decal material matches the surface material, the decal will be projected.
Specular Worklow: Base Textures Shading Parameters
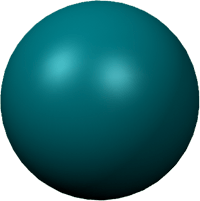
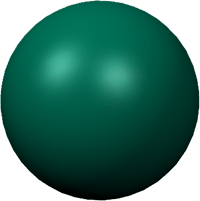
Diffuse
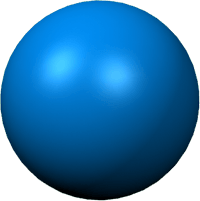
Diffuse defines the base color of the surface.
|
|
|

|

|

|
Specular
Specular is a color picker to choose the auxiliary specular color for the specular texture. It can be used for specifying different specular colors for one texture or modifying the texture color on the spot. The specular color of the texture and this color will be blended.

|

|

|

|

|

|
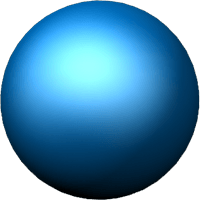
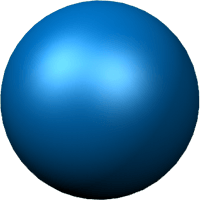
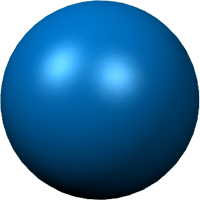
Gloss
Gloss is a coefficient modifying the size of the highlight (Phong shading). Low values imitate wider highlights, typically appropriate to create diffuse reflection from mat surfaces. High values imitate pinpoint highlights, typically appropriate to create uniform reflection of light rays from glossy surfaces.
|
|
|

|

|

|
Normal Intensity
Normal intensity is a coefficient to scale the intensity of the normals (provided by a normal map). The higher the value, the higher the normal texture effect is.
Translucent
Translucent is a scale of the translucency effect, which permits light to pass through the object, but diffuses it so objects on the opposite side are not clearly visible.
Microfiber
Microfiber is a coefficient to scale the intensity of the microfiber (provided by a microfiber texture). The higher the value, the higher the microfiber texture effect is.
Material Mask
Material mask parameter specifies decal bit-mask. If the material mask of the decal material matches the surface material, the decal will be projected.
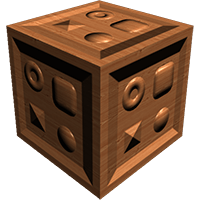
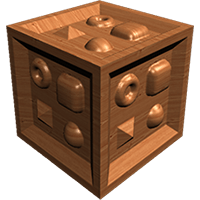
Parallax
Parallax Height
Parallax height is a coefficient to scale the power of the parallax texture displacements. The higher the value, the bigger the normals are.
|
|

|

|
Parallax Step
Parallax step parameter specifies the step of the parallax mapping.
Lightmap
Lightmap Scale
Lightmap scale is a coefficient to scale the intensity of the light map illumination. The higher the value, the brighter the illumination is.
Lightmap Gamma
Lightmap gamma is a coefficient to specify the gamma of the light map illumination.
Detail Textures Shading Parameters
Metalness Workflow: Detail Textures Shading Parameters
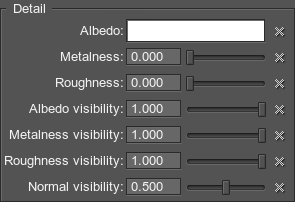
A set of the shading parameters for detail textures:
Albedo
Albedo is a multiplier of the detail color of the surface provided by the detail albedo texture similar to the base texture Albedo parameter.
Metalness
Metalness is a multiplier of metalness provided by the detail metalness texture similar to the base texture Metalness parameter.
Roughness
Roughness is a multiplier of the roughness of a surface similar to the base texture Roughness parameter.
Albedo Visibility
Albedo visibility specifies the influence of the detail texture albedo over the base texture albedo.
Metalness Visibility
Metalness visibility specifies the influence of the detail texture metalness over the base texture metalness.
Roughness Visibility
Roughness visibility specifies the influence of the detail texture roughness over the base texture roughness.
Normal Visibility
Normal visibility parameter specifies the influence of the detail normal texture normal over the surface.
Specular Workflow: Detail Textures Shading Parameters
A set of the shading parameters for detail textures:
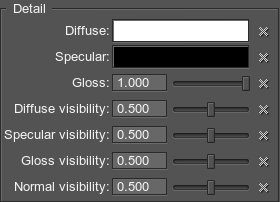
Diffuse
Diffuse is a multiplier of the detail color of the surface provided by the detail diffuse texture similar to the base texture Diffuse parameter.
Specular
Specular is a color picker to choose the auxiliary specular color for the detail specular texture similar to the base texture Specular parameter..
Gloss
Gloss is a parameter modifying the size of the highlight of the detail texture similar to the base texture Gloss parameter.
Diffuse Visibility
Diffuse visibility specifies the influence of the detail texture diffuse over the base texture diffuse.
Specular Visibility
Specular visibility specifies the influence of the detail texture specular over the base texture specular.
Gloss Visibility
Gloss visibility specifies the influence of the detail texture gloss over the base texture gloss.
Normal Visibility
Normal visibility parameter specifies the influence of the detail normal texture normal over the surface.