Adding Enemies With AI
Enemies are the important part of any shooter. We are going to create an enemy that moves around the scene chasing the player, starts firing at a certain distance from the player, and gets killed (deleted) if hit by the player's bullets.
Before adding an enemy model, you should create it in a 3D modeling software.
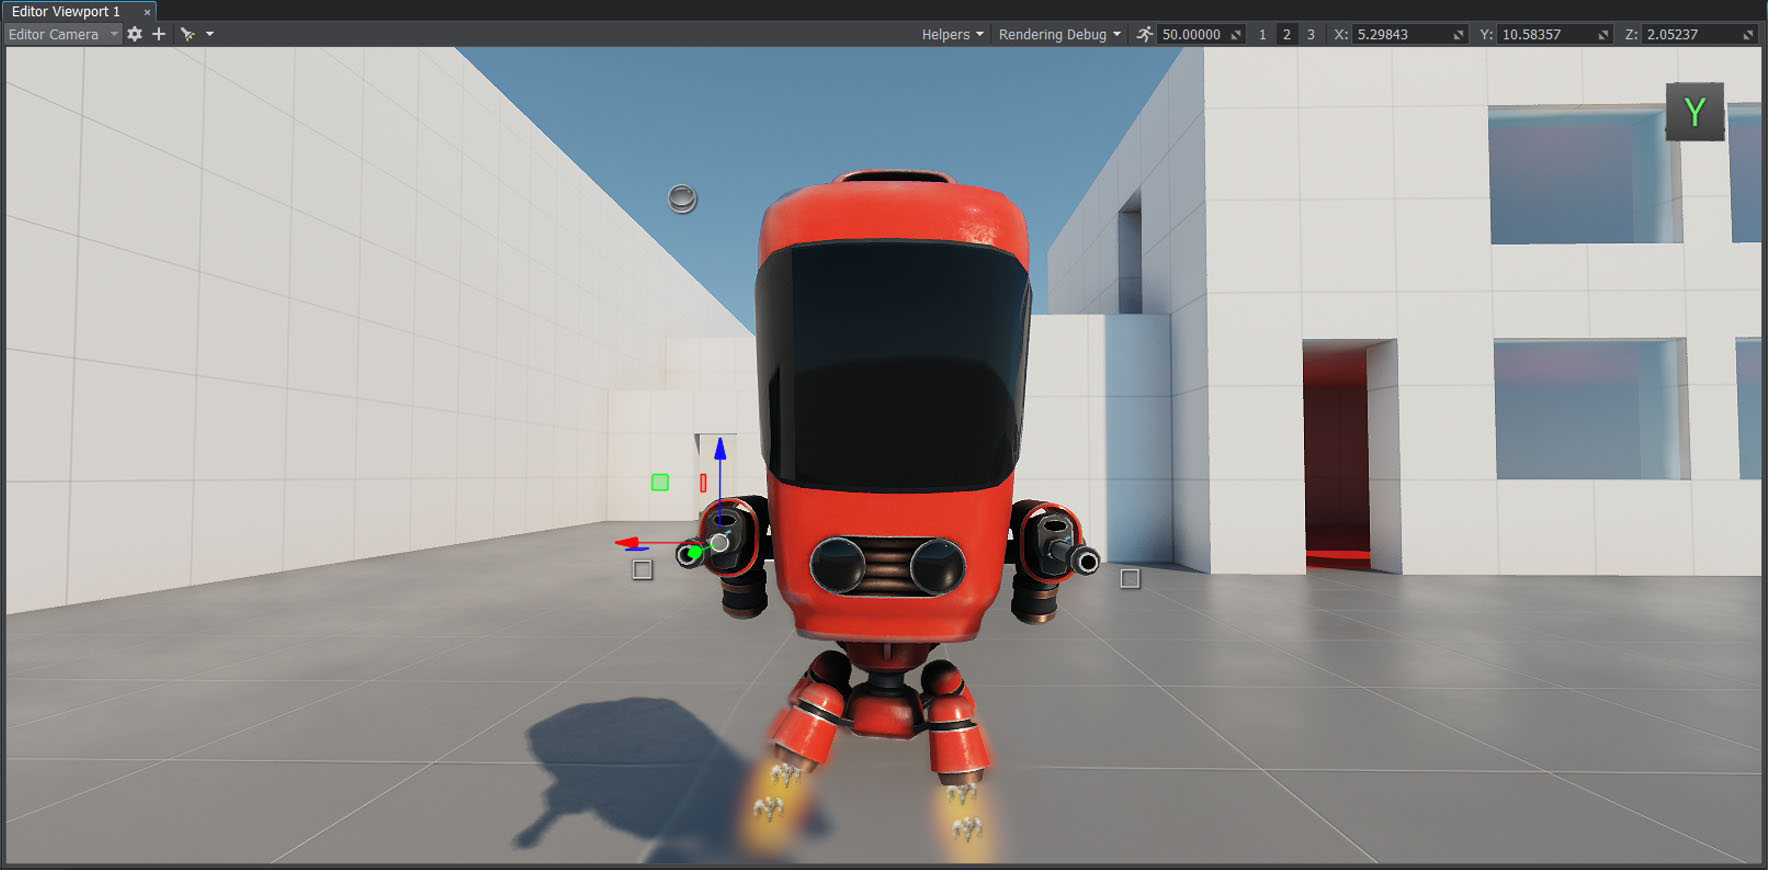
Find our ready-to-use robot_enemy.node enemy template in the data/fps/robot folder and place it in the scene.
Applying a Finite-State Machine for AI#
To be a strong opponent, your enemy must have a certain level of intelligence. A simple AI can be implemented using a Finite-State Machine — a concept allowing you to describe the logic in terms of states and transitions between them.
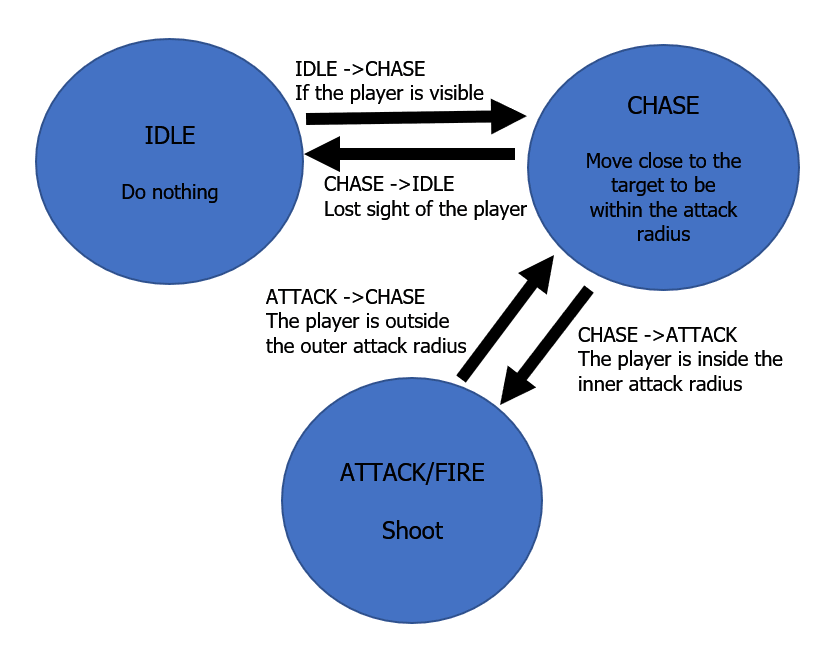
For simplicity, consider three states: Idle, Chase, and Attack/Fire.
The following diagram describes what the enemy should do in each state, and how it will switch different states. The typical transitions would be from Idle to Chase, from Chase to Attack, and vice versa.
Raycasts to Determine Visibility#
How will the enemy "see" us? This can be implemented with the help of raycast (Intersections), which we have already used to determine the bullet hits. The algorithm is simple: we shoot a ray from the enemy's location in the direction he is looking at, detect the first object intersected by the ray and check if it is the player. All this can be described using the following function:
private bool IsTargetVisible()
{
	Vec3 direction = (player.WorldPosition - enemy.WorldPosition);
	Vec3 p0 = intersectionSocket.WorldPosition;
	Vec3 p1 = p0 + direction;

	Unigine.Object hitObject = World.GetIntersection(p0, p1, playerIntersectionMask, hitExcludes, hitInfo);
	if (!hitObject)
		return false;

	return player.ID == hitObject.ID;
}
To implement transition between states in each frame, we are going to do the following:
private void Update()
{
	// update the information on the target, path to it and orientation
	UpdateTargetState();
	UpdateOrientation();
	UpdateRoute();

	switch (currentState)
	{
		case EnemyLogicState.Idle: ProcessIdleState(); break;
		case EnemyLogicState.Chase: ProcessChaseState(); break;
		case EnemyLogicState.Attack: ProcessAttackState(); break;
	}
}

private void ProcessIdleState()
{
	// if the target (player) is visible, transition Idle -> Chase
	if (targetIsVisible)
		currentState = EnemyLogicState.Chase;
}

private void ProcessChaseState()
{
	// recalculation of direction and acceleration coordinates

	// if the target (player) is not visible, transition Chase -> Idle
	if (!targetIsVisible)
	 currentState = EnemyLogicState.Idle;

	// check the distance, transition Chase -> Attack
	if (targetIsVisible && lastSeenDistanceSqr < attackInnerRadius * attackInnerRadius)
	{
		currentState = EnemyLogicState.Attack;

		// start shooting
	}

	// approaching the target
}

private void ProcessAttackState()
{
	// check the distance, transition Attack -> Chase
	if (!targetIsVisible || lastSeenDistanceSqr > attackOuterRadius * attackOuterRadius)
	{
		currentState = EnemyLogicState.Chase;

		// stop shooting
	}
}
Using Navigation#
Just seeing the object is not enough, one must also get within shooting distance (within the attack radius). The enemy should be able to chase the player correctly — build a route from its current position to the player's current position, without walking through obstacles or getting stuck halfway. To give the enemy additional knowledge about how it can navigate through the level, you can use navigation. The PathRoute class in the UNIGINE API is responsible for finding path on the plane or in three-dimensional space. Pathfinding is performed only within the Navigation Area, which can be either of the following two types:
- Navigation Sector is used to search for a path both in three-dimensional space (a multi-story house, for example) and on the plane — in the sector projection area (in this case the Z coordinate is ignored). Sectors can be combined to build complex areas — a set of intersecting sectors forms a single navigation area.
- Navigation Mesh is used for pathfinding only on the plane at a specified height above the mesh polygons — i.e. polygons in this case show where you can walk. Unlike sectors, Navigation Mesh is always on its own, i.e. you cannot create areas by combining several meshes or a mesh and sectors.
In our case, since our characters move in a relatively simple environment, we will use Navigation Mesh to define the navigation area.
Such a mesh can be generated based on the FBX model of the scene using special tools, for example, RecastBlenderAddon.
We already have prepared such a mesh and added it in the data/fps/navigation folder.
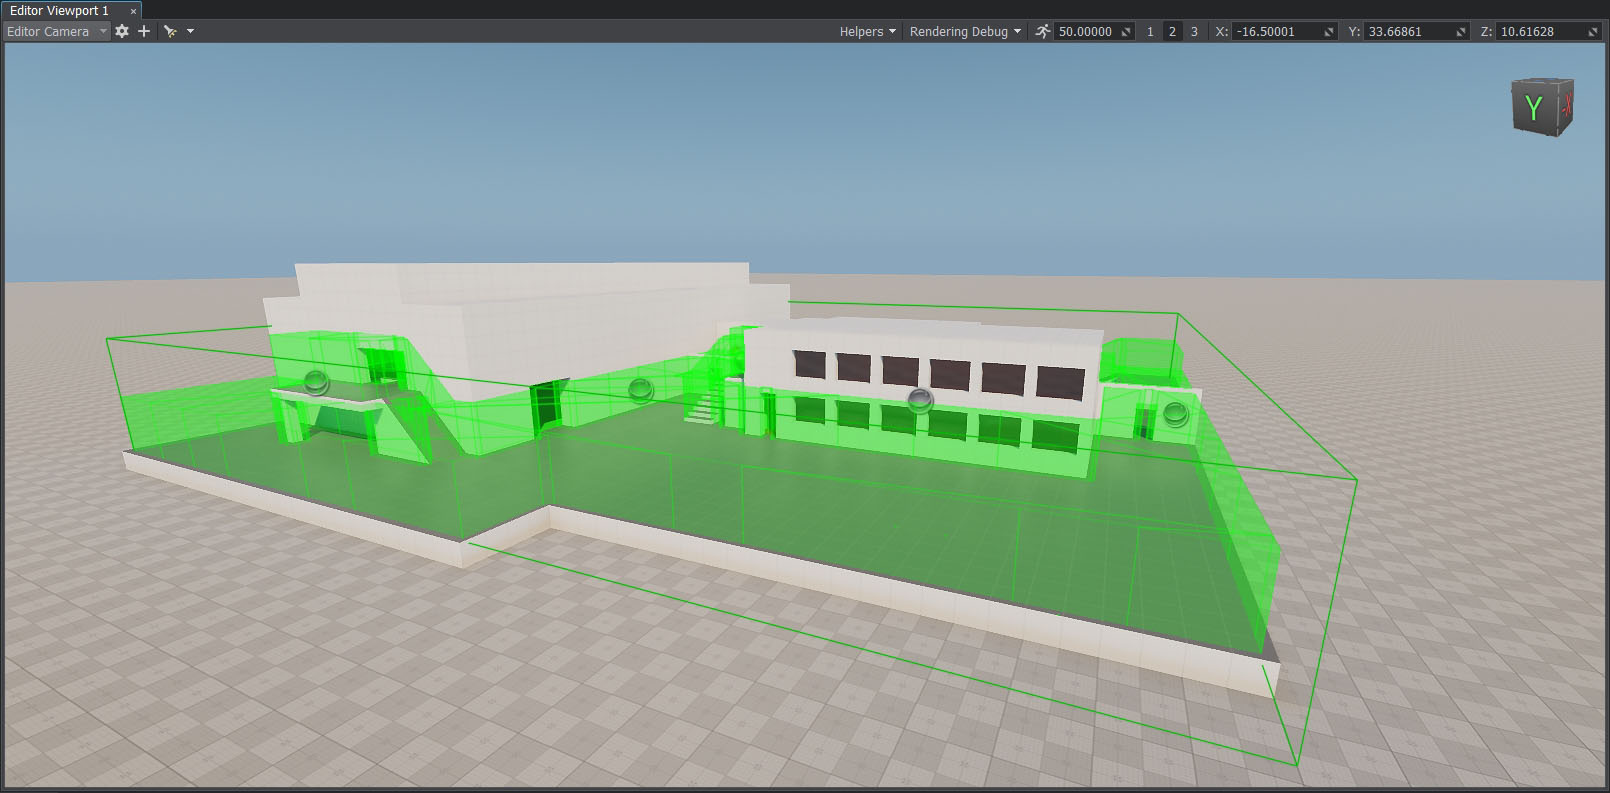
To place the mesh in the scene, click Create -> Navigation -> NavigationMesh in the Menu Bar and select the navigation/navmesh.mesh file. Align the mesh with the area to cover all areas where walking is allowed.
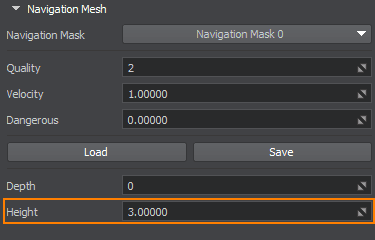
In the Parameters window, set the Height of the navigation mesh to 3 for proper route calculation.
Now that we have a navigation area, we can start pathfinding. In the Chase state, our enemy, instead of rushing to the last visible position of the player along a straight line, will follow the path using the Navigation Mesh we added. The path consists of a queue of route points calculated using the functionality of the PathRoute class. It looks something like this:
private void UpdateRoute()
{
	 if (Game.Time - lastCalculationTime < routeRecalculationInterval)
		 return;

	 if (shouldUpdateRoute)
	 {
		 // calculate the path to the player
		 route.Create2D(node.WorldPosition, lastSeenPosition, 1);
		 shouldUpdateRoute = false;
	 }

	 // if the route is calculated
	 if (route.IsReady)
	 {
		 // check if the target point of the route is reached
		 if (route.IsReached)
		 {
			 // clear the queue of route points
			 calculatedRoute.Clear();

			 // add all root points to the queue
			 for(int i = 1; i < route.NumPoints; ++i)
				 calculatedRoute.Enqueue(route.GetPoint(i));

			 shouldUpdateRoute = true;
			 lastCalculationTime = Game.Time;
		 }
		 else
			 // recalculate the route if the target point isn't reached
			 shouldUpdateRoute = true;
	 }
}
Teaching the Enemy to Shoot#
After teaching the enemy to chase the player, we need to teach it to shoot. You don't want to strangle the player, do you?
To implement the shooting ability, we need a bullet NodeReference that will be created at the moment of shooting when the robot is in the Attack state.
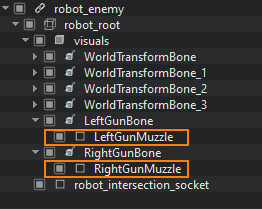
Let's add the shooting logic in the EnemyFireController component to make the robot shoot alternately from the left and right muzzle. The positions of their muzzles where bullets will be spawned are defined by the positions of two Dummy Nodes that are assigned to the Left Muzzle and Right Muzzle fields of the component.
-
Create the EnemyFireController.cs component and paste the following code into it:
EnemyFireController.cs
Source code (C#)using System; using System.Collections; using System.Collections.Generic; using Unigine; [Component(PropertyGuid = "AUTOGENERATED_GUID")] // <-- this line is generated automatically for a new component public class EnemyFireController : Component { public Node leftMuzzle = null; public Node rightMuzzle = null; public AssetLink bulletPrefab = null; public float shootInterval = 1.0f; private float currentTime = 0.0f; private bool isLeft = false; private bool isFiring = false; public void StartFiring() { isFiring = true; } public void StopFiring() { isFiring = false; } private void Init() { // timer reset currentTime = 0.0f; // switch fire to the right muzzle isLeft = false; } private void Update() { // if the robot is not in the Attack state (Idle or Chase), do nothing if (!isFiring) return; // timer updating currentTime += Game.IFps; // check the shooting interval if (currentTime > shootInterval) { // timer reset currentTime -= shootInterval; // create a bullet from the asset assigned to the bulletPrefab Node bullet = World.LoadNode(bulletPrefab.AbsolutePath); // set the bullet position depending on the side of the shot bullet.WorldTransform = (isLeft) ? leftMuzzle.WorldTransform : rightMuzzle.WorldTransform; // switch the muzzle for the next shot isLeft = !isLeft; } } } - If necessary, enable editing of the robot_enemy node and assign the EnemyFireController.cs component to the robot_root Dummy Object.
-
Drag and drop the LeftGunMuzzle and RightGunMuzzle Dummy Nodes to the corresponding fields of the EnemyFireController component.
-
Drag and drop data/fps/bullet/bullet.node to the Bullet Prefab field.

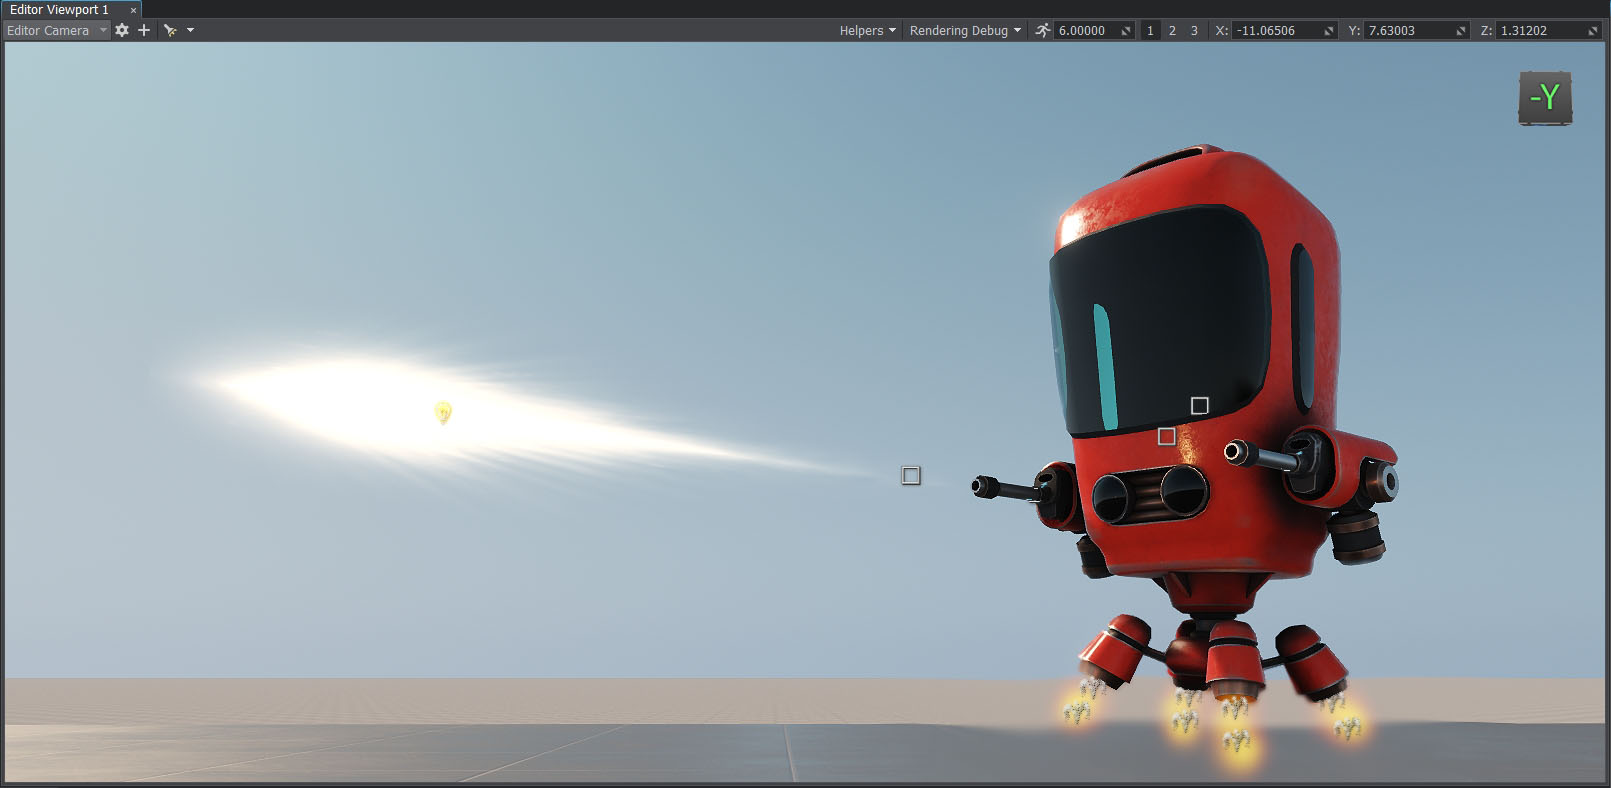
After spawning, the bullet should move in the appropriate direction changing its position in the world. If the bullet intersects with an object, a hit effect should be spawned at the point of impact. And if this object can take damage (i.e., it has a Health component, we'll do that a bit later), its health should be decreased by a certain value. Also, you can make the bullet apply an impulse to physical objects.
- Add the data/fps/bullet/bullet.node asset to the scene.
-
Create the Bullet.cs component and copy the following code:
Bullet.cs
Source code (C#)using System; using System.Collections; using System.Collections.Generic; using Unigine; #region Math Variables #if UNIGINE_DOUBLE using Vec3 = Unigine.dvec3; #else using Vec3 = Unigine.vec3; #endif #endregion [Component(PropertyGuid = "AUTOGENERATED_GUID")] // <-- this line is generated automatically for a new component public class Bullet : Component { public float speed = 10.0f; public int damage = 1; public AssetLink hitPrefab = null; [ParameterMask] public int intersectionMask = ~0; private WorldIntersectionNormal hitInfo = new WorldIntersectionNormal(); private void Update() { // set the current bullet position Vec3 currentPosition = node.WorldPosition; // set the direction of the bullet movement along the Y axis vec3 currentDirection = node.GetWorldDirection(MathLib.AXIS.Y); // update bullet position along the trajectory according to the set speed node.WorldPosition += currentDirection * speed * Game.IFps; // find the intersection of the bullet's trajectory with some of objects Unigine.Object hitObject = World.GetIntersection(currentPosition, node.WorldPosition, intersectionMask, hitInfo); // if intersections weren't found, do nothing if (!hitObject) return; // otherwise load NodeReference with hit effect Node hitEffect = World.LoadNode(hitPrefab.AbsolutePath); // set NodeReference to the hit point and set its direction according to the hit normal hitEffect.Parent = hitObject; hitEffect.WorldPosition = hitInfo.Point; hitEffect.SetWorldDirection(hitInfo.Normal, vec3.UP, MathLib.AXIS.Y); // delete the bullet node.DeleteLater(); } } - Enable editing of the bullet node and assign the bullet component to its Static Mesh node.
-
Drag data/fps/bullet/bullet_hit.node to the Hit Prefab field.

- Assign the LifeTime.cs component to the bullet (Static Mesh) node and set its Life Time value to 5 seconds.
- Select the bullet Node Reference and click Apply to save changes and remove the bullet node from the scene.
Putting All Together#
Now summarizing the above, let's create the EnemyLogic.cs component with the following code:
EnemyLogic.cs
using System;
using System.Collections;
using System.Collections.Generic;
using Unigine;

#region Math Variables
#if UNIGINE_DOUBLE
using Vec3 = Unigine.dvec3;
#else
using Vec3 = Unigine.vec3;
#endif
#endregion

// declare the enemy states
public enum EnemyLogicState
{
	Idle,
	Chase,
	Attack,
}

[Component(PropertyGuid = "AUTOGENERATED_GUID")] // <-- this line is generated automatically for a new component
public class EnemyLogic : Component
{
	public Node player = null;
	public Node intersectionSocket = null;
	public float reachRadius = 0.5f;
	public float attackInnerRadius = 5.0f;
	public float attackOuterRadius = 7.0f;
	public float speed = 1.0f;
	public float rotationStiffness = 8.0f;
	public float routeRecalculationInterval = 3.0f;

	[ParameterMask(MaskType = ParameterMaskAttribute.TYPE.INTERSECTION)]
	public int playerIntersectionMask = ~0;

	// initialize the enemy state
	private EnemyLogicState currentState = EnemyLogicState.Idle;
	private bool targetIsVisible;
	private Vec3 lastSeenPosition;
	private vec3 lastSeenDirection;
	private float lastSeenDistanceSqr;

	private BodyRigid bodyRigid = null;
	private WorldIntersection hitInfo = new WorldIntersection();
	private Node[] hitExcludes = new Node[2];

	private EnemyFireController fireController = null;
	// create a queue for route points
	private Queue<Vec3> calculatedRoute = new Queue<Vec3>();

	private PathRoute route = new PathRoute();
	private bool shouldUpdateRoute = true;
	private float lastCalculationTime = 0.0f;
	private bool IsTargetVisible()
	{
		Vec3 direction = (player.WorldPosition - intersectionSocket.WorldPosition);
		Vec3 p0 = intersectionSocket.WorldPosition;
		Vec3 p1 = p0 + direction;

		Unigine.Object hitObject = World.GetIntersection(p0, p1, playerIntersectionMask, hitExcludes, hitInfo);
		if (!hitObject)
			return false;

		return player.ID == hitObject.ID;
	}

	private void Init()
	{
		// initialize the parameters of the point moving along the path within navigational mesh
		route.Radius = 0.0f;
		route.Height = 1.0f;
		route.MaxAngle = 0.5f;

		bodyRigid = node.ObjectBodyRigid;
		hitExcludes[0] = node;
		hitExcludes[1] = node.GetChild(0);

		targetIsVisible = false;
		// get the EnemyFireController component
		fireController = node.GetComponent<EnemyFireController>();
		shouldUpdateRoute = true;
		lastCalculationTime = Game.Time;
	}

	private void Update()
	{

		UpdateTargetState();
		UpdateOrientation();
		UpdateRoute();

		// enemy state switching
		switch (currentState)
		{
			case EnemyLogicState.Idle: ProcessIdleState(); break;
			case EnemyLogicState.Chase: ProcessChaseState(); break;
			case EnemyLogicState.Attack: ProcessAttackState(); break;
		}

		// change color depending on the current state
		vec4 color = vec4.BLACK;
		switch (currentState)
		{
			case EnemyLogicState.Idle: color = vec4.BLUE; break;
			case EnemyLogicState.Chase: color = vec4.YELLOW; break;
			case EnemyLogicState.Attack: color = vec4.RED; break;
		}

		// visualize the enemy states
		Visualizer.RenderPoint3D(node.WorldPosition + vec3.UP * 2.0f, 0.25f, color);
		Visualizer.RenderPoint3D(node.WorldPosition + vec3.UP * 3.0f, 0.25f, IsTargetVisible() ? vec4.GREEN : vec4.RED);
		Visualizer.RenderPoint3D(lastSeenPosition, 0.1f, vec4.MAGENTA);

		// visualize the attack radius
		Visualizer.RenderSphere(attackInnerRadius, node.WorldTransform, vec4.RED);
		Visualizer.RenderSphere(attackOuterRadius, node.WorldTransform, vec4.RED);

		// visualize the route points
		foreach (vec3 route_point in calculatedRoute)
			Visualizer.RenderPoint3D(route_point + vec3.UP, 0.25f, vec4.BLACK);

	}

	private void UpdateRoute()
	{
		if (Game.Time - lastCalculationTime < routeRecalculationInterval)
			return;

		if (shouldUpdateRoute)
		{
			// calculate the route to the player
			route.Create2D(node.WorldPosition, lastSeenPosition, 1);
			shouldUpdateRoute = false;
		}

		// if route calculation is over
		if (route.IsReady)
		{
			// check if the target point was reached
			if (route.IsReached)
			{
				// clear the queue of path points
				calculatedRoute.Clear();

				// add all root points to the queue
				for(int i = 1; i < route.NumPoints; ++i)
					calculatedRoute.Enqueue(route.GetPoint(i));

				shouldUpdateRoute = true;
				lastCalculationTime = Game.Time;
			}
			else
				// recalculate the route if the target point wasn't reached
				shouldUpdateRoute = true;
		}
	}

	private void UpdateTargetState()
	{
		targetIsVisible = IsTargetVisible();
		// if the player is visible, remember his latest registered position
		if (targetIsVisible)
			lastSeenPosition = player.WorldPosition;

		lastSeenDirection = (vec3)(lastSeenPosition - node.WorldPosition);
		lastSeenDistanceSqr = lastSeenDirection.Length2;
		lastSeenDirection.Normalize();
	}

	private void UpdateOrientation()
	{
		vec3 direction = lastSeenDirection;
		direction.z = 0.0f;

		quat targetRotation = new quat(MathLib.SetTo(vec3.ZERO, direction.Normalized, vec3.UP, MathLib.AXIS.Y));
		quat currentRotation = node.GetWorldRotation();

		currentRotation = MathLib.Slerp(currentRotation, targetRotation, Game.IFps * rotationStiffness);
		node.SetWorldRotation(currentRotation);
	}

	private void ProcessIdleState()
	{
		// if the target is visible (player) - shift Idle -> Chase
		if (targetIsVisible)
			currentState = EnemyLogicState.Chase;
	}

	private void ProcessChaseState()
	{
		vec3 currentVelocity = bodyRigid.LinearVelocity;
		currentVelocity.x = 0.0f;
		currentVelocity.y = 0.0f;
		if (calculatedRoute.Count > 0)
		{
			float distanceToTargetSqr = (calculatedRoute.Peek() - node.WorldPosition).Length2;

			bool targetReached = (distanceToTargetSqr < reachRadius * reachRadius);
			if (targetReached)
				calculatedRoute.Dequeue();

			if (calculatedRoute.Count > 0)
			{
				vec3 direction = calculatedRoute.Peek() - node.WorldPosition;
				direction.z = 0.0f;
				direction.Normalize();
				currentVelocity.x = direction.x * speed;
				currentVelocity.y = direction.y * speed;
			}
		}

		// if the target isn't visible - shift Chase -> Idle
		if (!targetIsVisible)
			currentState = EnemyLogicState.Idle;

		// check distance and shift Chase -> Attack
		else if (lastSeenDistanceSqr < attackInnerRadius * attackInnerRadius)
		{
			currentState = EnemyLogicState.Attack;
			currentVelocity.x = 0.0f;
			currentVelocity.y = 0.0f;
			// start shooting
			if (fireController)
				fireController.StartFiring();
		}

		bodyRigid.LinearVelocity = currentVelocity;
	}

	private void ProcessAttackState()
	{
		// check distance and shift Attack -> Chase
		if (!targetIsVisible || lastSeenDistanceSqr > attackOuterRadius * attackOuterRadius )
		{
			currentState = EnemyLogicState.Chase;
			// stop shooting
			if (fireController)
				fireController.StopFiring();
		}
	}
}-
Enable editing of the robot_enemy node and assign the new component to the robot_root Dummy Node in the Parameters window.
-
Right-click the player Node Reference in the World Nodes window and select Unpack to Node Content. The Node Reference will be removed and its contents will be displayed in the World Nodes hierarchy.
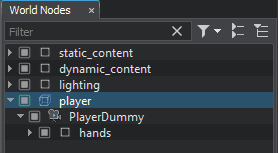
- Drag and drop the player_hit_box node to the Player field of the EnemyLogic component. This node imitates the player body and is used in calculations. Make sure that the Intersection option is checked for player_hit_box.
-
Drag and drop the robot_intersection_socket node of the robot_enemy node to Intersection Socket field. This is the node from which the robot will do intersection checks.

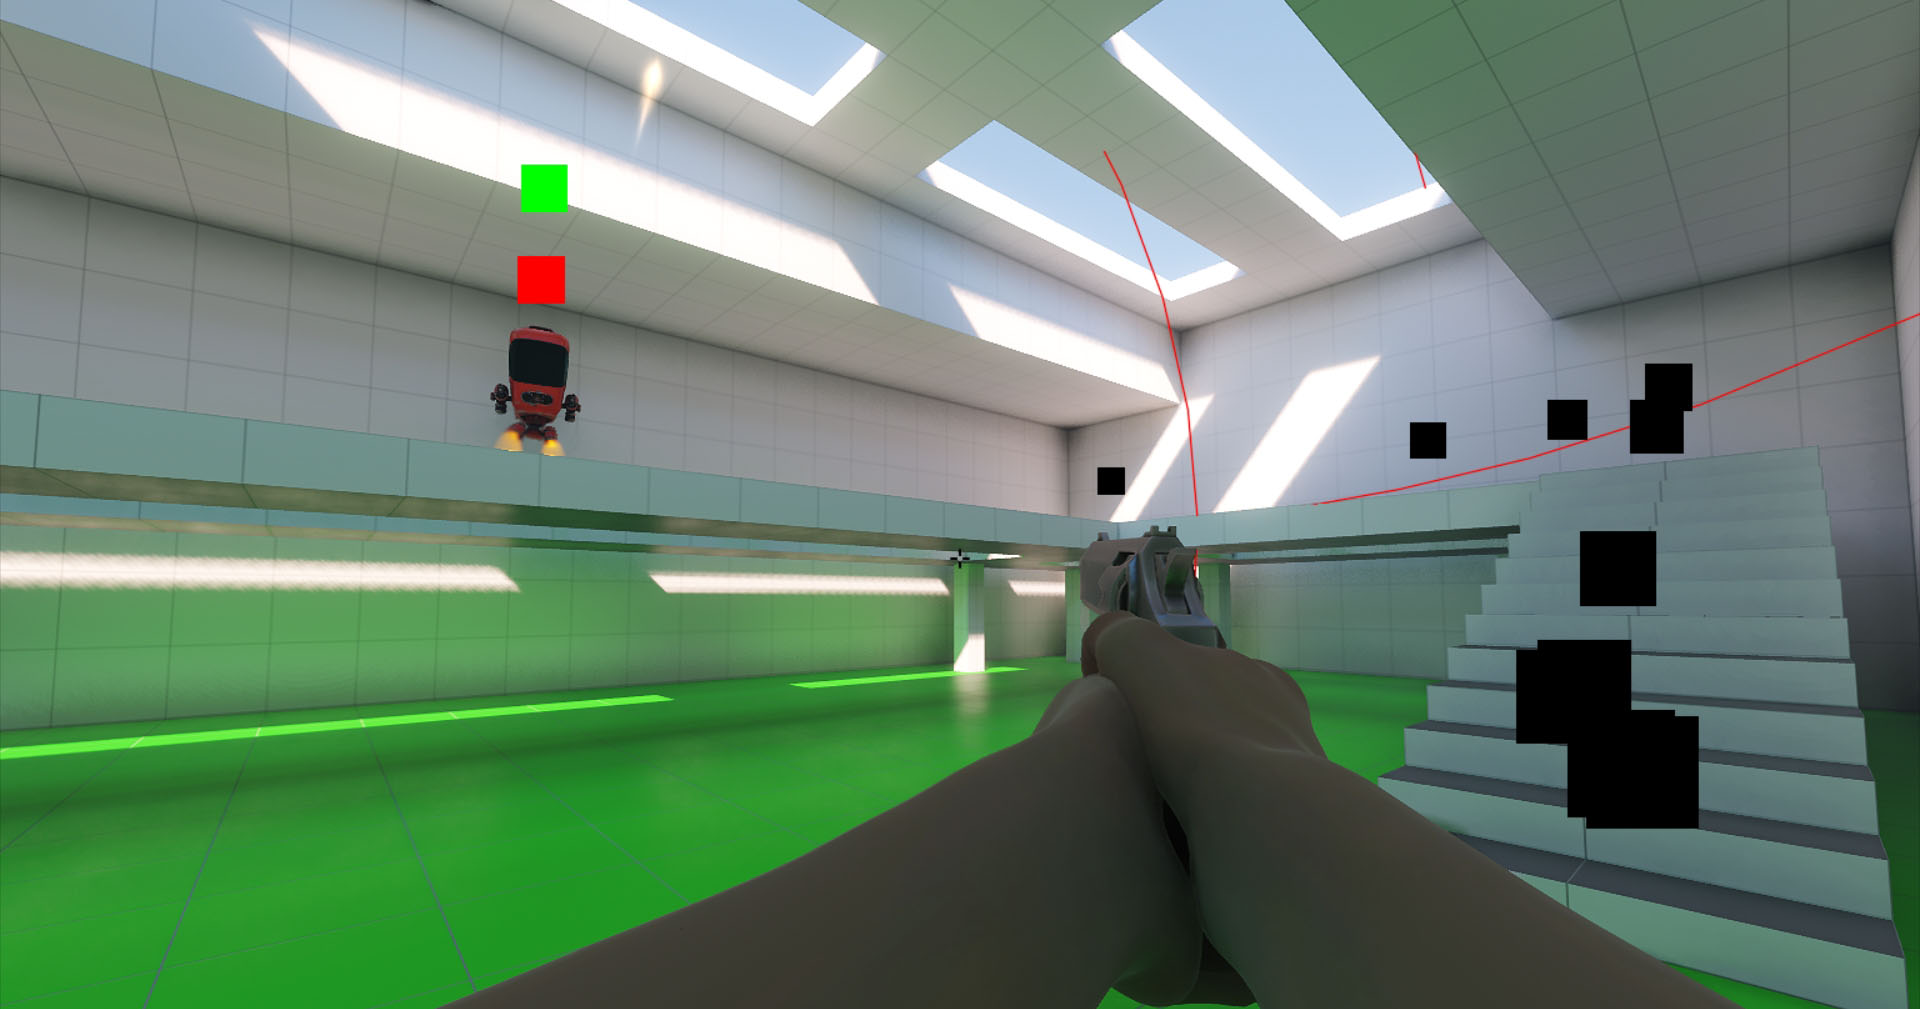
For debugging, you can enable Visualizer that will display the inner and outer attack radius, as well as the colored squares above the robot indicating:
- The state of the robot: Idle — BLUE, Chase — YELLOW, Attack — RED.
- If the target is visible: Yes — GREEN, No — RED.
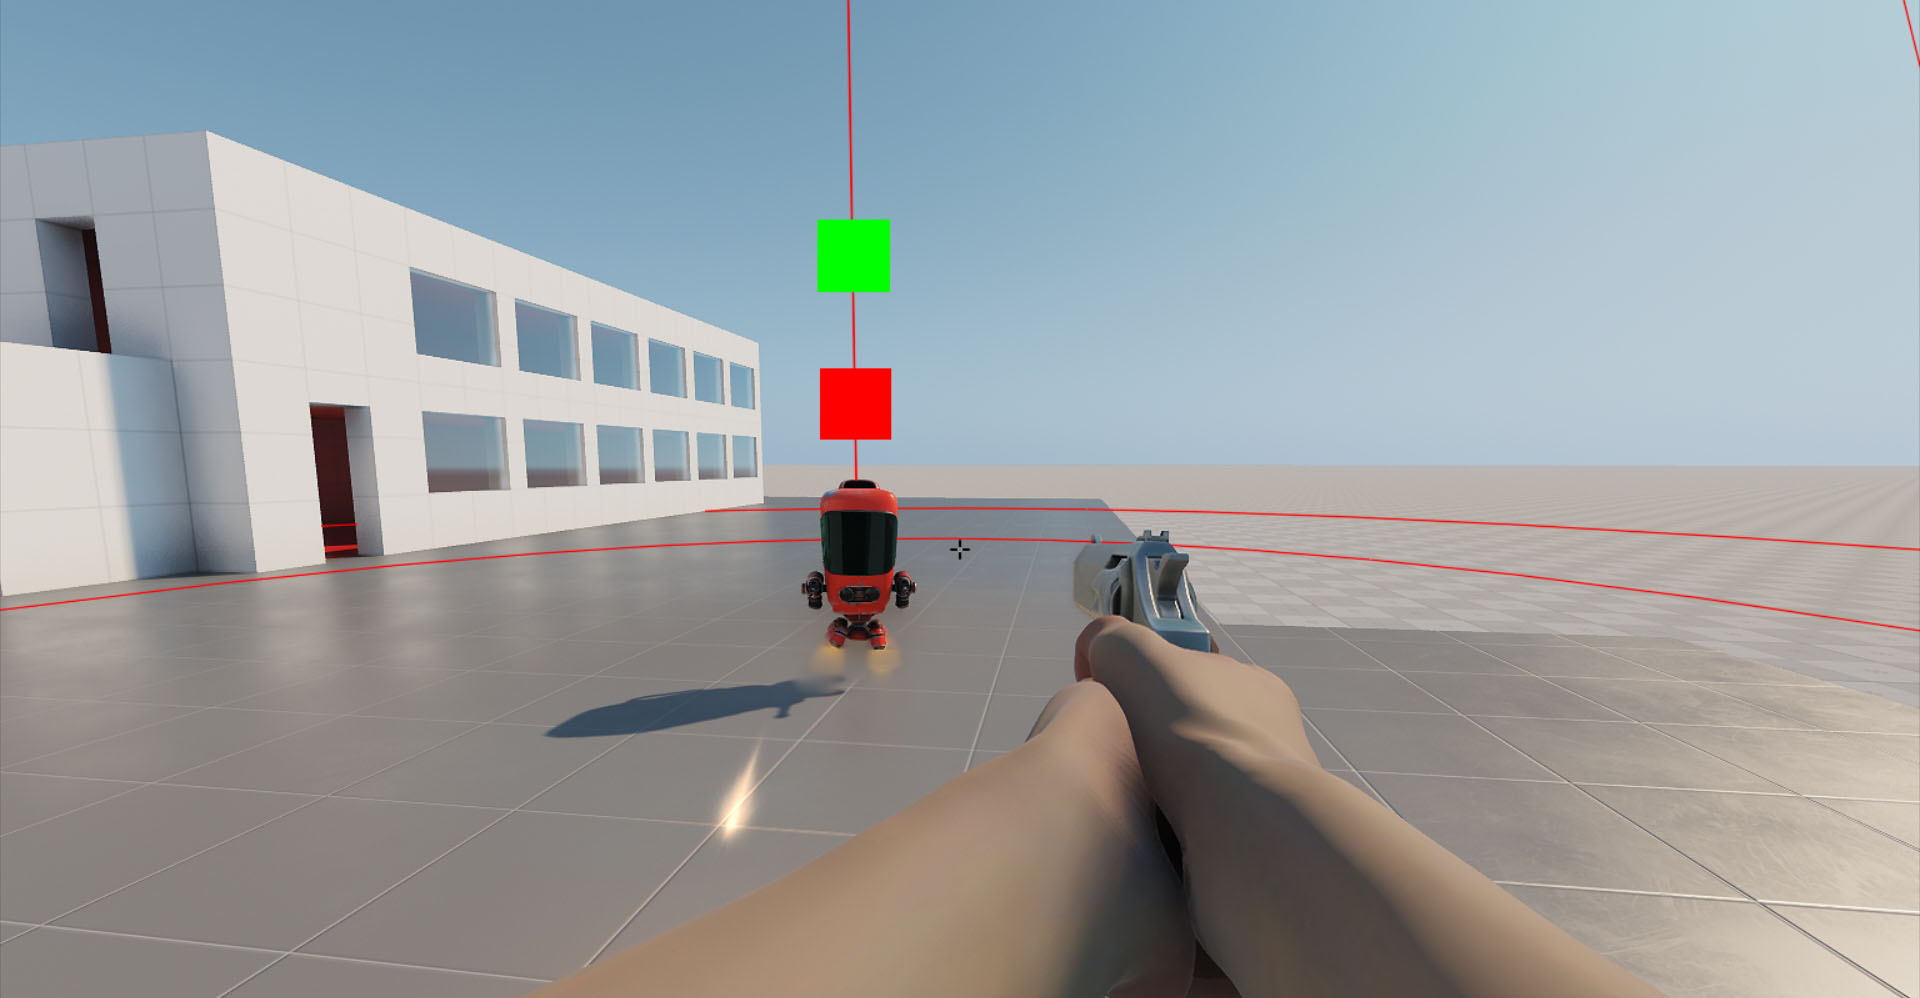
And the points of the calculated path:
The information on this page is valid for UNIGINE 2.20 SDK.