Basic Optimization Techniques
Once you have assessed the scene performance status, you already have some idea of what exactly you need to pay attention to in order to improve and speed up your application.
As a rule, one of the main ways to improve performance is to correctly select and apply optimization tools to the 3D scene geometry.
Let's take a look at the main tools available in UNIGINE:
-
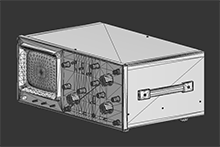
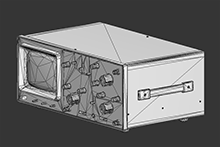
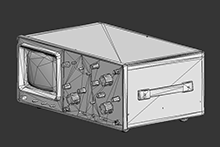
Levels of Detail (LODs) — the main way to optimize your project. The idea is to show a simplified model with less detail instead of a highly detailed model when the object is far away from the camera. To do this, you need to take a detailed model and create several versions of it for different distances, each with a reduced number of polygons.
A model with LODs can be represented as a single Mesh object with a number of surfaces, each representing a certain LOD. LOD settings allow you to specify the distance for switching between surfaces.
LODs can be configured automatically when importing the model into UNIGINE or manually via a 3D editor and UnigineEditor.
10109 polygons
LOD 05004 polygons
LOD 12583 polygons
LOD 2


-
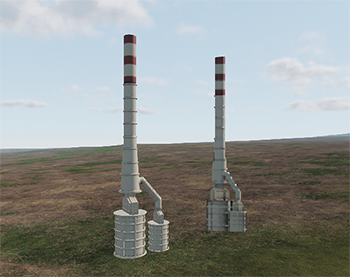
Impostors — flat images used instead of real models at a far distance from the camera. This method allows rendering objects with preserving visual accuracy: each impostor has the same transformation and appearance of the original object, but its geometry has only 2 triangles. Typically, impostors are used in scenes with a large number of objects that need to be visible from a long distance.
UNIGINE has a handy tool for creating impostors — Impostors Creator. It is accessible via the UnigineEditor main menu (Tools -> Impostors Creator).
 A real object (on the left) and its impostor (on the right) in the scene
 - Switching on and off the nodes at a certain distance from the camera using World Switcher. With this tool, you can disable parts of the virtual scene that are far away from the user, thus improving performance.
- Occlusion Culling allows you to avoid rendering geometry occluded by other opaque geometry by cutting it off using special occluders (Occluder, Occluder Mesh) or using Hardware Occlusion Queries.
- Managing a large number of identical objects using Mesh Cluster and Mesh Clutter allows you to simplify the node hierarchy by replacing many identical objects with one. Mesh Cluster allows you to arrange the meshes it stores around the scene as you see fit. Mesh Clutter scatters meshes randomly, and they cannot be edited individually. However, using Mesh Clutter is more efficient in terms of memory consumption.
However, it's not just the geometry of a 3D scene that affects performance. Inefficient use of light sources, dynamic shadows and reflections, and other effects can significantly reduce the application speed. That's why UNIGINE has a bit masking mechanism that allows you to selectively apply certain effects or enable certain properties for individual objects. Bit masks are used in the following systems:
- Rendering into viewport
- Shadowing
- Reflections rendering
- Collisions
- Intersections
- Decals
- Fields
- Sound sources
- Physicals
- Pathfinding (inside Navigation Areas)
Bit mask operating principle is as follows: an effect or property has a certain set of flags — bit masks — that define the scope of this effect or property. Cameras, Objects, Collision Shapes (used to detect collisions with physical objects) and other entities contain some of these bit masks depending on the type of entity and the possibility of applying a particular effect to it.
Masks are compared bitwise using logical conjunction, that is, the first bit of one mask is compared to the first bit of the other mask and so on. Two bit masks are considered a match if they have at least 1 matching bit, regardless of the value of the other bits.
An effect is only applied to an object if their bit masks match.
The information on this page is valid for UNIGINE 2.20 SDK.