Organizing Assets
You can rename you assets, move them between the folders and manage their hierarchy safely and easily using the Asset Browser. You don’t have to worry that your material will lose a texture when you change its name. The Asset System will track the changes and keep all links and dependencies between the resources.
Creating and Moving Folders#
Within your project you can create as many folders as you need, including nested ones. Keeping the folder tree of your project well-structured will help to find necessary assets quickly and makes migration of assets between projects easier.
To create a new folder right-click somewhere in the Main panel of the Asset Browser and choose Create Folder or use Create button in the top-right corner.

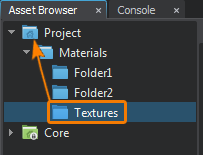
To move a folder to another location within your project you can select it in the Folder View panel and simply drag it to the target folder.

To move several folders select them in the Main panel and drag to the target folder in the Folder View panel.
Renaming an Asset#
To rename an asset right-click the asset’s icon or a thumbnail preview and choose Rename or select the asset and press F2 on the keyboard, then type a new name and press Enter.
Moving an Asset#
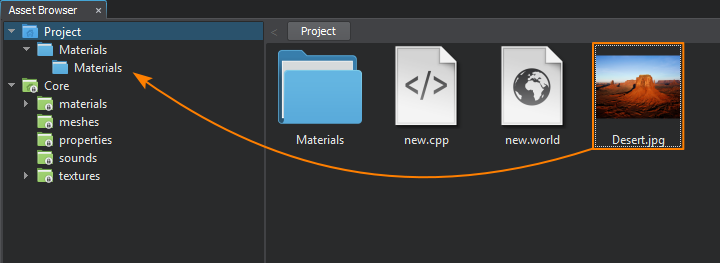
To move an asset or a group of assets to another folder, select the asset(s) you want to move and then drag to the target folder.

Another way to move an asset is to right-click the asset’s icon or a thumbnail preview and choose Cut or select the asset and press Ctrl + X on the keyboard. Then open the desired target folder, right-click and choose Paste (or press Ctrl + V on the keyboard).
Copying an Asset#
To copy an asset right-click the asset’s icon or a thumbnail preview and choose Copy or select the asset and press Ctrl + C on the keyboard. Then open the desired target folder, right-click and choose Paste (or press Ctrl + V on the keyboard).
Deleting an Asset#
To remove an asset right-click the asset’s icon or a thumbnail preview and choose Delete or select the asset and press Del on the keyboard.