UNIGINE 2.7.3: Major UnigineEditor Update, Properties and Component Systems Upgrade, IG Template, Experimental Road Tool
Key Changes
- Major UnigineEditor update: new features, performance optimizations
- Properties system upgrade: support for arrays and complex data structures
- Component system evolution: improved performance, multi-threading, SDK Browser integration
- Improved refraction for glass
- Screen-Space Dirt effect
- Improved sky rendering
- Extended IG application template
- Improved import of textures
- Experimental road tool (WorldSplineGraph system)
On the way to the major 2.8 release while working on the updated terrain system we gathered a lot of useful user feedback, and the scope of the feature has grown significantly. In order to avoid painful migrations, we decided to dedicate more time to polishing the feature as much as possible. Same thing with the full round Earth solution as they share some codebase. Therefore, we decided to keep both features in development branches for a while and to move the 2.8 release date to Q1 2019. In the meantime, we have a lot of other planned for 2.8 features ready (and some much more), so we decided to release them as 2.7.3 now.
Notice: UNIGINE 2.7.3 SDK requires SDK Browser version 1.9.11 or later.
UnigineEditor Update
The main tool, you build your UNIGINE worlds with, has got a lot of significant improvements, making it even more powerful and easy to use. A lot of repeatedly used operations were optimized to make them faster and easier, ensuring higher efficiency.
Better Placement Tools
We have focused on the most frequently used object placement operations and made them a lot faster and more efficient.
Cloning with previous transformation. An extremely useful feature for placing a series of like objects along a line.
- Clone an object.
- Transform (move, rotate, and scale) the clone as necessary.
- Press Shift + D as many times as required (or press and hold this combination) to create clones. Every next clone will use the last applied transformation.
![]()
Cloning with snapping and manual positioning. This feature facilitates tiling of areas with objects.
- Enable Snapping By Grid and set the required step value.
- Select an object to be cloned in the world.
- Choose the Move manipulator.
- Press and hold Shift + Alt while dragging an object with the mouse or using arrows on the keyboard. A new clone is created every step.
Cloning with Bound Box snapping and manual positioning. This feature allows positioning clones of the object in a tight row even if you don’t know the object’s dimensions.
- Enable Snapping By Bound Box mode.
- Select an object to be cloned in the world.
- Choose the Move manipulator.
- Press and hold Shift + Alt while dragging an object with the mouse or using arrows on the keyboard. Bound boxes of adjacent objects will touch each other.
Improved Drop To Ground feature now finds the closest surface below the object and above it eliminating problems with alignment of objects placed slightly below the surface.
Quick change of assets to be used (node references, static meshes, or materials stored in a certain folder of your project) with the mouse wheel or a special UI button:
- Select a node in the world.
- In the Parameters tab, click and hold the quick asset change button near the node, mesh, or material field and drag the mouse. The corresponding asset will be replaced with others stored in the same folder.

Copying and pasting node transformations. A long-awaited feature is finally available.
- Select a source node.
- In the Parameters tab, click the context menu to the right of any transformation parameter.
- Select Copy Position (or another transformation parameter depending on the line).
- Select the target node.
- Using the context menu of the target node, click Paste Position (or another transformation parameter depending on the line), and the target node accepts the copied values of the source node.
![]()
You can also copy and paste all transform values of a node by clicking Copy All Transforms and Paste All Transforms in the context menu.
Improved Geometry Import
Forward axis used by default was -Y, so all imported models had to be re-oriented in 3D editors, via code, or adjusted otherwise to correct their orientation. We changed default orientation for geometry to make the work with models more consistent.
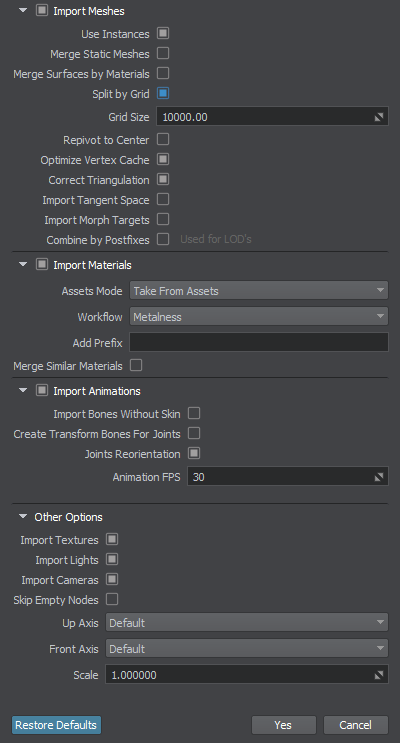
It is a very important change especially for new projects!
- Now all geometry is imported with +Y as forward axis.
- To provide compatibility with older projects we added new import options enabling you to select Front and Up axes. For old projects use Front (-Y) and Up (Default).
- We also added a new Joints Reorientation option to change orientation of bones for animations and animated geometry. When enabled, all bones will have the same forward axis as the geometry. This simplifies work with animations via code for programmers reducing excessive axis manipulations: if a mesh has +Y as a forward axis, the bones will have +Y as well.
- Another important new option is Create Transform Bones for Joints. It enables automatic generation of World Transform Bones for each joint of animated FBX assets saving artist's time spent on manual assignment of bones. You can simply delete unnecessary ones after generation.
Improved Texture Import
Texture import has become much easier now with new texture presets. Instead of choosing between DXT3, ATI1, ZLC2, most artists are unfamiliar with, you can now simply select the appropriate preset from the dropdown list and all parameters (image type, format, number of channels, etc.) will be set automatically.
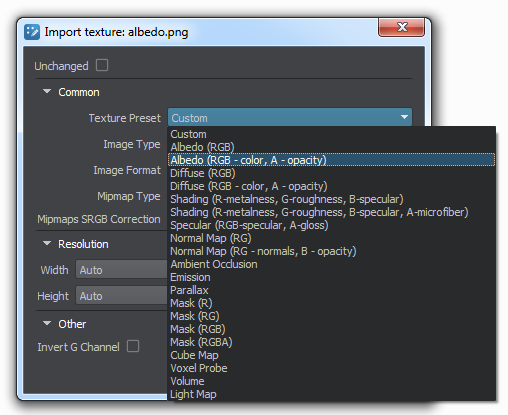
You can also choose to automatically adjust texture resolution to closest "power-of-2" values to enable DXT compression for best performance by selecting Auto for Width and Height parameters. Using optimized parameters is very important as it provides less video memory consumption, faster streaming, and less spikes generated.
Import of 16-bit TIFF images is now supported.
It is highly recommended to select appropriate presets for all textures in your project and re-import them, as this ensures that all of them are optimized for best performance. Just doing this may significantly increase your project’s performance and greatly reduce spikes on texture loading.
Improved Surface Management
Quick Copy and Paste Operations
You can now copy and paste all parameters from one surface to another, just like node transformations above. To do so, use a context menu displayed by clicking  in the top-right corner of the Surfaces section.
The copy/paste option supports multi-selection. This can be especially useful, when setting up LODs for several models, for example. The following paste options are available:
- Paste Parameters By Surface Names - in this case the parameters copied from source surfaces will be pasted to destination surfaces with matching names.
- Paste Parameters Sequentially - in this case the parameters copied from source surfaces will be simply pasted to destination surfaces in the order they appear in the hierarchy.

Compact View
Surface parameters are now displayed in a more compact form next to the surface hierarchy, making selection of surfaces and adjustment of their parameters easier.

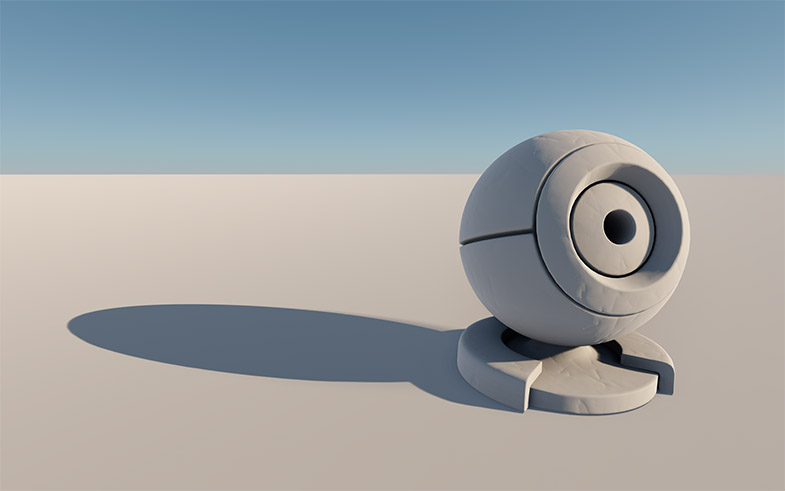
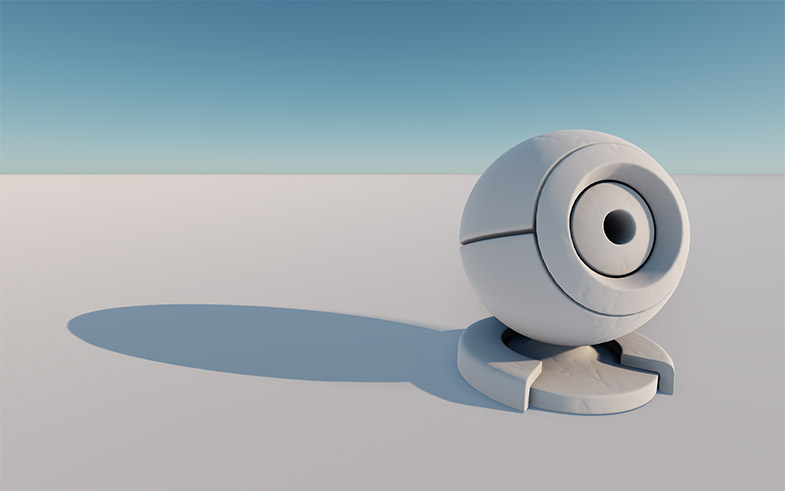
Surface Physics and Sound Parameters
The surface_base property is an optional one now, it is used for logic purposes only and does not define physical or sound occlusion characteristics of a surface anymore, all related characteristics (collision, intersection, restitution, friction, and occlusion) have become surface parameters (see the image above).
New Help Window
New Help window provides quick access to the Getting Started guide, video tutorials, documentation, and community, to help you learn the basics, make your first steps in UNIGINE, get any additional information you need and ask for help when necessary.

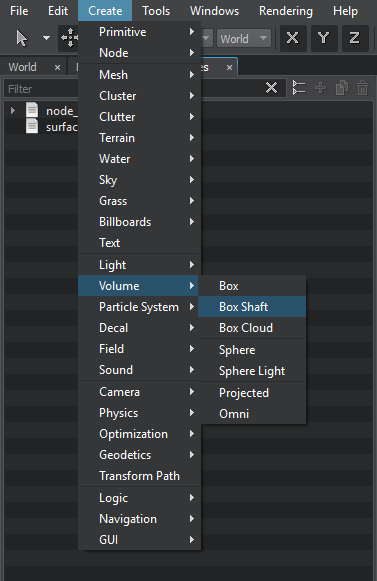
New Create menu
New Create menu has become more intuitive, due to new categorization. Moreover, compound nodes with all necessary settings are now created in a single click.
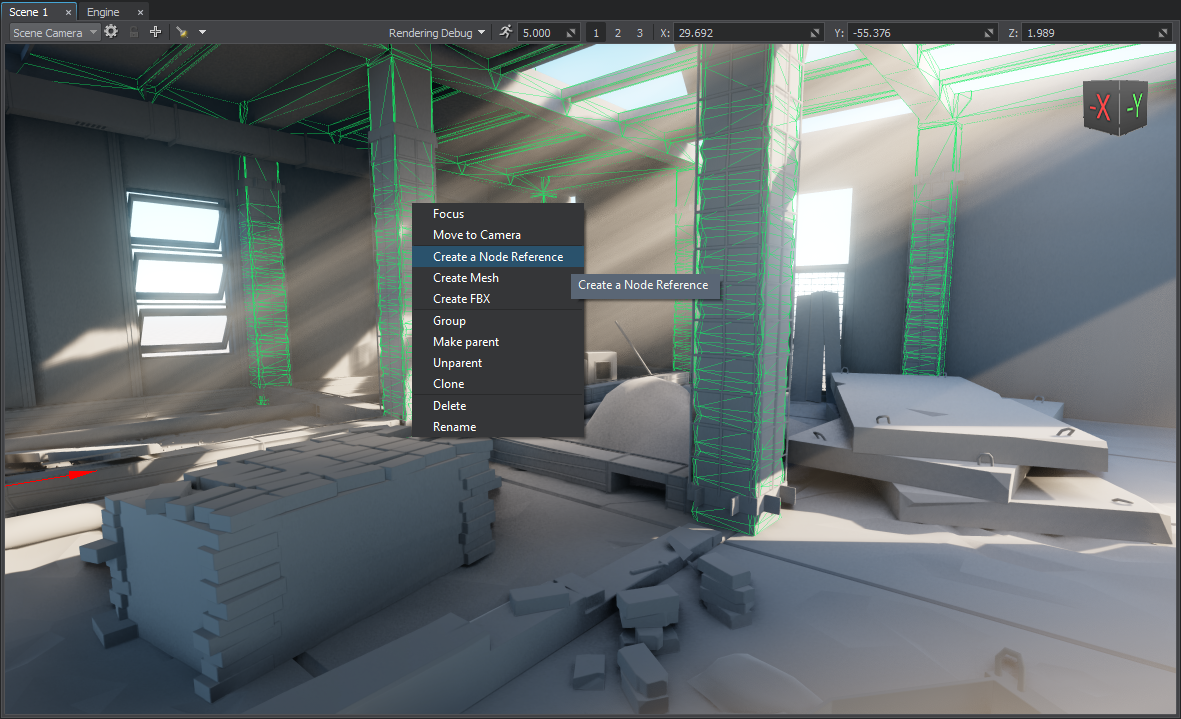
Viewport Context Menu
A long-awaited feature - context menu in the viewport is now available. Simply right-click on any object in the viewport and choose the desired action.
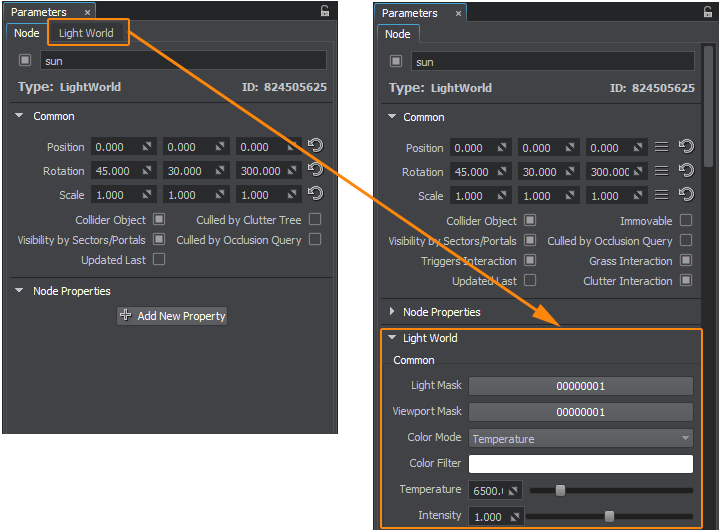
Node-Specific Settings
Node-specific settings have moved from the separate tab to a dedicated section in the Node tab, so now you don’t have to switch between tabs when setting up node parameters.
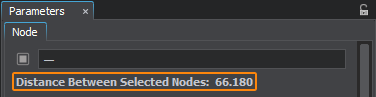
Ruler Feature
Another new feature is a universal “ruler” enabling you to measure distance between any pair of nodes in the scene, just select them both, and the distance will be displayed in the Parameters window. To measure the distance between any points in the scene’s space just create two dummy nodes, place them at desired locations, select them and check the distance:
Other Editor Improvements
The list of other Editor improvements includes the following:
- You can now specify any script file for your world in the UnigineEditor.
- Sequential import of multiple similar assets made simpler, Asset Browser now remembers previous asset import settings and offers to use them by default. You can reset import settings to system defaults via the Restore Defaults button.
- Increased speed of displaying node parameters on selection.
- Asset dialog now remembers the last folder - no more clicking back to the same location over and over again!
- Asset operations speedup.
- Significant UI performance improvements: optimized initialization, layouts are drawn faster.
- Fixed a lot of bugs in the Tracker Tool.
- Some fixes were made for the Landscape Tool as well. We also made a minor improvement related to generation of 2.5D buildings. Now the Ground Floor material is assigned separately from the Pedestal and Undeground Pedestal materials. This enables you to easily adjust the pedestal height where necessary. For this feature to work properly, you'll need to re-generate 2.5D buildings in your project. More detailed information can be found here.
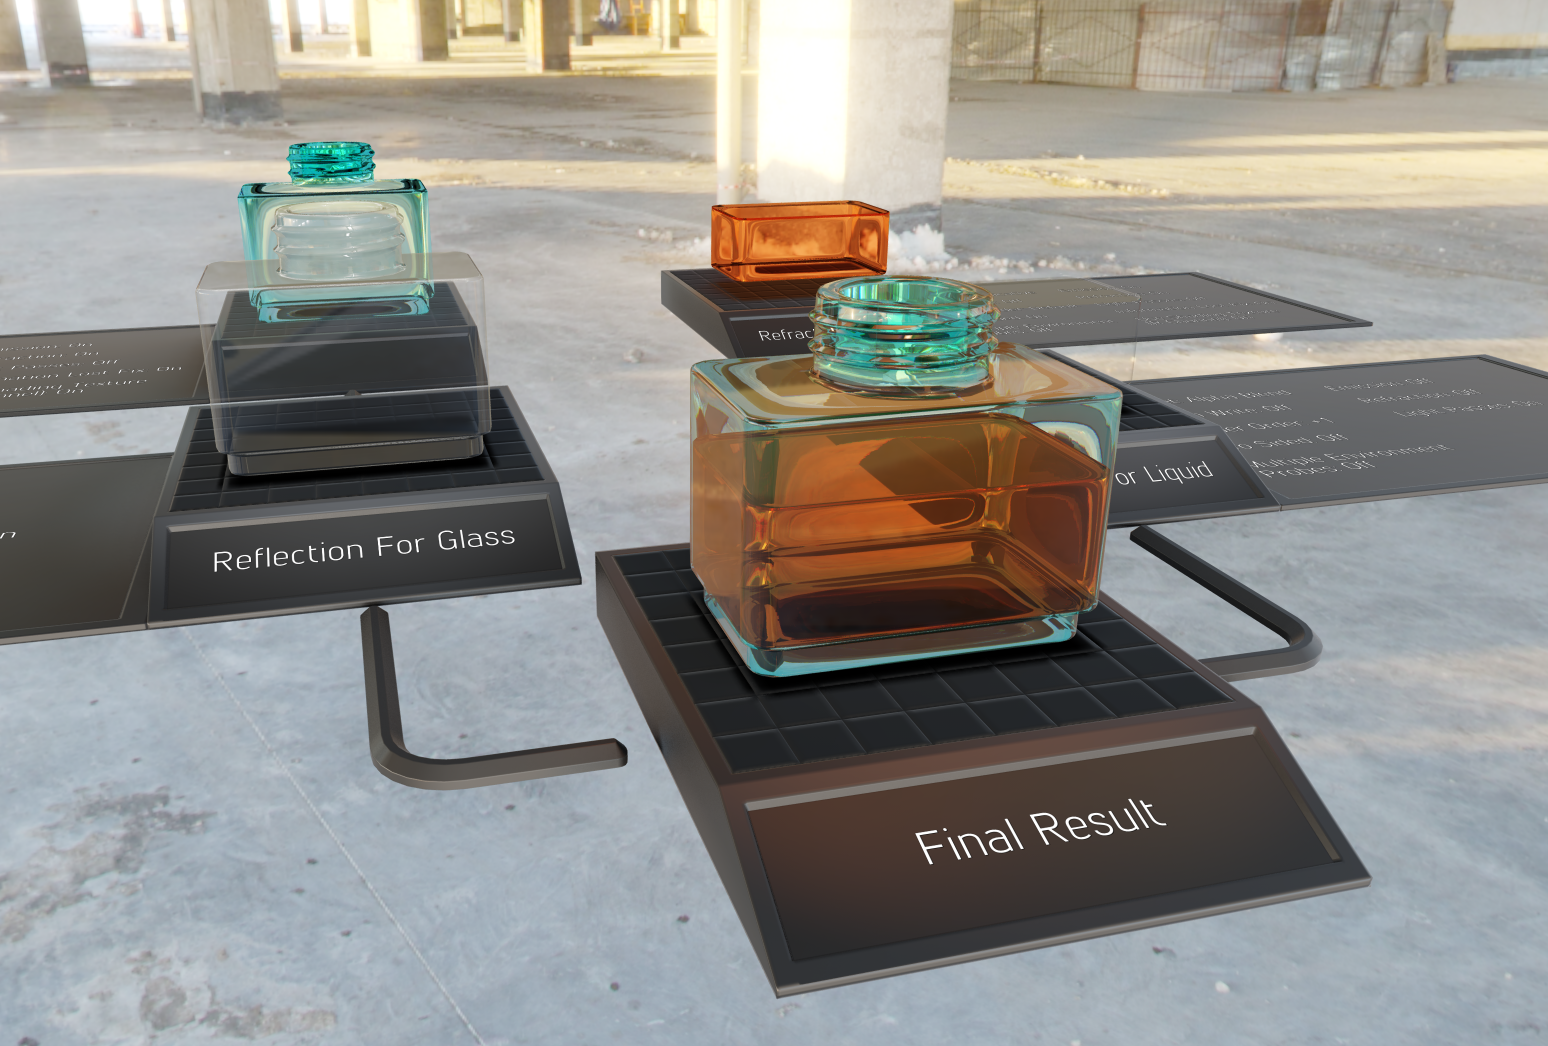
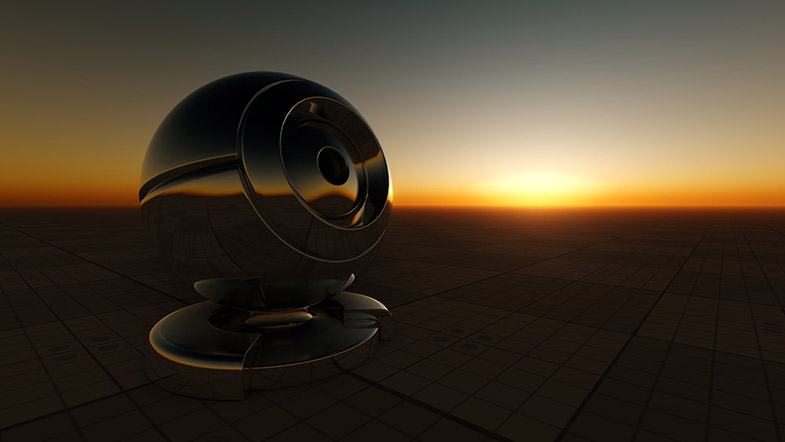
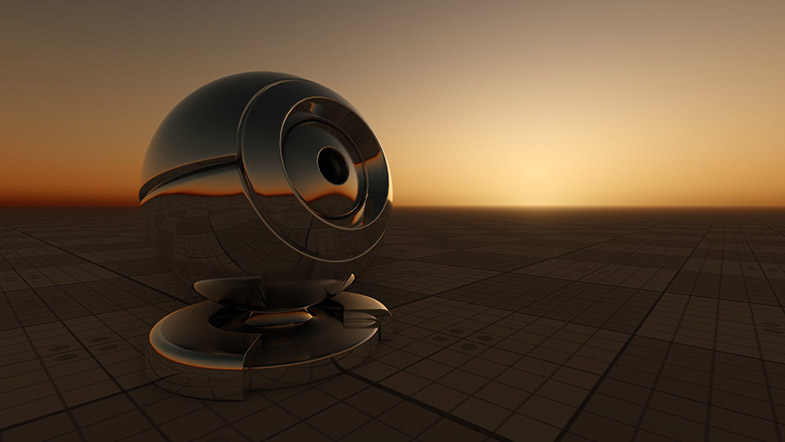
Improved Refraction for Glass
Now you can create glass with the look of refraction and reflections close to real, and what is important - all of that is rendered in real time.
A number of improvements made to the mesh_base material enable you:
- to choose whether refraction is to be rendered for front sides only, to make real looking monolithic glass objects with no cavities, or for cavities inside as well. This is controlled via the Front Side Only option.
- to set a texture to modulate the Index of Refraction (IoR) across all surfaces of the object, simulating increased refraction for thicker walls of glass objects making it look more realistic. To enable texture modulation just check the Use Shading Texture (R-Channel) option for your material and assign a Shading texture with IoR values stored in the R channel.

A new Glass sample, illustrating how to make a realistic looking glass jar with liquid, is included in the Samples suite.
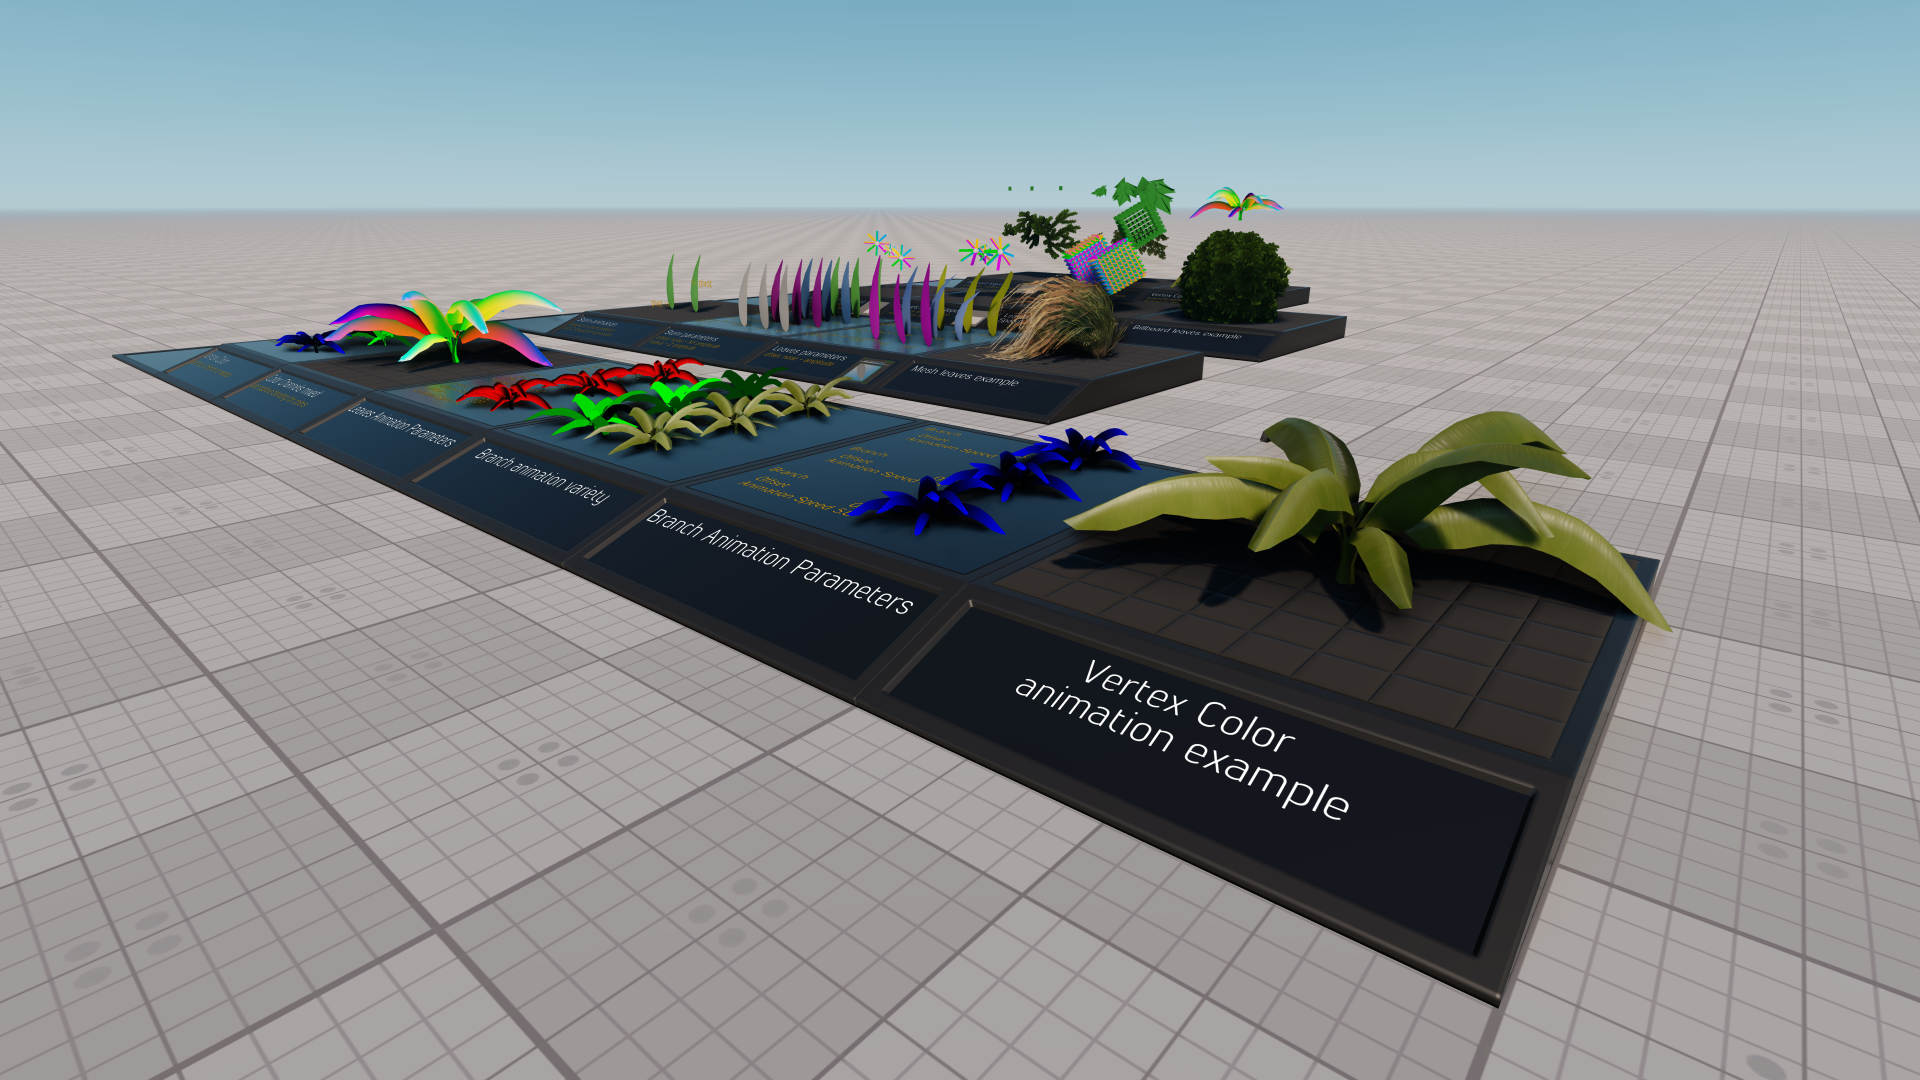
Vertex Color Animation For Vegetation
Added Geometry Vertex Color based animation for vegetation. Leaves are rendered as standard polygons; vertex colors are used for animation.
Vegetation movements are configured using RGB channels as follows:
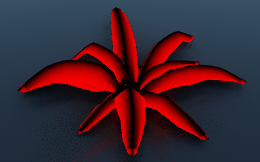 |
Red channel is used for animation of smaller or peripheral parts of vegetation (leaves). Bright parts are animated, and dark parts are not animated. |
 |
Green channel is used to define the movement order for branches in order to desynchronize them. The movement sequence starts from the brightest element to the darkest. |
 |
Blue channel is used to define which parts of branches can be bent. Brighter parts indicate bendable portions, and darker parts—stiff portions. |
A set of parameters gives you total control over vegetation animation making it look like real.
For more information on setting up vertex-color-based vegetation animation please refer to the mesh_base material article.
A new sample illustrating Vertex Color Animation was added to the Samples suite.
We also added vertex color animation for all trees in the Vegetation add-on.
Automatic White Balance Correction
White Balance Correction eliminates the discoloration in the final image due to certain colors in the scene having more intensity and/or a higher or lower color temperature. A new feature that we introduce is called Adaptive Automatic White Balance Correction and it ensures realistic coloration of your scenes in real-time mode.
To ensure the most natural look of your scene it is recommended to adjust colors of light sources by setting color temperatures.

Screen-Space Dirt Effect
Various slits and cavities are prone to accumulating dirt and dust, while edges tend to wear, scratch and change their initial color, usually this is simulated using so-called curvature maps prepared for each model.
Introducing a new Screen-Space Dirt Effect enabling you to perform curvature mapping (simulate worn scratched edges and accumulation of dirt and dust in cavities) in the screen space for all objects globally. It saves time for large complex scenes with a lot of various models and elements making them look more natural without having to prepare textures for each of them individually.
All major settings of the SSDirt effect are global and are adjusted via the Render->SSDirt section of the Settings window. However, some parameters for fine tuning can be set up per material. The SSDirt effect is applied to all materials inherited from the mesh_base and terrain_global_base having the SSDirt option enabled (this option is available only when the Procedural Effects option is enabled for the material).
Improved Environment Probes
Environment probes were significantly improved. Now you can choose between inner and outer attenuation for box projection of an environment probe:
- If your probe is placed in a room, so that you can see its borders from outside, it is recommended to use inner attenuation.
- If you have a probe with its size matching that of the room it is better to use outer attenuation.
Parallax correction is now available for environment probes using spherical projection, it enables rendering of reflections taking into account the camera's position. Without this option, reflection cubemaps are simply projected onto objects, and do not follow the viewer's perspective. You can also adjust correction factor affecting the distance to reflected surrounding objects for fine tuning to fit a medium or small object into the environment.
VR Optimizations
Native Stereo Reprojection
We added Stereo Reprojection mode for VR. This mode enables to render 45 FPS as 90 FPS. Instead of rendering a picture for both eyes each frame, it is rendered for one of them, while the picture for the other is obtained by making reprojection of the rendered one, next time the picture is rendered for the second eye and reprojected for the first one, and so on. Two modes are available:
- dynamic reprojection - slower, but more accurate, more pronounced ghost effect.
- fast reprojection - faster, reduced ghost effect, but clipping of frontal parts of moving objects may occur.
For more information on Stereo Reprojection mode please refer to the Stereo Rendering article.
To set the value via the console, use the render_stereo_reprojection console command.
Hidden Area
Some pixels are not visible in VR, why not optimize rendering performance by skipping them? So, we added culling for such pixels with the following modes available:
- OpenVR-based culling mode - culling is performed using meshes returned by OpenVR. Take note, that culling result depends on HMD used.
- Custom culling mode - culling is performed using an oval or circular mesh determined by custom adjustable parameters.
You can specify a custom mesh representing such hidden area, adjust its transformation and assign it to a viewport.
To set the value via the console, use the render_stereo_hidden_area console command.
Better Skies
Added Use Sky Color option for volume_fog_base and volume_cloud_base materials, to control whether to take into account the current sky color or not.
A new Volumetrics sample illustrating this feature as well as the use of different types of volumes for various fog effects was added to the Samples suite.
Added RGBA 3D texture support and jitter for the volume_cloud_base material.
Added a new Haze Gradient parameter for the clouds_base material making gradual fadeout of clouds towards the horizon look more realistic.
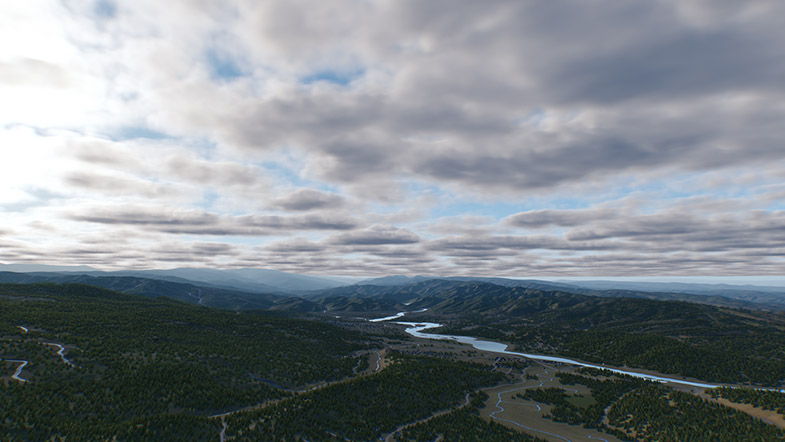
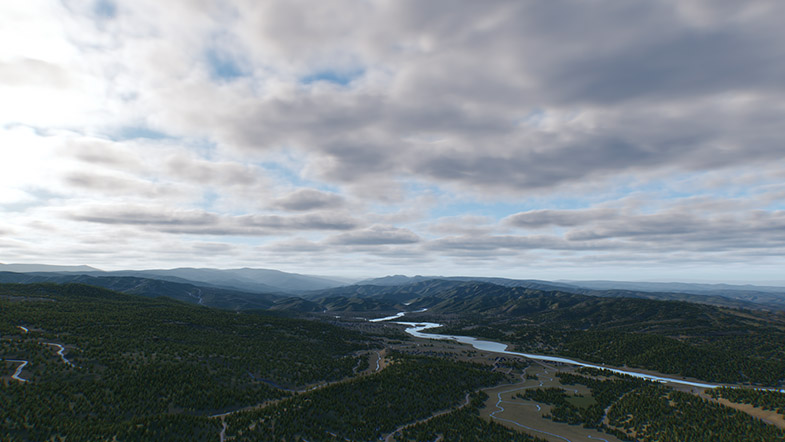
Scattering LUT textures Mie and Base were updated, now providing more natural scattering and shadow colors.
Other Rendering Improvements
The list of other rendering improvements includes the following:
- Decals and water now support auxiliary pass, making it possible to render them correctly when various post-sensors, such as thermal vision, are used. Now water looks more realistic on images from an IR camera, moreover, hot thermal signatures underwater (engines, etc.) are hardly seen from above. A sample illustrating this feature was added to the Samples suite.
- Texture streaming has become even more efficient. Textures now consume less video memory, are streamed faster and cause less spikes.
- The Transparent Blur state, previously added to the mesh_base material, is now available for the particles_base material as well, enabling you to create a heat haze effect typical for hot air.

- Improved SSAO is now less intense on bright surfaces and is influenced by the color of dark ones, making it look more natural.
- Removed ground texture and color from environment settings, as they are no longer needed.
- Fixed bug with incorrect baking of omni lights to voxel probes having the Visibility Light Omni option disabled.
- Fixed crash associated with missing material for procedural rendering of particles.
- Fixed crash associated with missing material assigned to an ObjectDynamic.
- Alpha test is now taken into account during the Auxiliary Pass.
- Reduced SSAO + SSRTGI artefacts with disabled increased accuracy, quarter resolution depth, and step size < 6.
- Fixed Environment Probe streaming artefacts on AMD+Linux.
- Added haze support for VolumeProj and VolumeOmni.
- Fixed cubemap switching when rendering environment probes in the Multiple Environment Probes mode. 3D texture switching when rendering several voxel probes during the forward pass was fixed as well.
- TAA has got a new Antialiasing in Motion option enabling improved anti-aliasing for moving camera and objects.
- Pivot Offset is now taken into account when calculating bounds for grass and impostors.
- Fixed bug with setting material mask for ObjectTerrainGlobal.

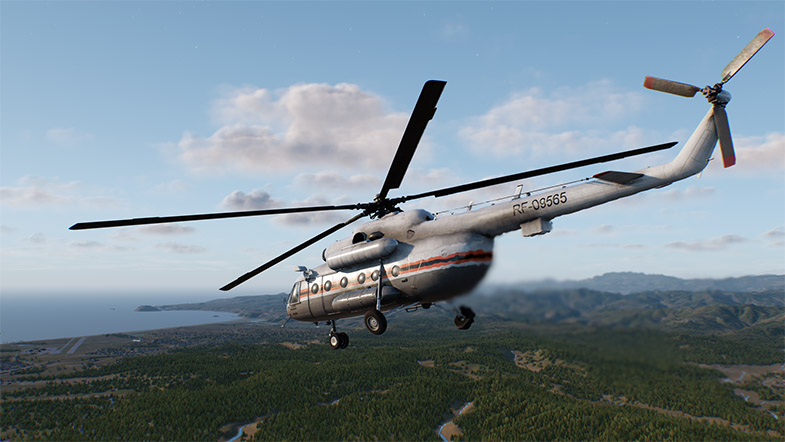
Extended IG Application Template
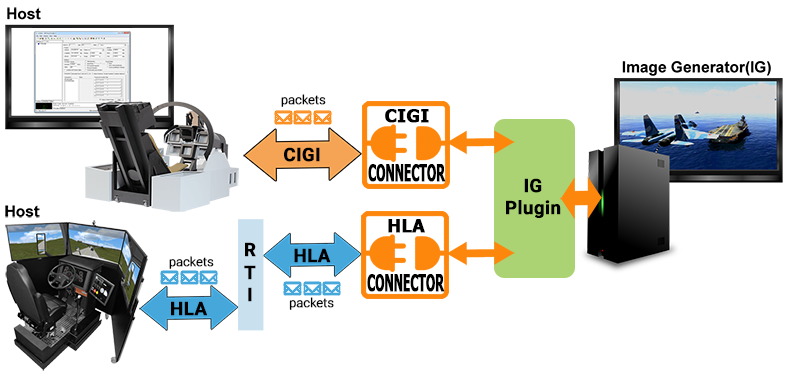
The IG (Image Generator) Application template introduced in 2.7.1 continues its evolution and has got a large pack of updates by this release. It is intended to be a plug-n-play component for professional distributed simulation systems.
The updated IG Template is designed to be simple, easy to use and extensible via its plug-in based architecture. The main framework plugin, that manipulates systems, entities, articulated parts, component templates and so on, is the IG Plugin, it operates in terms of the UNIGINE Engine (Nodes, NodeReferences, etc.) and is not bound to any specific communication protocol. The IG plugin uses a set of additional plugins, called connectors, that are used to link IG terminology with that of each specific protocol (CIGI 3.0, 3.2, 3.3 versions and HLA 1.3 version are currently supported). Basically, the architecture now looks as follows:
There’s more in a scene than the terrain database and the entities moving around – sky, atmosphere, and water. Drawing these ethereal parts of the environment, with convincing visual effects on the top of that, is the IG’s responsibility too, and their quality defines realism of the final image. The look of these ethereal parts depends on the weather and the time of day, so the IG supports the following environment simulation models:
- An ephemeris model determines the position of the sun and moon, which both cast light into the scene, depending on given coordinates and date/time.
- A weather model, either in the IG or supplied by an external weather simulation, provides the cloud coverage, and a global wind concept with direction and strength, affecting vegetation animation and the environment.
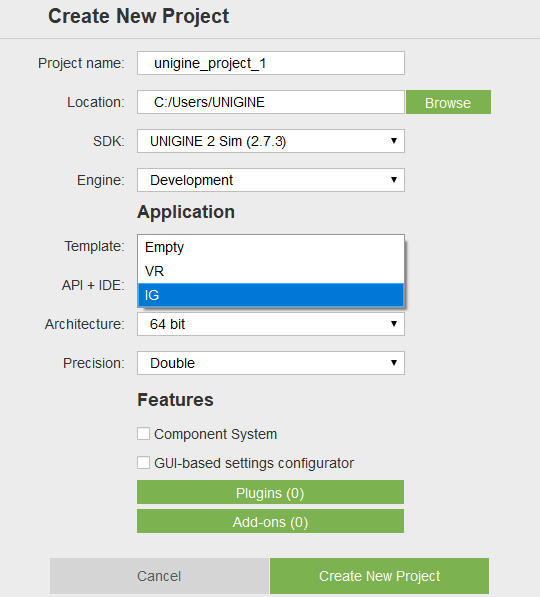
The basic workflow is simple now and does not require any recompilation:
- Create a new project in SDK browser using the IG Template.
- Open the world in UnigineEditor and generate the terrain using the Landscape Tool.
- Add models to represent entities used in your simulation (aircrafts, vehicles, etc.). Assign properties (lights, landing gears, wheels, controllers, effects, etc.) to the corresponding nodes and adjust their parameters as required.
- Open the configuration file (ig_config.xml) and add definitions for all your entities, specify necessary system settings and connector parameters.
- Launch your application and use a host to communicate with it!
As the new IG architecture was introduced, the CigiClient and HLAClient plugins, that were used earlier are now considered deprecated and will no longer be supported. The new IG plugin has taken its basic functionality from the CigiClient plugin with a set of modifications and extensions.
For more information on the IG Template please refer to the following articles:
- IG Template article for more details on building your IG using the template.
- IG Plugin API section for more information on managing IG via code (C++).
The complete list of improvements includes the following:
- Updated weather effects: snow, rain, lightnings and wind are available.
- Global wind system now affects clouds and trees.
- High-level weather system enables you to control humidity, fog, precipitation, etc.
- Support for ephemeris system: positions of the Sun and the Moon are now set automatically by just specifying date and time.
- Airport lights system: high-performance lights with adjustable visibility distance and angle.
- Support for all types of aircraft lights: landing, taxi, beacon, strobe, navigation, etc.
- Extended HLA support.
- Extended CIGI protocol support now covers 70% of packets.
- SDK Browser integration.
A number of fixes and improvements were also made to the Syncker multi-channel rendering system increasing its robustness:
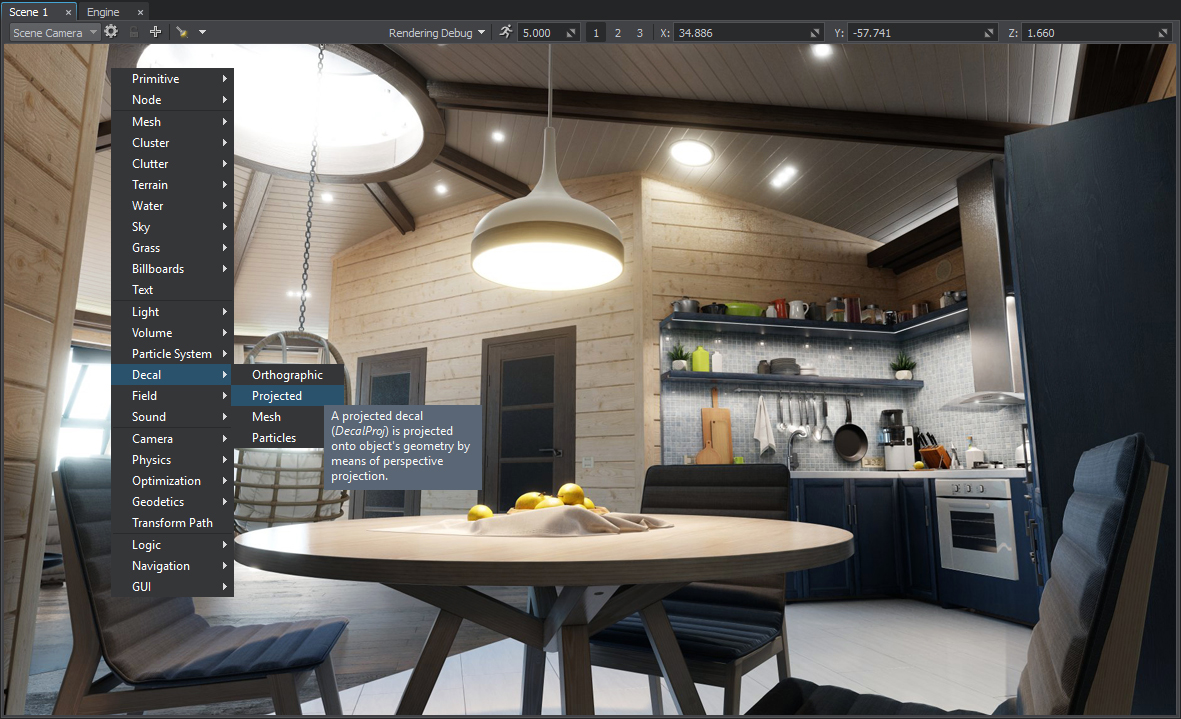
- Added support for decals (orthographic, projected and mesh).
- Inherited materials are also synchronized.
- Reduced packet size, as now only values of modified material parameters are sent.
- Fixed crashes associated with recursive deletion of nested NodeReferences.
- Fixed bug associated with transfer of node’s “enabled” flag.
Experimental Road Tool
This feature is an experimental one and is not recommended for production use.
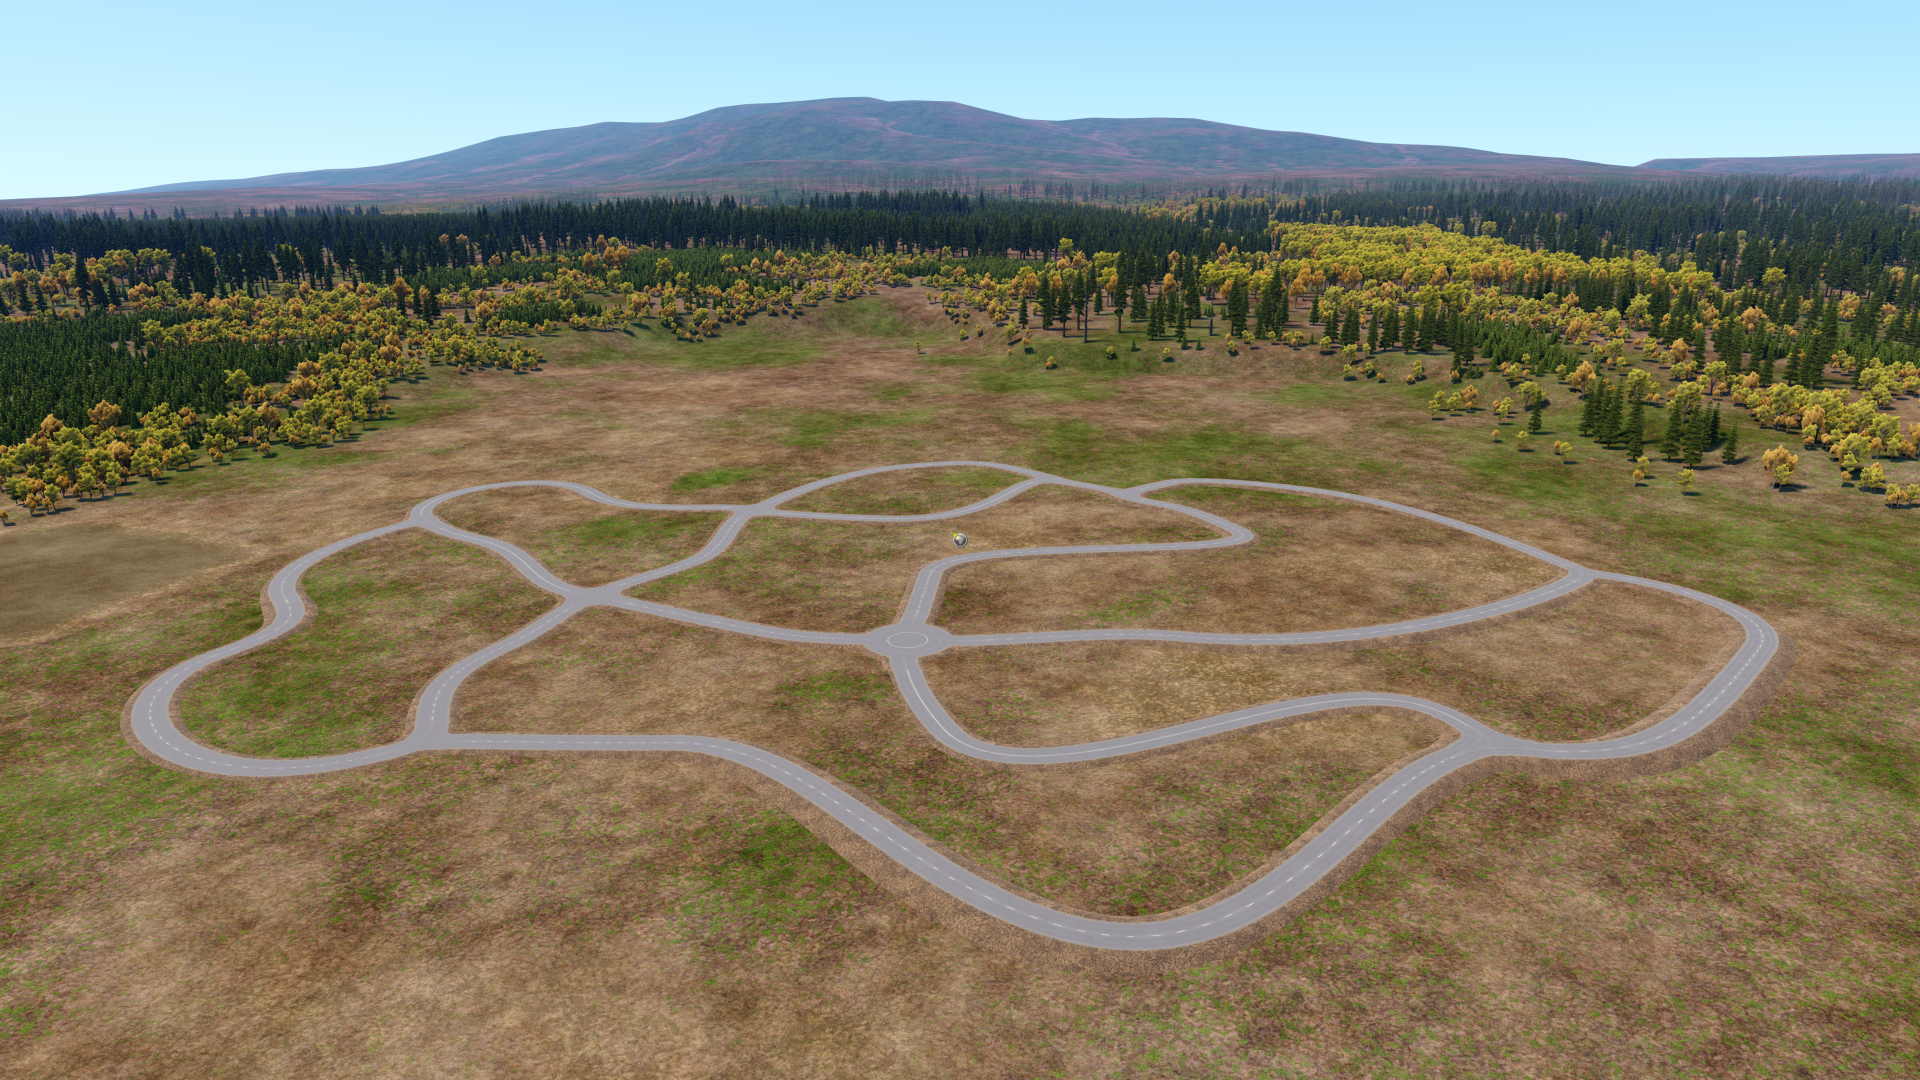
This tool enables you to create roads along arbitrary splines simply by setting up and adjusting control points via the UnigineEditor.
A new node called WorldSplineGraph is used as a basis for the road tool.
You can change the appearance of the road system by using your own custom geometry as building blocks for various complex elements of your roads - junctions, bridges, ramps, etc.
The Landscape Tool already generates roads on the basis of vector data as new WorldSplineGraph objects. You’ll be able to adjust the look and shape of the generated roads to fit your preferences in the UnigineEditor quickly and easily without the need to re-generate them.
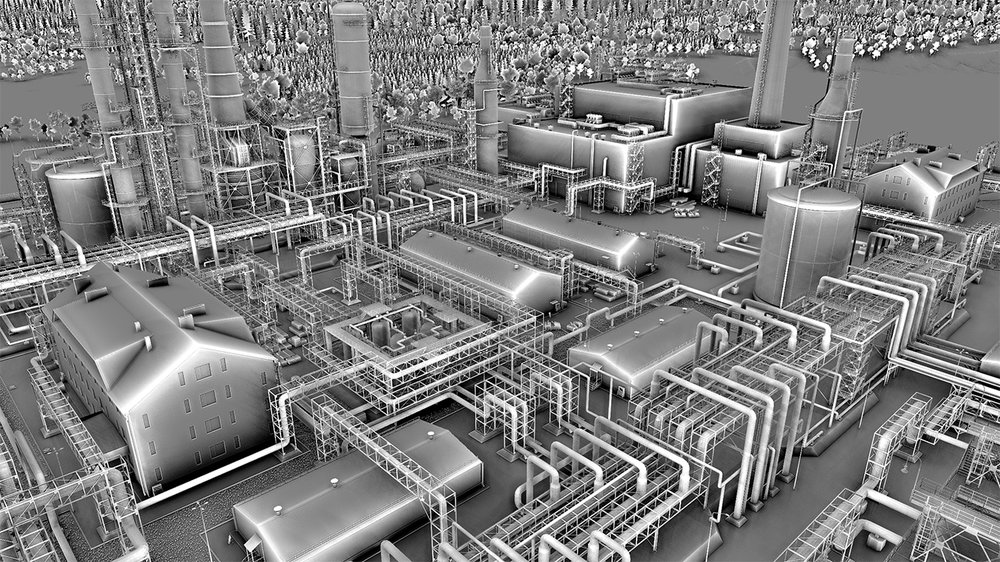
The WorldSplineGraph is a multi-purpose node with a range of applications going beyond roads creation. It can also be used for ropes, pipes, and any objects, having a form that follows a curved path. This will help artists to quickly build various complex structures from typical basic elements placed along spatial curves, such as pipes and tubes at an oil refinery, for example.
The WorldSplineGraph node uses a number of optimizations, particularly baking elements into large segments to ensure acceptable performance for large areas.
Please note, that this tool provides only a visual representation and does not offer any traffic system or rope physics simulation.
Two new samples illustrating use cases of the new WorldSplineGraph node are included in the Samples suite:
- world_spline_graph/roads - roads created on the terrain surface.
- world_spline_graph/ropes - chains, ropes and cables.
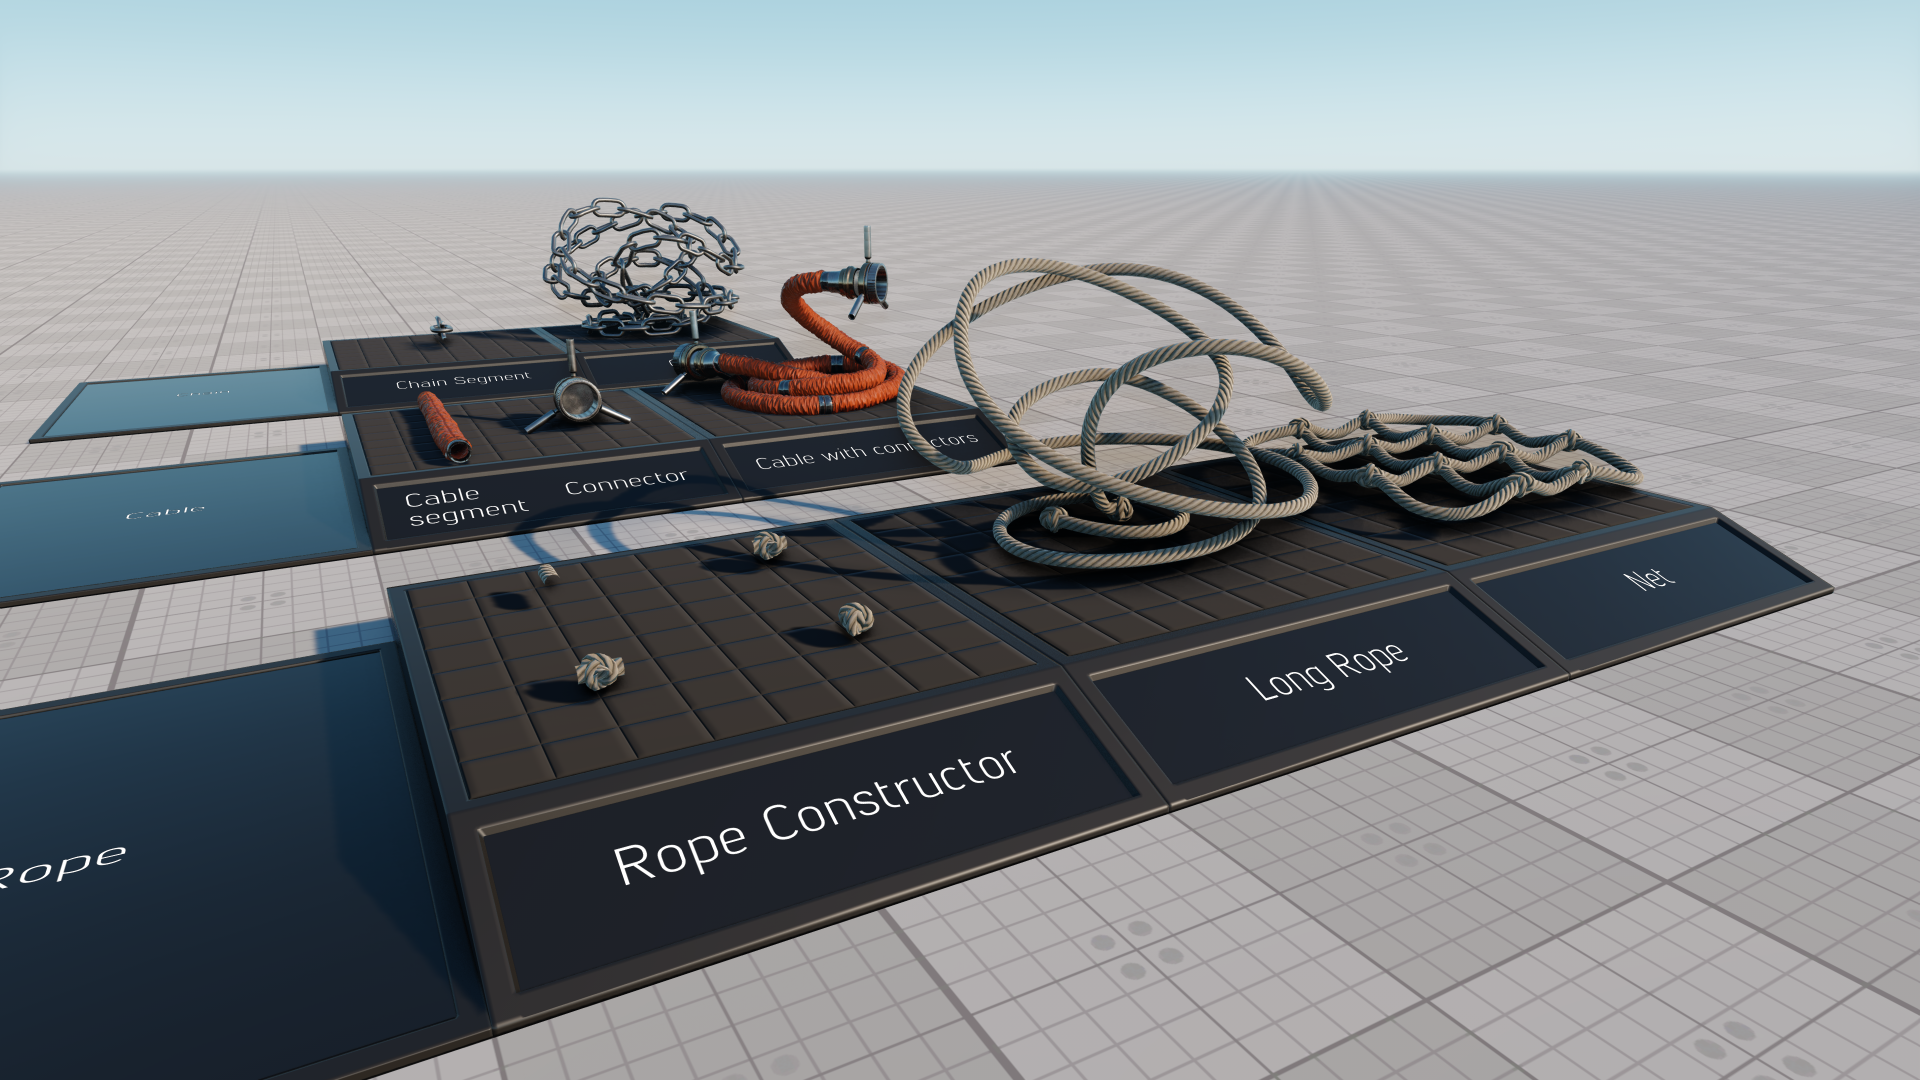
For your convenience we also added a new Road Tool Constructor add-on with a set of ready-to-use assets (road segments and various types of junctions) that can be used as construction elements to simplify roads creation.
For more information please refer to the following articles:
- World Spline Graph article to learn how to use the World Spline Graph tool.
- WorldSplineGraph class article to learn how to manage WorldSplineGraph nodes via API.
- C++ sample for the WorldSplineGraph class illustrating how to manage spline graphs and generate geometry along the graph segments: source/samples/Api/Nodes/WorldSplineGraph.
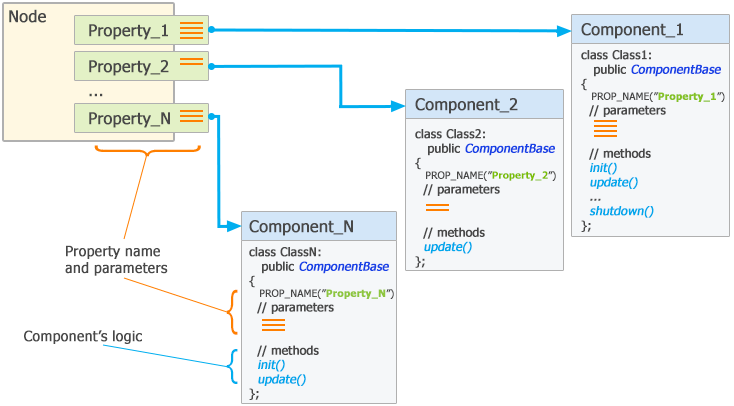
Properties System Upgrade
Property is a core element for application logic, which is also used to attach components to nodes. Thus, the capabilities of the Properties System also define the potential and flexibility of the Component System.
Upgraded properties now support complex data types, providing an exceptional flexibility in implementing your application logic. These data types are as follows:
- Structure - it can be thought of as "a definition of a property inside a property". It is also composed of parameters of any type supported by the property, including arrays (see below). Structures can also include other structures (nested) and can be organized in hierarchy with parameter inheritance and overloading (much like in object-oriented programming).
- Array - it is a collection of parameters, all having the same type, and accessed using a common name followed by an index: array[0]. Arrays can have multiple dimensions (arrays of arrays), arrays of structures are also supported.
The format of the *.prop file has changed, so now you can define any sophisticated parameter hierarchy for your property, for example like this:
<?xml version="1.0" encoding="utf-8"?>
<property version="2.7.3.0" name="custom_prop" manual="1">
	 <!-- First structure declaration -->
	 <struct name="struct1">
			 <parameter name="param_a" type="int">1</parameter>
			 <parameter name="param_b" type="toggle">0</parameter>
			 <parameter name="param_c" type="int">1</parameter>
	 </struct>
	 <!-- Inherited structure declaration-->
	 <struct name="struct2" parent_name="struct1">
			 <parameter name="param2_a" type="toggle">0</parameter>
			 <parameter name="param2_b" type="float">1.0</parameter>
	 </struct>
	 <!-- Struct parameter of struct2 type -->
	 <parameter name="my_struct_param" type="struct2"></parameter>
	 <!-- Nested structure declaration -->
	 <struct name="struct3">
			 <parameter name="param3_a" type="struct2">0</parameter>
			 <parameter name="param3_b" type="int">15</parameter>
	 </struct>
	 <!-- Declaration of a 2-dimensional array (matrix) of integer elements-->
	 <parameter name="my_int_array" array_type="int" array_dim="2"></parameter>
	 <!-- Declaration of a one-dimensional array of struct3 elements-->
	 <parameter name="my_struct_array" array_type="struct3"></parameter>
</property>
Property parameters are now managed individually via the PropertyParameter class, to get any parameter by its name or ID you should use the Property::getParameterPtr() method.
For example, to access third element of the my_struct_array parameter you can use the following code:
PropertyPtr property = properties->findManualProperty("custom_prop");

PropertyParameterPtr param = property->getParameterPtr("my_struct_param")->getChild("param2_b");
Automatic type conversion of property parameters make them act like some universal variables i.e. you can set a new value for an integer parameter int_param and type it like this:
PropertyParameterPtr int_param;

…

// setting a new value of integer parameter using a string
int_param->setValue(“15”);

// setting a new value of integer parameter using a float
int_param->setValue(5.0f);

// getting integer parameter’s value as a string
Log::message(“Integer parameter value: %s”, int_param->getValueString().get());
For more information please refer to the following articles:
- Property File Format article.
- Property class article in API Reference.
Component System Evolution
The evolution of the Component System, introduced in 2.7 as an experimental feature, has brought it to the Production stage. Multiple performance optimizations, along with use of multi-threading as well as SDK Browser integration, make it even more powerful and easy-to-use. As the Component System is based on properties, all related improvements (parameter types and hierarchy), described above, made a significant contribution to it as well.
Logic of components is implemented via a set of methods (init(), update(), etc.), that are called by the corresponding functions of the world script, as it was before. But now a component can have any combination of these methods (e.g. multiple update() methods or just a single init()). Moreover, you now have a new parallelUpdate() method at your disposal. This method is executed after the update() and before the render() and can be used to perform some heavy resource-consuming calculations such as pathfinding, generation of procedural textures and so on (e.g., to perform pathfinding calculations simultaneously for all mobile units having the corresponding component assigned).
A number of operations are now performed automatically and the set of macros used for component declaration was extended reducing the amount of code you have to write and speeding up development process. E.g. components are now registered automatically, just add the REGISTER_COMPONENT macro to the corresponding .cpp file and consider it done, all necessary property files will be created as well.
Integration with the Microprofile tool is another new feature, it enables you to monitor overall performance of the Component System, as well as to add profiling information for your custom components.
The list of other improvements includes:
- Added an ability to specify Title, Tooltip, Group, when declaring a parameter as well as specify the list of items for a Switch parameter.
- Files will be regenerated only if they were modified.
- Order value can be specified for each component method to determine execution sequence for them.
- SDK Browser integration: to use the Component System in your new project just check the corresponding option when creating it.
For more details on working with components in 2.7.3 please refer to the following updated articles:
- Custom Component System article for more details on using the Custom Component System.
- Custom Component System API for more details on managing components via C++ API.
- Custom Component System Usage Example for more details on implementing logic using the Custom Component System.
- C++ Sample: source/samples/Api/Logics/ComponentSystem .
Other Engine Improvements
- Optimized spatial tree performance for cases with large number of dynamic nodes, spatial tree is updated 13 times faster now. So tens of thousands of moving objects are processed without a significant performance hit.
- shutdown() and destroy() methods of WorldLogic / SystemLogic / EditorLogic and all plugins are now called in reverse order (the last one having its init() called shall have its shutdown()/destroy() called first). This ensures proper initialization and cleanup sequence avoiding crashes.
- File System modifiers are back. They serve to automatically choose which resources to load when a UNIGINE project is run on different platforms or with different localizations. Instead of keeping multiple versions of the same project and copying shared data between them, you can add a custom postfix to file or folder names, and load only required resources on demand. Please note, that this feature is run-time only, and is not supported by the UnigineEditor.
- Added Node::updateEnabled() method to public API, it can be used to update node's internal state according to the current "enabled" state.
- Fixed streaming of 3D textures with mips.
- Fixed bug with unregistered intersections with loaded tiles of ObjectTerrainGlobal.
- ObjectDynamic now loads meshes correctly.
- Joystick input is now handled even when application window is out of focus.
- Optimized use of occluder by ObjectMeshCluster resulting in 4Mb memory saved per instance.
- Height of a WidgetButton now cannot be less than the value specified in setHeight().
- Fixed bug with buttons going unresponsive on Linux.
- Fixed crash on quitting the application associated with texture streaming.
- Fixed crash on deleting a plugin at run time.
- Thread::stop() method now always waits for the thread to terminate correctly.
- Improved Screenshot sample, now it grabs the final image including GUI.
Feature Preview: New Terrain System
Our R&D team continues its work on new terrain system (to be released in 2.8 version). They are currently focused on improving performance of details by means of baking them into a megatexture. Highly detailed tesselation is already implemented and enables to make pebble and stones for closeup views by means of convex geometry. Another important feature is easy terrain modification in run-time. It is also being addressed, together with simple API to control.
We have multiple requests for collaboration improvement to allow several artists editing terrain simultaneously. So we’re working on implementation of an approach using layers for terrain masks as separate nodes in the world. Thus, it will be possible to enable, disable, move or rotate them independently at any time (as demonstrated on the animation).
Different team members will be able to modify different levels and commit their changes without any conflicts with others. This functionality is also important for creation of roads and rivers as terrain adjusts its heights to ensure alignment with roads, and when a road is moved or modified otherwise the initial heights must be restored from terrain’s ”memory”.
Feature Preview: Full Round Earth
Other part of our development team is concentrated on full round Earth solution (ObjectPlanet) for flight simulation and similar tasks (continent-wide road network planning, precise weapon simulation, etc). This solution provides seamless planet rendering from space down to the surface with support for elevation data of arbitrary resolution and high-resolution insets. The power of UNIGINE's 64-bit coordinates precision is utilized here to its full extent.

Real-scale round planet Earth with the ability to provide complete surface coverage: spherical cube map projection is used for raster data representation. True spherical geometry enables you to fly around the whole planet.
The following features were implemented so far:
- LOD system providing smooth switching (geomorfing) from the planet scale to high-resolution insets.
- High-resolution insets at any location, smoothly blended with neighboring coarse-data regions.
- Shading similar to the one of ObjectTerrainGlobal: familiar detail adjustment workflow.
- Generation of raster data on the basis of GIS data is also implemented via the Landscape Tool similar to ObjectTerrainGlobal.
- Environment with global water and skies integrated with the planet looking realistic in flight scenarions.
- Geo API ensuring precise objects positioning using geo-coordinates (lat, lon, alt) or azimuth-elevation data.
- Physics simulation with gravity as well as collision and intersection detection.
- Data streaming performed in a separate thread.
Both terrain and planet features will be available in the upcoming beta releases of 2.8 version.
SDK Browser
- Extended set of project templates:
- IG template for creating your custom UNIGINE-based Image Generator application.
- VR template for creating an application for VR.
- Various bugfixes.
Documentation
- Added a set of new Video Tutorials:
- The article on Content Optimization was replaced by an extended Content Optimization section with a lot of recommendations on optimizing geometry, lighting and reflections, water, terrain and physics.
- Extended the Getting Started article.
- Added an article on Getting Started with VR.
- Added an article on Working with Smart Pointers.
- Added a new usage example on Splitting Logic Between Several WorldLogic Classes.
- Updated articles on File Formats.
- Updated articles on materials in the Materials section.
- Improved API Reference: better layout of methods and variables lists with brief information displayed right next to each item and ability to choose detailed mode to display arguments and return values.
- A set of visual improvements in the documentation.
- The complete list of API changes is available in the API Migration Guide.
- The complete list of Console command changes is available in the Console Migration Guide.
Entertainment SDK Subscription From $83 / Month
UNIGINE 2 Entertainment SDK is available via subscription for only $83 per month (with the commitment for a year).
As a number of design studios, indie game developers, promising startups and simply gifted coders interested in UNIGINE grows up every day, we want to make our technology more affordable and suitable for their needs.
Unlike UNIGINE 2 Sim and Engineering SDKs, which are targeted towards heavy lifting in the enterprise area, UNIGINE 2 Entertainment SDK is aimed to game development, architecture visualization, and various VR experiences.
For $83 per month (with the commitment for a year) you will get:
- UNIGINE 2 Entertainment SDK (1 developer seat, active for 1 year).
- Royalty-free license to create unlimited number of applications (and run them on unlimited number of machines forever).
- Personal profile at UNIGINE Developer Portal.
 |
 |