This page has been translated automatically.
Video Tutorials
Interface
Essentials
Advanced
How To
Rendering
Professional (SIM)
UnigineEditor
Interface Overview
Assets Workflow
Version Control
Settings and Preferences
Working With Projects
Adjusting Node Parameters
Setting Up Materials
Setting Up Properties
Lighting
Sandworm
Using Editor Tools for Specific Tasks
Extending Editor Functionality
Built-in Node Types
Nodes
Objects
Effects
Decals
Light Sources
Geodetics
World Nodes
Sound Objects
Pathfinding Objects
Players
Programming
Fundamentals
Setting Up Development Environment
Usage Examples
C++
C#
UnigineScript
UUSL (Unified UNIGINE Shader Language)
Plugins
File Formats
Materials and Shaders
Rebuilding the Engine Tools
GUI
Double Precision Coordinates
API
Animations-Related Classes
Containers
Common Functionality
Controls-Related Classes
Engine-Related Classes
Filesystem Functionality
GUI-Related Classes
Math Functionality
Node-Related Classes
Objects-Related Classes
Networking Functionality
Pathfinding-Related Classes
Physics-Related Classes
Plugins-Related Classes
IG Plugin
CIGIConnector Plugin
Rendering-Related Classes
VR-Related Classes
Content Creation
Content Optimization
Materials
Material Nodes Library
Miscellaneous
Input
Math
Matrix
Textures
Art Samples
Tutorials

Postprocess Materials

UNIGINE allows creating postprocessing effects using postprocess materials: they are applied after the scene in the viewport has been rendered, but before outputting it onto the screen.

Postprocess materials can be created via the Material Editor or implemented as scriptable materials. Some of the postprocessing effects, such as HDR and DOF, can be adjusted directly in the Render Settings.

Warning
Make sure that you disable all postprocess materials on all multi-monitor configurations.

How to Apply Postprocess Materials#

The postprocess materials are assigned globally or to a specific camera and affect the whole scene rendered in the viewport. To apply postprocess materials, do the following:

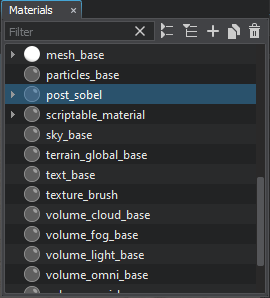
  1. In the Material Settings, select a postprocess material.

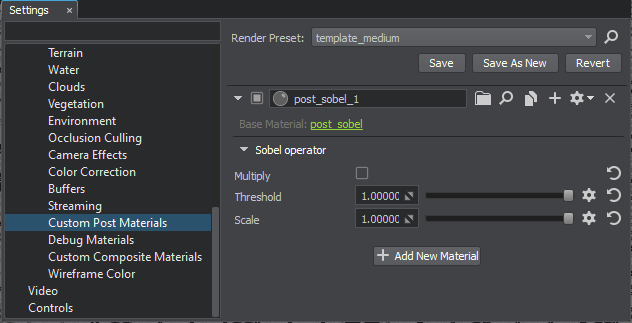
  2. Open Settings -> Custom Post Materials and click Add New Material. Assign the selected material by dragging it to the field or by specifying the name of the material. If you want to use several postprocess materials at the same time, add them one by one in the list and these materials will be rendered in the order they are positioned in the section.

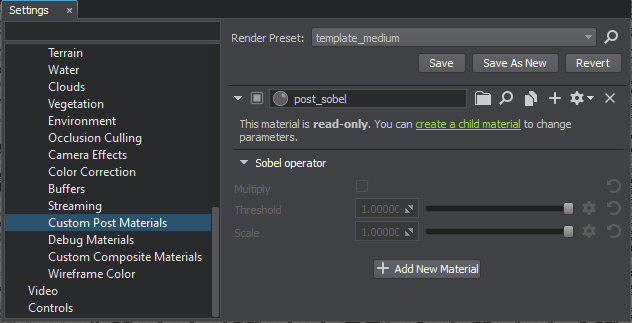
  3. Click create a child material to enable specifying states and parameters of the material. The new child material will be created and assigned here.

You can also apply postprocess materials as scriptables to a selected camera.

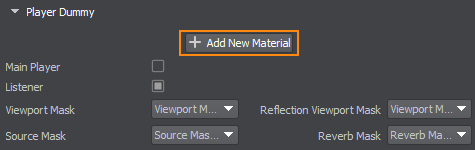
To apply the post process effect only to a specific camera, go to the Parameters tab of the corresponding Player node and assign the material to it.

Last update: 2022-07-01
Build: ()