添加道路
您应该升级到
 Roads are generated by tiling a decal created from a primary static mesh along the vector data available.道路是通过重复平铺贴花的方式生成的,贴花是从一个主要的静态网格沿着可用的矢量数据创建的。
See Also另请参阅#
观看这段视频,来自Sandworm地形生成系列视频教程:
Preparing a Primary Object准备一个主要对象#
First, we create a Mesh Static object that will be used as a building block for the generation.首先,我们创建一个Mesh Static对象将被用作构建块的一代。
-
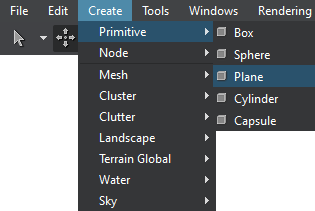
Create a plane: click Create —> Primitive —> Plane on the Menu bar.创建一个平面:单击菜单栏上的Create -> Primitive -> Plane。
-
Specify the mesh parameters. For our road, we set the following:指定网格参数。对于我们的道路,我们设置如下:
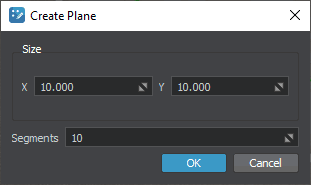 注意We recommend using more than a single segment to make road curves smoother.我们建议使用超过一段道路曲线平滑。
 -
Assign the sw_georeferenced/nodes/road/materials/road.mat material to the plane.给平面分配sw_georeferenced/nodes/road/materials/road.mat材质。
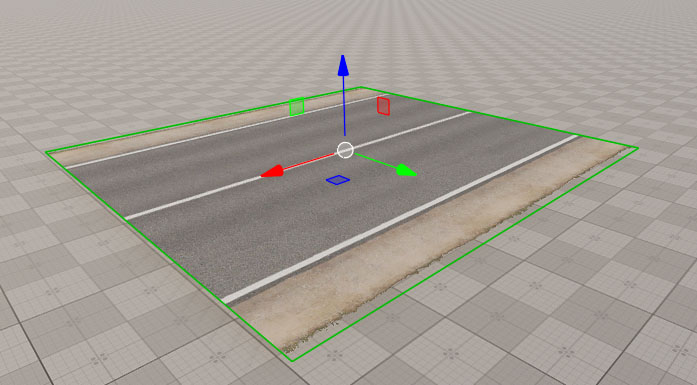 The road is generated by tiling the primary mesh along one of the axes X, Y, or Z (forward axis), so make sure that your mesh is oriented correctly — in this case, the forward axis is X (red arrow).这条路是由重复平铺主网格沿一个轴X, Y,或Z(向前轴),所以确保您的网是面向正确的——在这种情况下,轴是X(红色箭头)。
Now that the primary node for roads (the *.node asset) is ready for use, you can disable it or delete from the scene.
现在,道路的主节点(*.node资源)是准备使用,您可以禁用或删除从现场。
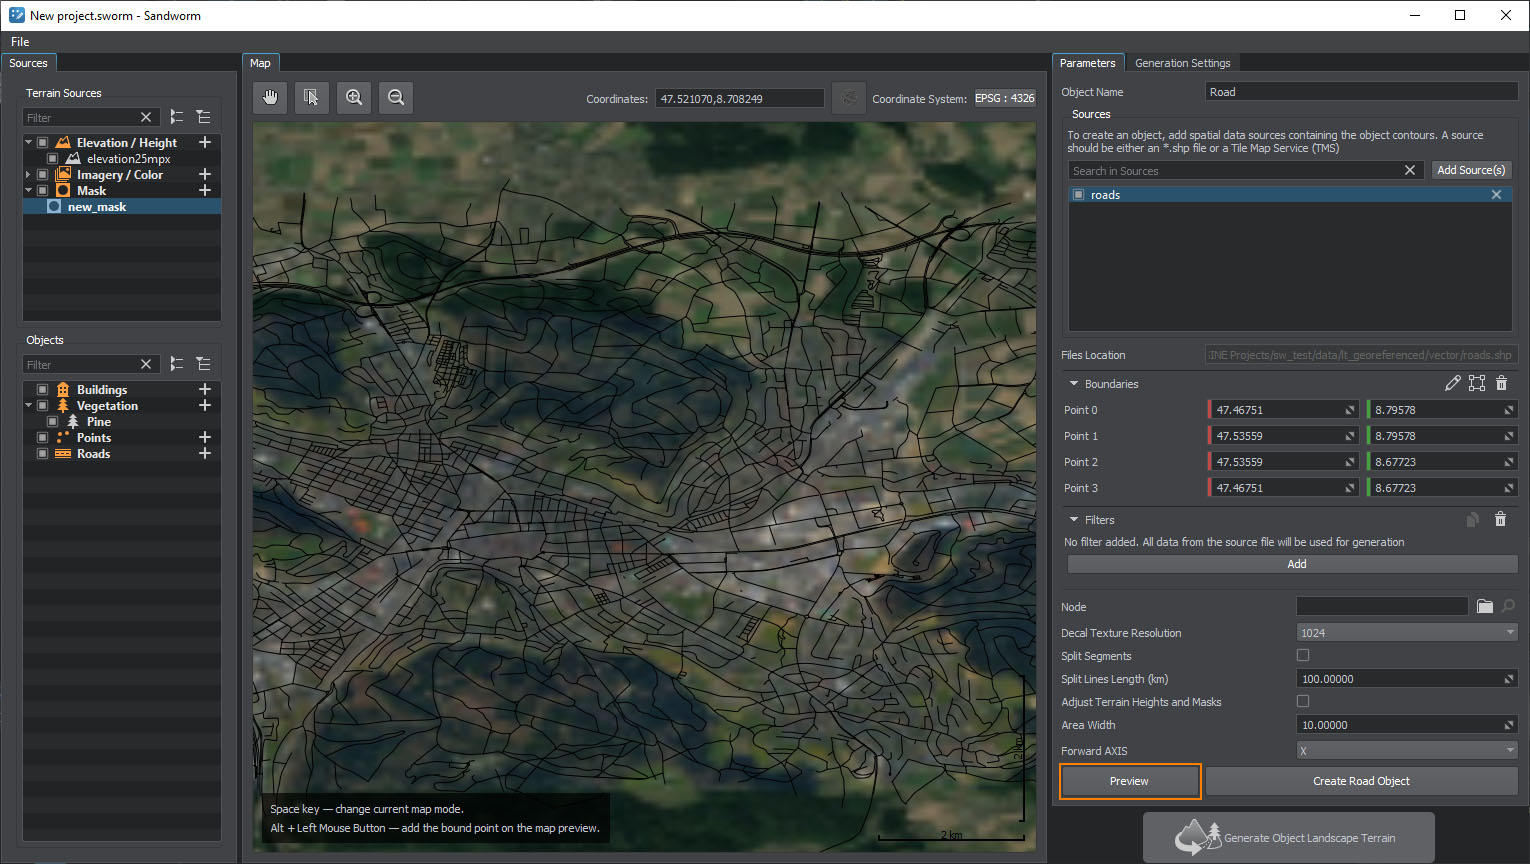
Setting the Road Object添加道路对象#
-
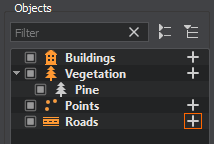
Create the object: in the Objects panel, click + for Roads.创建对象:在Objects面板中,单击 Roads 的+。
-
In the Parameters tab, add a source: click the Add Source(s) button, select Assets and set the path to the sw_georeferenced/vector/roads.shp file.在Parameters选项卡中,添加源:点击Add Source(s)按钮,选择Assets 并设置 sw_georeferenced/vector/roads.shp 文件的路径。As the source is added, we can click the Preview button below to see the road data preview on the map. This step is optional, you can create the layer without generating the preview.添加源以后,我们可以单击Preview按钮下面看到地图上的道路数据预览。这一步是可选的,您可以创建层没有生成预览。
-
Add a filter to pick specific data from the source and set the following values:添加 filter 以从源中选择特定数据并设置以下值:
 You can either use the drop-downs to select the values or click the
  button to open the Attributes Table and select the values there.您可以使用下拉菜单选择的值或单击按钮打开属性表并选择的值。
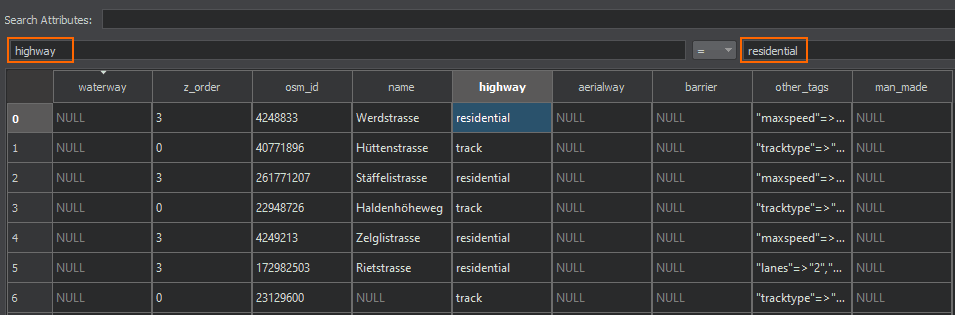 注意This step is optional. You can add no filters at all — in this case all roads available in the data source will be generated.这一步是可选的。您可以完全不添加过滤器——在这个例子中所有可用的道路将生成的数据源。
 -
Set the prepared primary object as Node and keep other settings as they are.将准备好的 主要对象 选择为 Node 并保持其他设置不变。
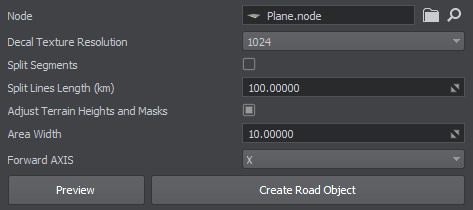
- Click the Create Road Object button.单击Create Road Object按钮。
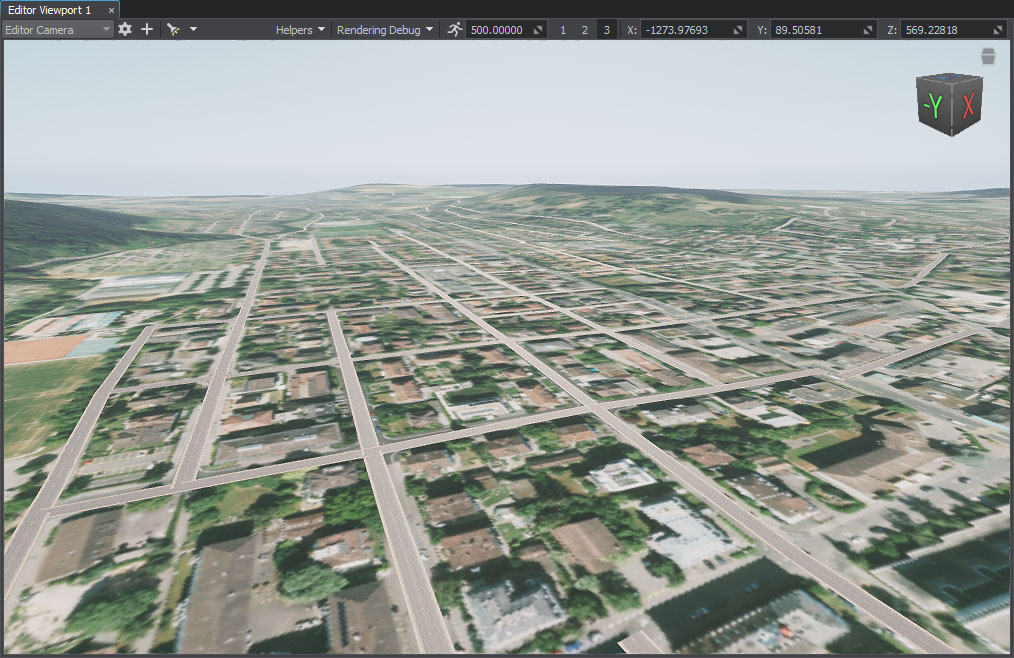
Generated Roads生成的道路#
What Else还有什么#
- Read more about the road parameters.详细了解道路参数。
- Read more about the filter settings.阅读更多关于 过滤器设置。