Implementing Color Zone
Now we can implement the zones to throw the objects into. We will make holes in the floor, implement zone visualization, and add a trigger volume that will destroy objects entering it.
Step 1. Unpack Node References to Make Holes in the Floor#
To make some floor nodes invisible and non-colliding (objects will fall through them), while keeping the character's turning working smoothly, we must unpack some floor node references. The unpacking means breaking the link to the node file on disk and changing its parameters.
- To create Color Zones select some floor tiles in a group (holding the Shift hotkey), right-click and choose Unpack To Node Content.
- Then disable Collisions for these nodes but make sure that Intersection is enabled, so that the character's turning works correctly.
- To make them invisible, go to Viewport Mask and click Clear All. This way all bits of mask are set to 0 and they will not match the Camera Viewport Mask.
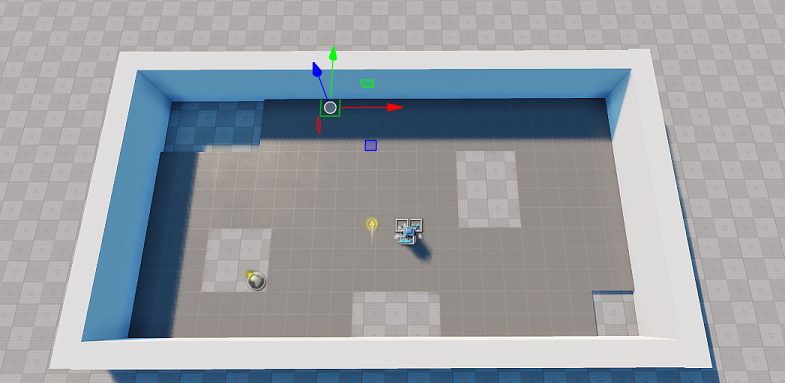
- Disable Collision option for the ground node. Now, Physical Objects can fall through the holes and the ground.
Step 2. Implement Zone Visualization#
Let's create a plane with an emission material to represent the Color Zone.
- Choose Create->Mesh->Static and search for plane.mesh.
- Place it in the world via the Viewport.
- Rename the node to "color_zone".
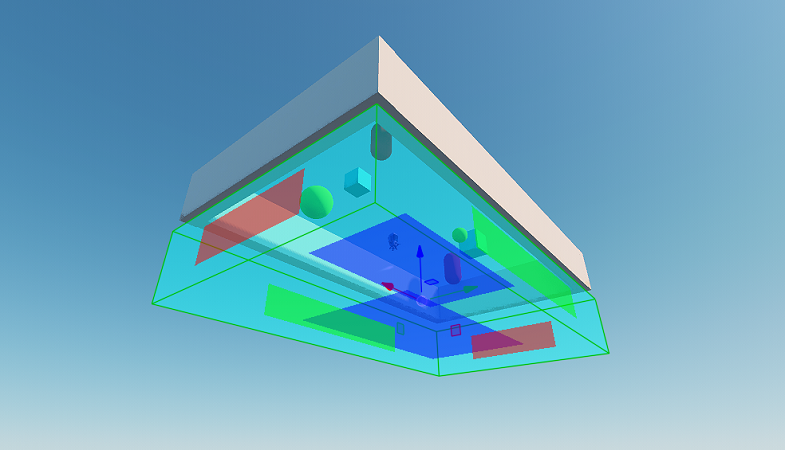
- Scale it to the size of the play area and position it between the floor and the ground, so it is visible only through the holes.
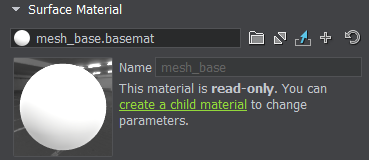
- Create a child material for the plane surface and call it color_zone_mat. In the States tab check the Emission option.
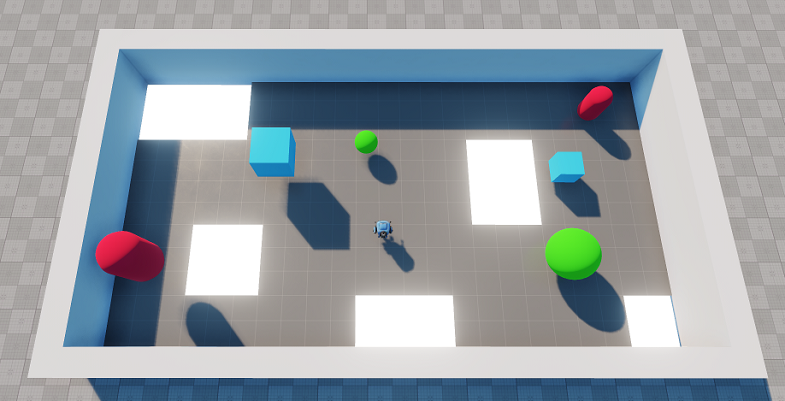 Color Zone Visualization
Step 3. Make the Colors Change Over Time#
The Color Zone must be easy to spot. Let's create a dynamic material that changes color emission over time using linear interpolation.
- Create a new C++ component and call it ColorChanger.
- The code, that changes the material emission color for the Color Zone over time, is given below.
ColorChanger.h (C++)
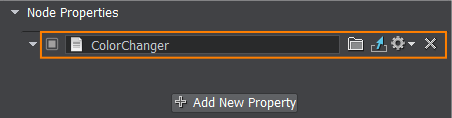
#pragma once
#include <UnigineComponentSystem.h>
#include <UnigineMathLib.h>
#include <UnigineGame.h>

class ColorChanger : public Unigine::ComponentBase
{
public:
	// declare constructor and destructor for our class and define a property name.
	COMPONENT_DEFINE(ColorChanger, ComponentBase)
	// declare methods to be called at the corresponding stages of the execution sequence
	COMPONENT_INIT(init);
	COMPONENT_UPDATE(update);

protected:
	void init();
	void update();

private:
	float changeSpeed = 1.5f;

	Unigine::MaterialPtr color_zone_mat;
};
ColorChanger.cpp (C++)#include "ColorChanger.h" using namespace Unigine; using namespace Math; REGISTER_COMPONENT(ColorChanger); void ColorChanger::init() { ObjectMeshStaticPtr mesh = checked_ptr_cast<ObjectMeshStatic>(node); // get the color zone's material color_zone_mat = mesh->getMaterial(0); } void ColorChanger::update() { if (color_zone_mat != nullptr) { // calculate the interpolation coefficient for this frame float k = (Math::sin(Game::getTime() * changeSpeed) + 1) / 2.0f; //interpolate between two colors with given coefficient and set it to the first surface's material color_zone_mat->setParameterFloat4("emission_color", Math::lerp(vec4(1.0f, 1.0f, 0.0f, 1.0f), vec4(0.0f, 1.0f, 1.0f, 1.0f), k)); //interpolate between two values of emission intensity with given coefficient and set it to the first surface's material color_zone_mat->setParameterFloat("emission_scale", Math::lerp(1.0f, 4.0f, k)); } } - Build and run the solution to generate a property file for the component.
- Switch back to the UnigineEditor and attach the ColorChanger property to the color zone visualization (color_zone).
Step 4. Add a World Trigger#
To get rid of objects that were thrown in the Color Zone, let's use a World Trigger. The trigger defines an area into which a physical object will fall and a callback that fires when an object gets inside.
- Create a new World Trigger by choosing Create->Logic->World Tigger and place it in the world.
- Check the Touch option in the Parameters Window of the World Trigger node to make the trigger fire callbacks on partial contact with another node.
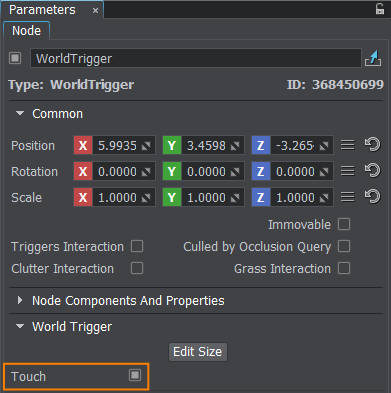
- Position it beneath the ground and adjust its size so it covers the whole play area by going to Parameters and clicking Edit Size. Adjust the size of the World Trigger in the Viewport.
- Create a new C++ component in your IDE and call it KillZone and copy the following code to the corresponding files. The trigger callback will delete any entering object. Don't forget to save your code.
KillZone.h (C++)
#pragma once
#include <UnigineComponentSystem.h>

#include <UnigineWorlds.h>

class KillZone : public Unigine::ComponentBase
{
public:
	// declare constructor and destructor for our class and define a property name.
	COMPONENT_DEFINE(KillZone, ComponentBase)
	// declare methods to be called at the corresponding stages of the execution sequence
	COMPONENT_INIT(init);

protected:
	void init();

	void enterCallback(Unigine::NodePtr target);

private:
	// the area into which an object should fall
	Unigine::WorldTriggerPtr trigger;
};
KillZone.cpp (C++)#include "KillZone.h" using namespace Unigine; REGISTER_COMPONENT(KillZone); void KillZone::init() { trigger = checked_ptr_cast<WorldTrigger>(node); // set the callback to be executed when an object enters the area if (trigger) trigger->addEnterCallback(MakeCallback(this, &KillZone::enterCallback)); } void KillZone::enterCallback(NodePtr target) { target->deleteLater(); } - Build and run the solution to generate a property file for the component.
- Switch back to UnigineEditor and add the KillZone component to the previously created World Trigger.
- Save changes to the world. Go to File->Save World or press Ctrl+S hotkey.
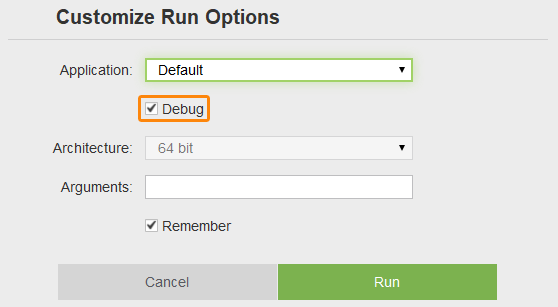
- To run the project via the SDK Browser, click on the ellipsis beneath the Run button to open the Customize Run Options window. By default your IDE builds a Debug version of your applications, while the SDK Browser is configured to launch the Release one. So, before clicking Run you should check the Debug option to run the proper executable to check out your progress while developing your application.