色彩校正
 This section describes settings for color correction of the scene.本节介绍场景色彩校正的设置。
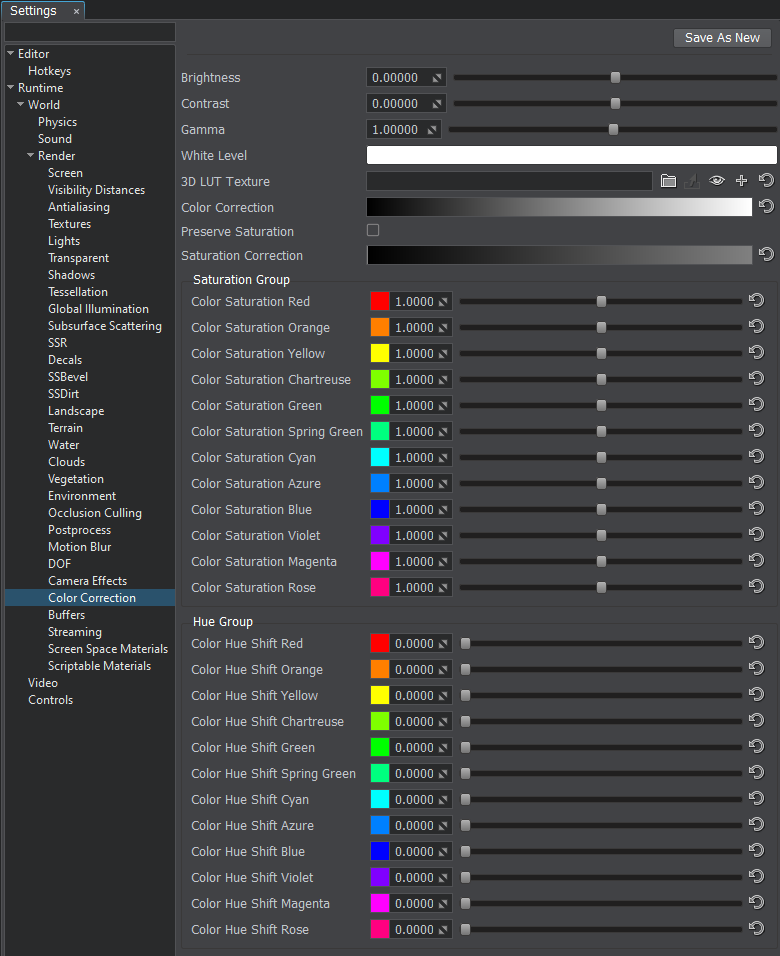
Scene Color Settings场景颜色设置| Brightness | Correction of the overall scene brightness:
|
|---|---|
| Contrast | Correction of the overall scene contrast:
|
| Gamma | Correction of the overall scene gamma.校正整个场景的伽玛。 |
| White | White level of the scene.场景的白平衡。 |
| LUT Texture | The loading, viewing, or clearing of the Lookup Table texture for color transformation.加载,查看或清除查找表纹理以进行颜色转换。 |
| Color Correction | Tonal range and tone response of the final image. The horizontal input color values are mapped to the vertical output values based on curves for Red, Green and Blue channels. By adjusting all three channels at once, you control the luminance of the final image.
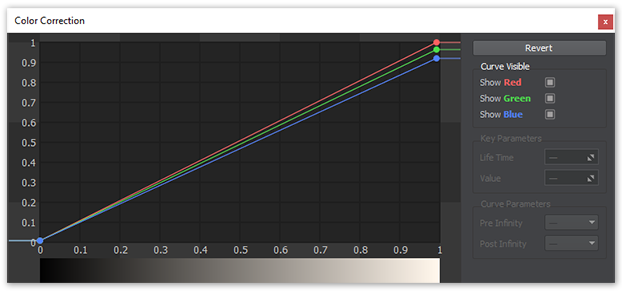 Color correction curvesColor correction curvesColor correction curves色彩校正曲线 Color correction curvesColor correction curvesColor correction curves色彩校正曲线 |
| Preserve Saturation | Preserve initial scene color saturation after applying color correction.应用色彩校正后,保留初始场景色彩饱和度。 |
| Saturation Correction | Correction curve of the overall scene saturation. The input luminance values are mapped to the vertical saturation values:
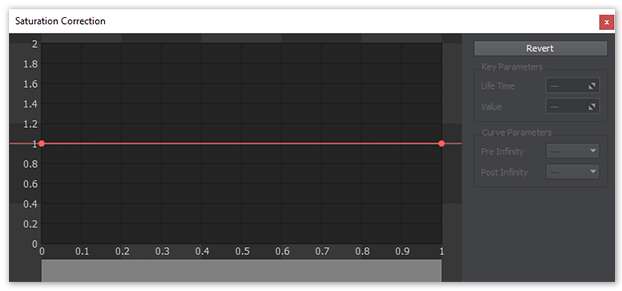 Saturation curveSaturation curve Saturation curveSaturation curve
Saturation curve饱和度曲线 |
| Saturation Group | Saturation fine-adjustment for 12 major colors of the spectre.
Saturation adjustmentSaturation adjustment
Saturation adjustment饱和度调整 |
| Hue Group | Hue (color shift) fine-adjustment for 12 major colors of the spectre.
 Hue adjustmentHue adjustmentHue adjustment色相调整 Hue adjustmentHue adjustmentHue adjustment色相调整 |
Color Correction LUTColor Correction LUT#
Color Correction LUT (Lookup Texture) is an optimized way of performing color grading in a post effect. Instead of tweaking individual color grading parameters, only a single texture is used to produce the corrected image. The lookup is performed by using the original image color as a vector to address the lookup texture.Color Correction LUT(查找纹理)是在后期效果中执行颜色分级的一种优化方法。无需调整单个的颜色分级参数,仅使用单个纹理即可生成校正后的图像。通过使用原始图像颜色作为矢量来处理查找纹理来执行查找。
One of the most common applications of lookup tables is to use them to see how images look in different media, such as TV/video or film, which have different color capabilities. Using a lookup table designed to mimic a certain display medium gives a much better idea what your current work will look like after it’s transferred to that medium.查找表最常见的应用之一是使用它们来查看图像在具有不同色彩功能的不同媒体(例如电视/视频或电影)中的外观。使用旨在模仿某种显示媒体的查找表,您可以更好地了解当前工作转移到该显示媒体后的样子。
Advantages of using a Color correction LUT include:使用色彩校正LUT的优点包括:
- Better performance — realtime computation is replaced by a simple array indexing operation.更好的性能-实时计算被简单的数组索引操作所取代。
- More professional workflow opportunities, where all color transforms can be defined using professional image editing software (such as Photoshop or GIMP), which provides a more precise result.更多专业工作流程机会,可以使用专业图像编辑软件(例如Photoshop或GIMP)定义所有颜色转换,从而提供更精确的结果。
Simple scene with neutral color correction applied.应用了中性色彩校正的简单场景。
Same scene using the lookup texture with shadows, highlights and vibrance applied.使用具有阴影,高光和鲜艳度的查找纹理的同一场景。Various visual effects can be created by changing the color correction LUT dynamically in realtime.通过实时动态更改色彩校正LUT,可以创建各种视觉效果。Lookup Texture Requirements查找纹理要求#
The 2D texture representation must be laid out in a way that it represents an unwrapped volume texture (as an image sequence of "depth slices").2D纹理表示必须以表示展开的体积纹理的方式进行布局(作为“深度切片”的图像序列)。

A 1024 x 32 texture, representing a 32x32x32 color LUT. 1024 x 32 纹理,代表 32x32x32 颜色LUT。Workflow Example工作流程示例#
- Generate a default lookup texture by clicking the
 button (Save texture) right to the LUT texture field and saving it as a TGA file (by selecting it in the Typefield).通过单击LUT纹理字段右侧的按钮(Save texture)并将其另存为 TGA 文件(通过在Typefield中选择它),可以生成默认的查找纹理。
 - Take a screenshot of your scene.拍摄场景截图。
- Import your screenshot into a graphics editor (e.g., Photoshop or GIMP) and perform all necessary image correction operations (brightness, contrast, etc.) to achieve a desired look.将您的屏幕截图导入图形编辑器(例如Photoshop或GIMP),然后执行所有必要的图像校正操作(亮度,对比度等),以获得所需的外观。
- Import your generated default lookup texture into the graphics editor and perform the same operations as for the scene screenshot. Save the modified lookup texture as a new LUT.将生成的默认查找纹理导入图形编辑器,并执行与场景屏幕截图相同的操作。将修改后的查找纹理另存为新的LUT。
- In Render Settings -> Color -> LUT texture, select you new texture.在Render Settings -> Color -> LUT texture中,选择新纹理。
Now your scene in UnigineEditor looks exactly as in the graphics editor!现在,UnigineEditor中的场景与图形编辑器中的场景完全一样!